Archive | Breads RSS feed for this section

Raspberry Scones

19 Oct

IMG_6474

I was always a bit hesitant about scones. They seemed like muffins’ dry and boring cousin. But that was until I met Luke, a man obsessed with scones. So I actually began ordering scones in restaurants and cafes and found that when done right, they can be AMAZING! My favorites were ones where there was fruit involved, blueberries or strawberries. And I figured, that it couldn’t be too hard to try to make some…

You know how when you get a new cookbook, there are just some recipes that jump out at you and you KNOW you have to try it?! Regardless of the time or the steps, sometimes the picture or the name of a recipe jumps out of the cookbook to me. I know which recipes these were for each of the dozen cookbooks I own (an example, Chipotle and Rosemary Roasted Nuts from Barefoot Contessa’s How Easy is That? cookbook). One of these such experiences was with The Smitten Kitchen Cookbook (another fairly new favorite cookbook of mine, from the blog Smitten Kitchen) and her recipe for Whole-Wheat Raspberry Ricotta Scones.

I now had the perfect reason to make scones: I finally came to the conclusion these could be delicious, I could feed my husband a good portion of them (and earn some brownie points, perhaps) AND I had a great recipe to start from.

I made these the first time last Christmas, following the recipe to a ‘T’ from the cookbook. I loved them and thought they turned out incredibly moist and delicious. However, I wanted to make them again and put my own spin on them. Particularly, I wanted to experiment with using something instead of ricotta, as I don’t normally have that just ‘hanging out’ in my fridge.

So, this is my own spin on the recipe from Deb’s cookbook. I think the original recipe is great and highly encourage you guys to pick up her cookbook, flip to page 15 and give it a go. You can also try my twist on it below and see what you think!

I didn’t have whole-wheat flour on hand and used cottage cheese instead of ricotta, so the texture and taste of mine is slightly different. I personally loved the twist and will continue to make them this way in the future, especially as it means I likely could decide to make these and have everything I need on hand and not require any grocery store trips. However, making them with the original recipe gives more texture and makes them a bit thicker, due to the ricotta mixture. So it’s up to you!

Ready for scone-making? Here we go…

Ingredients:

  • 2 c. all-purpose flour
  • 1 Tbsp baking powder
  • 1/4 c. sugar
  • 1/2 tsp salt
  • 6 Tbsp cold unsalted butter
  • 1 c. fresh raspberries (or insert in another fruit you want to use, blueberries or strawberries could be great!)
  • 3/4 c. skim milk cottage cheese
  • 1/3 c. heavy cream

How to Make:

First things first, preheat your oven (which I always seem to forget to do) to 425. Next, prep your baking sheet by lining it with a big sheet of parchment paper. My parchment paper loves to just roll itself back up in a ball so I set a drinking glass on each end to help keep it in place. Genius move, I know.

Next up: dry ingredients. Measure out the flour, baking powder, sugar and salt and whisk it all up together in a medium-sized bowl.

IMG_6446

IMG_6447

IMG_6448

IMG_6449

IMG_6450

Now, butter time. Grab your butter directly from the fridge when you’re ready for this step. Chop it up into little cubes and then drop those directly into your bowl of dry ingredients. As I lacked a pastry blender, I went with the finger-mixing method. Gently work the butter into the dry ingredients until the large butter pieces start to become little pea-size guys. The butter should be mixed in enough that the dry ingredients just look a bit more like a sandy mixture, kind of with a breadcrumb consistency.

IMG_6451

IMG_6452

IMG_6453

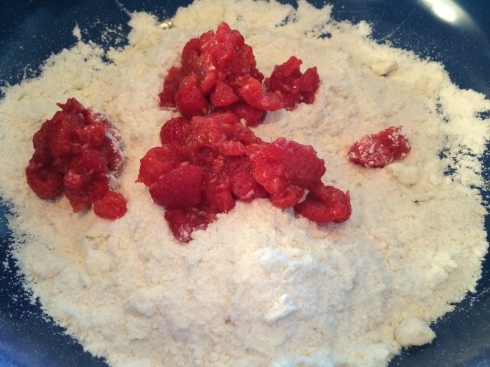
With whichever fruit you decided to use, throw it on a cutting board and chop it up a bit. Strawberries you’d want to definitely chop down into smaller pieces but blueberries and raspberries can just get a quick rough chop and be all set. Once you’re done chopping, throw the fruit into the dry ingredients.

IMG_6455

IMG_6456

IMG_6457

Last, but certainly not least, measure out and throw in the cottage cheese and the heavy cream. Stir everything together gently, ensuring all the dry ingredients are exposed to the wet ingredients, soaking up all the dairy goodness.

IMG_6458

IMG_6459

IMG_6460

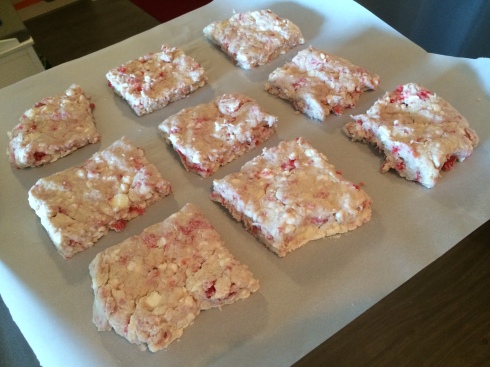
Once it all starts to come together and look like dough, pour out the batter on to a floured surface (cutting boards work well for this). Get your hands good and floured up too, as this is a sticky dough and it loves to hang out on your hands. Add some flour to the top of the dough and work it into a square that’s about an inch high. Now, cut the square into 9 smaller squares and transfer each square to your parchment-lined baking sheet.
IMG_6462

IMG_6463


IMG_6464

Bake ’em for 15 minutes or until the tops are just starting to golden up.

Sigh, they look and smell SO tasty, right?! Cool them for a few minutes in the pan, then move them to a wire cooling rack to fully cool.

IMG_6466

These are SUPER good when they’re still warm but they keep well in a Ziploc for a few days too. We loved having them on the counter to allow both of us to grab a quick breakfast on-the-go. They were also great for a snack or a little dessert at the end of the day. To be perfectly honest, they don’t last long on our counter as we both gobble them up pretty quick. I don’t even feel guilty about that, they’re so tasty and wonderful that we just can’t help ourselves.

IMG_6470

These got a big thumbs up from my husband, the scone-lover and I think you guys will REALLY love them too.

Highly encourage you guys to try these out and leave me a comment about how they go!

Beer Bacon Cornbread

16 Sep

Aug-Sept 2014 148

There is a large place in my heart for cornbread. In fact, it graces my Top 10 favorite foods (which I like to think is a hard category to crack) and I have a hard time finding a cornbread that I don’t want to eat. Do you feel me, people!?

What is it about cornbread that is SO good?! I personally believe it’s the savory and dense flavor, the cake-like texture and the fact that it’s an excellent dipping mechanism for soups (chili in particular).

As I’ve alluded to in some recent posts, Luke and I were craving a homemade chili and cornbread weekend to kick-start the fall season. I have had this cornbread recipe from How Sweet Eats as a Pinterest pin for a LONG time and was simply waiting for the right moment to try it out. This seemed like the ideal time to give it a go, especially as I’ve been really pumped about Jessica’s new cookbook and am anxiously waiting to dive into it’s colorful and drool-inducing pages.

(I have a slight cookbook obsession…umm…can’t help it.)

Before I dive into the details, can I just say two OTHER items that I really love – bacon and beer. And these are to be IN the cornbread?!

Heck yes, people! They are!

Jessica over at How Sweet Eats knows how to really spice up cornbread with all the perfect ingredients. My husband thought I was kidding as I asked if he wanted to try out Beer Bacon Cornbread. HA. Not kidding, just about to create the most epic cornbread ever.

No. Big. Deal.

Enough already, let’s do this!

Ingredients:

  • 6 slices thick-cut peppered bacon (just adds some extra zip to use peppered), chopped
  • 1 Tbsp bacon fat (leftover from your bacon fryin’)
  • 1 1/2 cups finely ground cornmeal
  • 3/4 cup cake flour + 3/4 cup all-purpose flour (or you can use 1 1/2 cups of whole wheat pastry flour, which I did not have on hand)
  • 2 Tbsp sugar
  • 1 1/2 Tbsp baking powder
  • 3/4 tsp salt
  • 3 eggs
  • 1 cup of beer (we used a light beer but you could experiment!)
  • 1/2 cup skim milk
  • 1/3 sour cream
  • 1/2 unsalted butter, melted down

How to Make:

Prepare for a delicious loaf of cornbread to come out of your oven, people. To make that a reality, preheat to 375 degrees and find your favorite loaf pan.

Now, my parents are firm believers in flouring pans for all breads and cakes and I must say, I swear by it too. To do this, spray the pan with Pam or another cooking spray and then drop a handful of flour into the pan. Working over your sink or garbage can, carefully turn the pan and pat the sides to spread the flour across all sides and the bottom of the pan. (The sound of my mom tapping the side of the pan as she floured it is a distinct sound that brings back memories. My mom made banana bread all the time. Seriously – ALL the time.)

Aug-Sept 2014 135

Before we dive into making the batter, gotta fry up that bacon! Use a skillet on the stove top and make sure to fry it up so it’s got a little crunch (at minimum). When the bacon is done, remove and set on a paper towel to absorb the grease and then leave the pan to cool as you’ll need a bit of the bacon fat later. Yes, we’re using bacon fat. You will love it. No complaints!

Once the bacon is cooled, chop it up into bite-size pieces.

Aug-Sept 2014 131

Now time to get the batter going. In your medium bowl or stand mixer, mix together the dry ingredients of cornmeal, flours, sugar, baking powder and salt.

Aug-Sept 2014 124

Aug-Sept 2014 125

Aug-Sept 2014 126

Aug-Sept 2014 127

Aug-Sept 2014 128

Once that’s all mixed together, you’ll grab a smaller second bowl to mix the milk (pictured below) and eggs (not pictured because I’m a moron) together, and then add into your dry ingredients. Add in the sour cream and the beer of choice (not pictured, but it did happen. Solemnly swear.).

Aug-Sept 2014 129

Last liquid to add is the melted butter and that bacon fat.

Aug-Sept 2014 130

Mix the batter until it’s all smooth and just before you finish, add in your chopped up bacon pieces. BEST PART. (Yes, you can sneak a piece or two. Who will know?!)

Aug-Sept 2014 132

Aug-Sept 2014 134

Pour your batter into your floured pan…

Aug-Sept 2014 137

…and then pop the pan into the oven and bake for 20-30 minutes. Use a toothpick or another wooden skewer to test the doneness (it should come out clean when inserted into the cornbread if it’s done).

Aug-Sept 2014 138

This had a BEAUTIFUL crust on it when it came out. Both Luke and I were ooohing and aaahing over how fantastic it looked and let me tell you, tastes even better!

Aug-Sept 2014 139

We ate ours with a big batch of our Nowinsky chili (coming to a future blog post near you) and it was perfect with something to dunk it with. It’s also really good with a little sweet butter spread on it. It has a tangy flavor and the sweetness of butter really compliments the tang of the bacon and beer mixed into the cornbread.

Aug-Sept 2014 144

Aug-Sept 2014 146

Gosh, I don’t know how many other words to use to get you to want to try this, guys. It’s SO tasty!

It stays really great for a few days, but definitely do recommend you devour it quickly. We found that after 4-5 days, the bitterness of the beer came out. But hey, it makes the fresh baked bread REALLY good, so it’s totally worth it. Just make sure to feed it to lots of hungry folks and I have no concern that you will gobble this up right away.

Aug-Sept 2014 151

Happy cornbread making, friends!

Chocolate Muffins (with a Healthy Spin)

4 Aug

IMG_3254

A few facts to preface this post. Fact #1: I thoroughly enjoy chocolate. Fact #2: I thoroughly enjoy muffins, cakes, cookies etc. However, maybe like some of you, Fact #3, my metabolism no longer allows me to consume these items as much as I’d like without some consequences. Which…is unfortunate.

Thus – I was on Pinterest one day trying to find some healthier (note not healthy…health-IER) recipes and found this little gem. There’s no flour involved – there’s applesauce and plain greek yogurt that help to keep the muffins together AND keep them moist. I was intrigued enough to give these a try.

Also, Fact #4 – my boyfriend Luke has quite an affinity for baked goods that come from my kitchen. So like most treats I make, the plan was to make a big batch, have a few myself and then feed the rest to Luke. Muah hahaha.

(He has yet to complain so I think it’s a win-win situation for both of us.)

Thus, another episode of Thursday evening baking happened this last week and the resulting muffins were quite delicious. I highly recommend!

I will say I changed up the recipe a bit because of the ingredients I had available. I’ve linked to the recipe I based these off of (and the blog post about that recipe links to the original recipe too) above for those who want to try the full-on healthier version or you can follow what I used below. I trust both will work out nicely for you. And regardless, you end up with chocolate muffins. 🙂

Recipe makes about 24 small muffins or 12 larger muffins.

Ingredients:

  • 1 3/4 cup of oats
  • 3 egg whites
  • 3/4 cup cocoa powder (the recipe calls for unsweetened cocoa but I had cocoa powder on hand so that’s what I used)
  • 1/2 cup applesauce (the recipe calls for unsweetened but I used normal applesauce and they still turned out wonderfully)
  • 1 tsp vanilla extract
  • 1/2 cup plain Greek yogurt
  • 1/2 tsp cream of tartar (or 1-1/2 Tbsp. vinegar)
  • 1-1/2 tsp baking powder
  • 1-1/2 tsp baking soda
  • 1/4 tsp salt
  • 1 cup hot water
  • 1 cup sugar (the recipe calls for a healthy substitute like I cup of Splenda granular OR 1/4 cup + 2 Tbsp stevia but I had none of these options so plain white sugar it was for me)
  • 1/2 cup dark chocolate chips (or whatever other type of chips you’d like!) and an extra 1/4 cup for the muffin tops

How to Make:

Preheat your oven to 350 degrees and grab a blender (or a food processor) as you’ll need no mixer or beaters to clean in this recipe. I know, I know…I was puzzled by this too. But trust me – it works!

Now – if you want smaller muffins for a crowd, this makes 24 muffins (thus you’ll need 2 muffin pans). If you want larger muffins for a smaller crew (1 pan) this makes 12 muffins. I did line my muffin tins but this recipe has a tendency to stick a bit. If you’d these to appear aesthetically pleasing with wrappers off (for any reason) you may want to simply spray the pans with a little Pam. Otherwise, I’m sure those you feed these to will not mind a bit licking of crumbs from the wrapper. I doubt they’ll mind.

Now prepare for this next part…you’re going to mix…

…everything. Ok, not the chocolate chips quite yet, but everything else goes right into the blender.

Yup, you read that right. Everything. Into. The. Blender.

Here we go…

In go the oats…
IMG_3233

…then the egg whites…

IMG_3234

…and applesauce…(note my oat measuring was exceptionally neat and tidy)

IMG_3236

…and then the cocoa (I wasn’t worried that mine was a bit clumpy as the blender would be blending it all together anyway)…

IMG_3237

…and vanilla…

IMG_3238

…and the plain Greek yogurt…

IMG_3239

…and the cream of tartar…and baking powder…and baking soda…

IMG_3241

…and the salt (which I plain forgot to take a photo of, but believe me when I say…it’s in there!)…

IMG_3242

…and the cup of hot water (which causes this fun, little effect)…

IMG_3243

…and then finally, the sugar or your sugar substitute.

IMG_3244

Now blend that concoction until the mixture is smooth (not chunky on the bottom but the same consistency all the way through). I was a bit concerned as the batter seemed to be a bit thin at first. But keep blending until the oats, applesauce and yogurt are consistently blended and that will really help to thicken it up. Trust me!

Now pour into a medium-sized bowl and stir in the 1/2 cup of dark chocolate chips.

IMG_3245

IMG_3246

Then, time to pour into the pans. (I was a wee bit messy at this part so if you have the same problem, just dab the batter spots off the pan with a paper towel. No biggie!)

IMG_3247

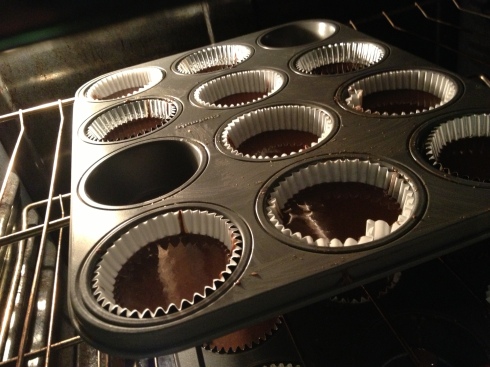
Now the muffins get baked for 10 minutes. Then, pull them out…

IMG_3248

…and drop a few of the chips on the top of each muffin. Add as many as you’d like! Most of mine had about 3-6 chips as dark chocolate chips are bit bigger than the normal chocolate chip.

IMG_3250

Now pop these guys back into the oven for an additional 3-6 minutes, or until a toothpick comes out clean. (I had to pop mine back in for about 8 additional minutes as they were still wet when I tested with a toothpick at 6 minutes. So watch these carefully and don’t worry if they take more than 3-6 minutes. It shouldn’t be TOO much more oven time.)

IMG_3251

Once the toothpick comes out clean from a the center of a few muffins, let them cool for a few minutes in the pan. Then place the muffins on a cooling rack or a cutting board to cool completely.

IMG_3252

IMG_3253

I will share – these are delicious eaten while they’re still warm for the obvious melty-chocolate reason. But they’re also delectable eaten once fully cooled. I let them sit out to cool for a few hours and then kept them stored in Tupperware, separated into layers with some assistance from parchment paper.

IMG_3259

IMG_3260

Feed these to your family, your friends, your significant other or spouse or maybe yourself for a snack. (I had a few snacks the night I made these…couldn’t…help…myself.) They’ll disappear REAL fast…

IMG_3255

IMG_3256

IMG_3257


IMG_3258

Give these a try and let me know if they turn out as delicious for you as they did for me!

IMG_3254

Happy baking!

Parmesan Knots

21 May

What a Monday! Gorgeous weather in Minneapolis – car windows down and sundress weather. Country music on the car radio. And the best part of today…grocery shopping!

I don’t believe I’ve shared how much I truly enjoy grocery shopping. I could lazily walk around the aisles in a grocery store for hours. I don’t know why I find it so cathartic, but it is hands down, one of my favorite things to do. I realize that’s a tad bizarre.

For instance, at a work function on Friday we had to do our normal round of introductions (who you are, how long you’ve been with the company etc. etc.) plus a fun fact that no one knows about you, that is memorable. I had to go 2nd and was frantically trying to think of something quirky and memorable. When I stood up, this was the first thing I thought of “I LOVE to grocery shop. Anytime. For anything. Sometimes for nothing at all. I would do it for other people for free, I love to do it so much.” There was a lot of laughter and a few people who harassed me from across the room to do their grocery shopping. It was memorable and it was TRUE. So fun fact for your Monday, I love to grocery shop.

Today was a mighty expensive trip as I was stocking up for the next 10 days at home instead of just a few weekend days. I’ve mentioned before I travel for work, so many times I don’t keep too much food in the fridge as it will usually spoil before I get to it. Today was all about buying lots of vegetables and protein – shrimp, steak, ham and turkey. To get good meat, well, cost a lleeeetttllee bit more than normal. But I’m STOCKED and ready to cook up a storm this week!

So enough about my weirdo tendencies, you’re reading this for FOOD.

Parmesan knots. What are those? Sent straight from heaven these bad boys are. Wow. Simple and mouth-watering. This was the side for the Doug and Laura dinner (thus far I’ve documented the blackberry margaritas and pico de gallo we also had) while I was visiting in Chicago.

I found this off of Pinterest (surprise, surprise). It’s from a great website for tasty, easy dinners. That’s my style. Another good one to explore.

Ready for some knots!?

Ingredients:

  • 1 tube (12 ounces) of refrigerated biscuits ( I used an off-brand but any brand will do – Pillsbury was recommended in the original recipe)
  • 1/4 cup canola oil
  • 3 tablespoons grated Parmesan cheese (It’s way tastier when it’s fresh – but if you must, the canned stuff can work too. But my personal challenge to you is to grate your own. Do it.)
  • 1/2 teaspoon garlic powder
  • 1 teaspoon dried oregano
  • 1 teaspoon dried parsley flakes

How to Make:

So these look way more complicated and fancy than they actual are. Perfect to make as a bread side dish for any big or small meal where you’d like to do a little bit of impressing. Just a suggestion.

First things first – preheat the oven to 400 degrees. Locate a cookie sheet and spray it with some non-stick spray. Pam is my bff for this task. You may have a different bff.

Take your tube of biscuits and open it up. You’re going to take each of the round biscuits and roll it out into a foot long cylinder.

Once in their cylindrical shape, tie them into a knot…like you would your shoelace. (Unless you tie with two bunny ears, you may struggle.) You just need one “around and through” with these. Tuck the ends under and you’ll have a fancy knot that required 3.2 seconds of effort. Be impressed with your skills. Then tie another one.

Once you’ve finished with your whole tube of biscuits, pop ’em in the oven for 8-10 minutes. You’ll know they’re done with they’re golden on top.

While your biscuits are cooking, mix up your remaining ingredients in a small bowl. When you take the knots out of the oven, you’ll want to put this on right away so the warmth of the biscuits melts this fantastic concoction all over the top. It’s hard to knot lick your fingers while working away. (See what I did there? Ha.) If you have a pastry brush – that works best. Otherwise, drizzle on the sauce with a spoon.

Eat these babies while warm and try to not have two…or three. Seriously, these are so good. And it’s just refrigerated biscuit dough shaped funny. I don’t know why that makes it taste SO. MUCH. BETTER.

Try the recipe and prove me wrong! 🙂

Esther’s Lemon Poppyseed Bread

8 Apr

Back to a “Vose Favorite” recipe – this is my great-grandma Esther’s recipe…one of my holiday favorites. We have this bread at Christmas and Easter, almost every year. It’s always a hit – I don’t think there’s anyone who doesn’t like it (at least in my family). You can see the recipe card has gotten some use over the years!

It’s quick and simple to whip up too, usually made the night before the day of the ‘big meal’.

Ingredients: (Makes 2 loaves)

  • 1 package of Duncan Hines lemon cake mix (this is the brand we usually use, but I’m sure any brand would do…as you can see it was Betty Crocker this time)
  • 1 package of instant lemon pudding (make sure it’s instant!)
  • 4 eggs (yes, 4)
  • 1 cup of hot water (not warm, not scalding, but hot)
  • 1/2 cup Crisco oil (I used vegetable oil and you could too…unless you’re really into Crisco.)
  • 1/4 cup poppyseeds (This is one entire thing of the small 1.25 oz containers)
  • 1/4 cup chopped nuts (I used walnuts – but experiment with whatever you’d like!)

How to Make:

Preheat that oven to 350 and then locate your hand mixer or if you’re extra special, electric mixer. (Again, very very very very jealous if you have the latter.) You are going to mix up everything (yes, even the nuts).

You’re going to mix everything for 4 minutes. Little arm workout in for those of us without the fancy schmancy electric mixer. (I had to find a bigger bowl because I was a moron and used a little, small one. Mom kindly suggested I use a bigger bowl to mix in. She’s so smart.)

Grab your two pans and spray them with Pam or rub them down with vegetable oil. Sprinkle flour into the pans and get all sides and the bottom coated in flour.

Pour your batter evenly amongst the two pans…even if you have two pans that aren’t quite the same size, like me. You want everything to cook evenly in the oven!

Try to restrain yourself from taste testing the batter….it’s soooooo tasty. But there are raw eggs in there, so it’s probably not a good idea.

Put the timer on 40 minutes, pulling the bread out to test for doneness at that time. It may need a few more minutes if your toothpick/wooden skewer/other doneness-testing device doesn’t come out clean from the top of the bread.

Here’s before the oven:

Once your breads are done, let them cool for a few minutes in the pans. Then gently slide them out to cool on a wire cooling rack or cutting board to finish cooling completely.

Here’s a slice, cooled and ready to be enjoyed. This is a perfect bread for holidays – easy to make ahead of time and it seems somewhat fancy, which is ideal for a festive occasion! It’s also extremely good to boot. Just sayin. 🙂

Follow my blog with Bloglovin

Rosemary Olive Oil Bread

6 Mar

So, I preface this post with this – I’m not a great baker. I for some reason have more success with the ‘cooking’ end than the ‘baking’ end of culinary abilities. Nonetheless, I’m determined to change that! I’ve dabbled in cakes and cookies but one thing I want, no DESIRE to become good at is bread making. Maybe it’s the kneading thing or that it’s just fun to watch rise. Or that it smells divine when it’s baking. I even loved play-doh as a kid (ask my mom!) and I think it’s all about me, deep down, wanting to be a master of bread.

Ok, that’s a bit extreme. Either way, I’m trying to attempt some variations of breads to see what I like, what’s fun to make etc. This past weekend, while I had the lasagna simmering on the stove, I attempted to make Rosemary bread. I found this recipe on pinterest.com which took me to the recipe I used on a great blog: A Hint of Honey. I can’t wait to peruse the blog for other tasty recipes!

This was a great bread recipe for a newbie like me – not a lot of steps but still kneading fun involved. 🙂 I modified the recipe a bit, but see A Hint of Honey for the original recipe and other delicious ideas.

Rosemary Olive Oil Bread:

Ingredients:

  • 1 cup warm water (not scalding hot but fairly warm)
  • 1 Tbsp. cane sugar
  • 2 tsp. active dry yeast (if you’re like me and get the packets, you’ll have a bit left over, 1/4 tsp to be exact)
  • 1 tsp. salt
  • 2 Tbsp. fresh rosemary, chopped or 2 tsp. dried (I only had dried, but LOVE rosemary and decided to use 2 Tbsp anyway. Up to you!)
  • 1/4 tsp. Italian seasoning (or pinch of each ground garlic, dried oregano, and dried basil) (I went with her suggested concoction and it turned out great, as an FYI)
  • 1/4 tsp. freshly ground black pepper
  • 2 Tbsp. extra virgin olive oil
  • 1 1/2 cups white whole wheat flour (I used normal whole wheat flour, again, up to you!)
  • 1/2 cup bread flour + extra for kneading
  • 1 egg, whisked + 1 Tbsp. water, for egg wash
  • dried rosemary, for sprinkling

How to Make:

In a large bowl, combine the warm water, sugar, and yeast. To a new bread maker, this process allows the yeast to ‘proof’. For those that know all about breads, I’m sorry I didn’t know about this term. I’m now more educated.

Stir in the salt, rosemary, seasonings, olive oil, and whole wheat flour. I didn’t mix it all the way in, just enough to have the flour and liquid start to mix together. Then, add in the bread flour and stir until it starts to come together. Mine came together in many little balls but it’s supposed to come together in one larger ball. Either way, now it’s time for FUN! Let’s knead…

Knead on a lightly floured surface for about 5 minutes. Yes, I know, you want to knead for 10 minutes. I too had to cut myself off from kneading. You’ll survive. If the dough becomes sticky, add in more flour to the dough or your heads, or both! It shouldn’t be sticky, but smooth when you’re all done.

Place the dough in a lightly greased bowl; cover (I used a clean kitchen towel for this); and let rise until (about) doubled in size. This step takes about an hour. If you’re making the lovely lasagna from my post a few days ago, this gives you time to continue work on that. Or drink a glass of wine. Or watch some Netflix. I may have done all three.

Now, more kneading fun, well, just punching. Punch down the dough and form it into a round loaf. I  then placed my load on a pizza pan sprinkled with bread flour. The original recipe also states you can place the dough on a flour dusted pizza peel or parchment paper. Whatever is in your kitchen should be able to work. Again, cover that baby up and let rise until doubled in size, about 45 minutes this time around

At this time, hopefully your lasagna (or other items in the oven, if there are any) are out and you can turn the head to 400 F. The recipe suggests to preheat and bake on a pizza stone, an item lacking in my kitchen. I simply warmed up my pizza pan (moved the dough to a new, floured spot while this preheat was happening.) Once the dough has risen, brush that baby with the egg wash and with a hearty helping of dried rosemary.

Bake on preheated stone (or for those with less cooking items at their fingertips, a preheated pizza pan) for 20-25 minutes until the top is golden brown and sounds hollow when tapped. I did not tap mine, but it was golden brown and looked/tasted done to me.

This recipe makes one, lovely, round load of glorious smelling bread. It also goes FABULOUSLY with lasagna. Just saying.

Enjoy!