Tag Archives: Vanilla

Cake Batter Dip

7 Apr

Holy cake batter heaven Batman! This may be one of the best dips I’ve ever made and I cannot WAIT for you try it! I’ve already memorized the recipe and know that Luke and I will always have this one in our arsenal when we’re having people over.

IMG_4773

Why is this so good?

I don’t know folks, but it just IS:

  1. Do you sneak cookie dough from the bowl as you’re SUPPOSED to be putting the cookies on baking sheets (you know who you are)?
  2. Do you always order cake batter ice cream when it’s an option (guilty)?
  3. Do you love finding an excuse to still eat teddy grahams (I forgot how AMAZING chocolate teddy grahams are friends…a travesty I realize)?
  4. Do you still enjoy finding ways to add sprinkles into things, just because (c’mon, they make everything more fun)?

If you answered yes to ANY of these things…you…must…try…this…dip.

I found this on Pinterest and was challenged by a friend to give this a go, blog about it so she’d know if this was worthy. Friends, it so is. This is worthy.

Thanks so much to Cassie Craves blog for bringing this joyous concoction to our attention! I made a few tweaks to the original recipe, but the basic concoction was from the aforementioned blog. Can’t wait to check out more of her posts!

Enough with the rambling, let’s get right into the thick of it!

Ingredients:

  • 1 package of Pillsbury Funfetti Cake Mix
  • 2 cups of Vanilla Greek Yogurt
  • 1 1/2 cups Whipped Topping
  • 1-2 tsp of Vanilla Extract
  • 2 Tbsp of colorful Sprinkles (plus extra for sprinkling on the top)

For Dipping:

  • Chocolate Teddy Grahams
  • Nilla Wafers
  • Other ideas: flat cookies, fruit, graham crackers

How to Make:

Locate a bowl and your mixer of choice. Then, prepare for some ingredient blending.

First pour in the Funfetti cake mix…

IMG_4729

…the 2 cups of Greek yogurt…

IMG_4731

…the cup and a half of whipped topping…

IMG_4732

…splash in the vanilla…

IMG_4734

…throw in the sprinkles…

IMG_4735

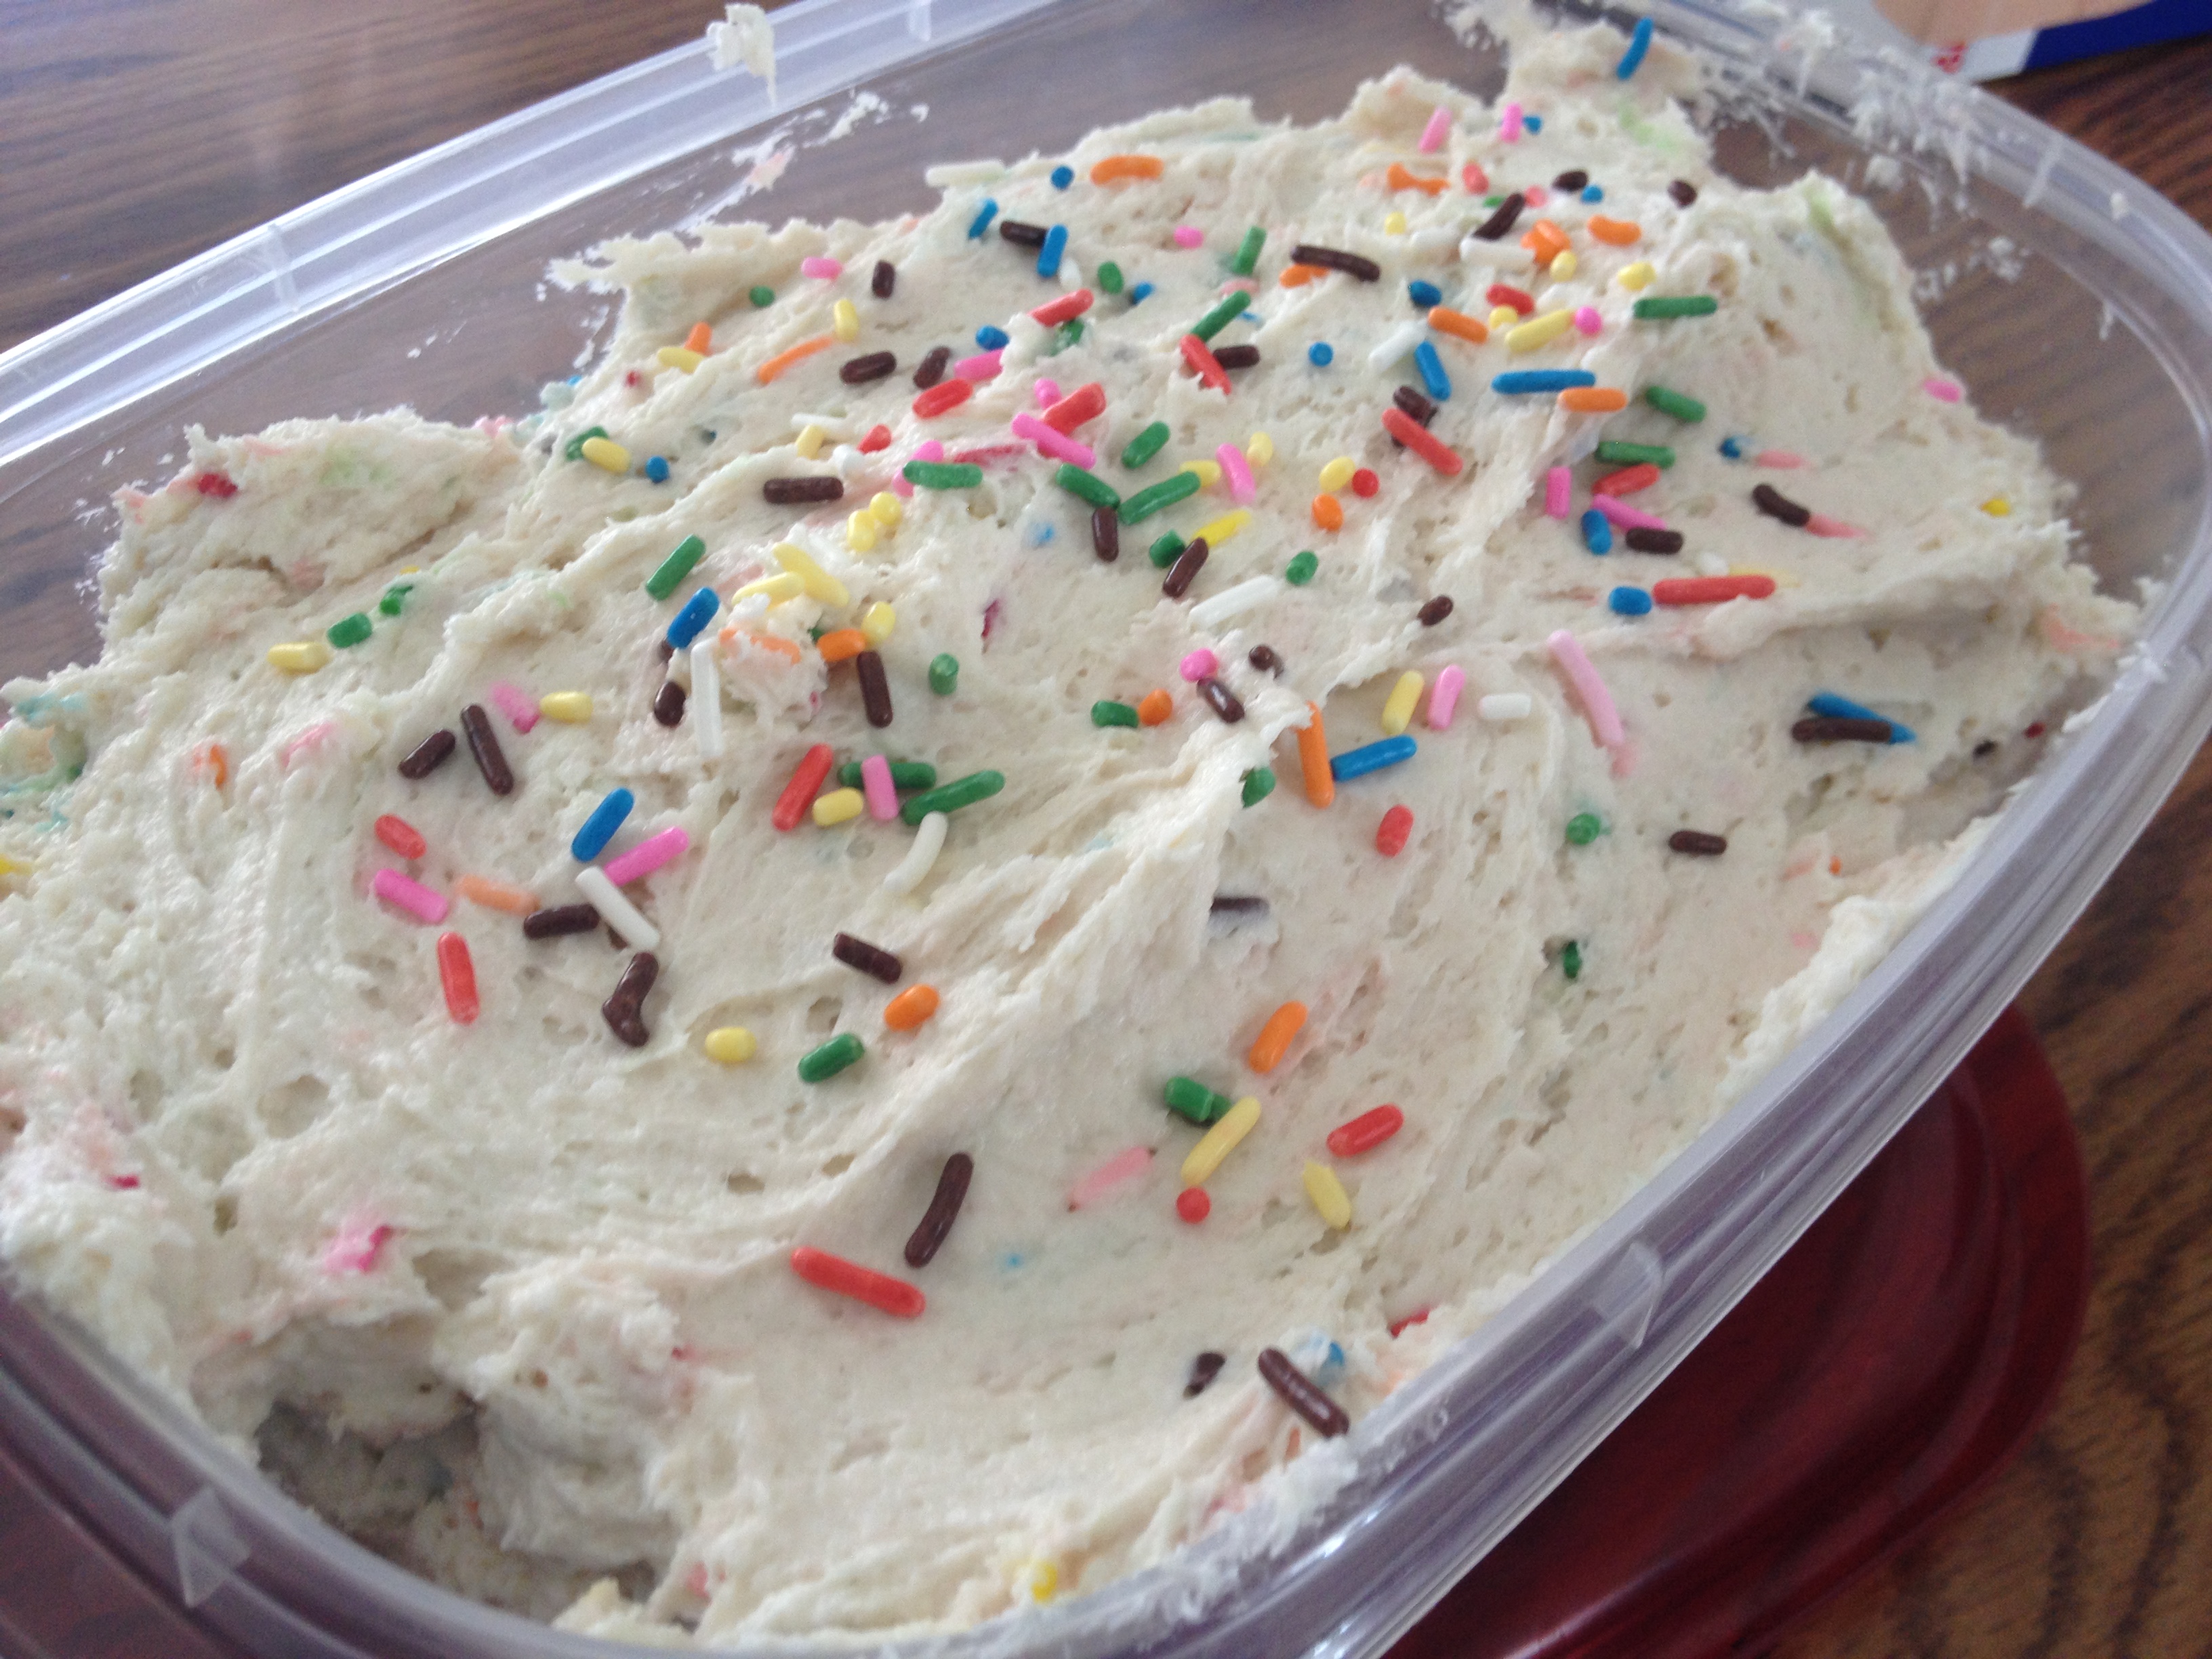
…and blend baby blend! This whips up nice and quick and the sprinkles create a really fun and colorful look too. Use a spatula to help get the dip off the sides if it starts to creep up. Then, spoon into some Tupperware as you need to pop it in the fridge for about 2 hours (minimum) before you dig in. (You can refrigerate longer too, it just needs a few hours to firm up a bit.)

IMG_4737

That does not mean that you can’t lick the beaters…and the extra spoon you just happened to have used…and the bowl that you used…

Sigh. So delicious.

Before you serve, scoop into your serving bowl of choice and have some sweet crispy snacks on hand to use to  dip. We chose Nilla Wafers and Chocolate Teddy Grahams. But plain graham crackers or fruit would work too, just be sure it’s durable so it holds up  as you pile on the goodness, forewarning.

IMG_4772

Make sure to add some sprinkles on top for garnish before you serve it up to all those excitedly lined up with their dipping mechanisms.

IMG_4773

I loved this, those who consumed it also gave it a thumbs up and I really, deeply think you will too.

Let me know what you think when you give this a whirl!!

Vanilla Bean Frosting

10 Mar

Is there anything better than vanilla bean? I think not! I have always LOVED the taste of this wonderful ingredient but used it for the first time today in the frosting for Dad’s cake. It was a bit of a hectic day, so I didn’t get a chance to whip up (no pun intended…ok…slightly intended) the frosting until my parents arrived at my apartment. Ah well, I enjoy cooking with some company. 🙂

For dinner, my parents and I had planned something relaxing and delicious – none other than Punch Pizza! See my recent post about Punch and why I think it’s so divine. We enjoyed both a Margherita Extra (the best EVER) and a delicious meat concoction with onions. It was great to have the combination of the two pizzas with the olive oil on one to outweigh the zip of the spice on the meat version. I’ll have to look up the name of that pizza, it was tasty.

Back to the vanilla bean. And the frosting. So, I’ll put this out there – this is not a healthy frosting. But MAN is it good. Mom and Dad kept sticking their fingers in the bowl of frosting and insisting on putting more on the cake. I even caught them in their frosting frenzy – including Dad sneaking extra layers on the cake. Got to love it.

For the recipe, this again a Sweetapolita creation. Below is her exact wording, measurements, ingredients and ‘how to make’ process which can be found on this page in her blog (when you see an ‘I’ that refers to Rosie, not to me):

******************************************************************************************************************************

Whipped Vanilla Bean Frosting

Ingredients

3 sticks + 2 tablespoons (375 grams/13 ounces) unsalted butter, softened and cut into cubes

3 cups sifted (480 grams/1 lb + 1 ounce) confectioners’ sugar (icing, powdered)

3 tablespoons (45 mL) milk

1 vanilla bean, scraped

1 teaspoon (5 mL) pure vanilla extract — I use Nielsen-Massey Vanillas 8-oz. Madagascar Bourbon Vanilla Extract

pinch of salt

Method

1. In the bowl of an electric mixer fitted with the paddle attachment, whip butter for 8 minutes on medium speed (I use “4″ on my KitchenAid). Butter will become very pale & creamy.

2. Add remaining ingredients and mix on low speed for 1 minute, then on medium speed for 6 minutes. Frosting will be very light, creamy, and fluffy.

3. Best used right away.

4. You can eliminate the vanilla bean and use a total of 1 1/2 teaspoons of pure vanilla extract.

*Adapted from Donna Hay

***************************************************************************************************************************

So, as I was whipping the frosting for a total of 8 + 1 + 6 minutes, I got in a little workout too. I unfortunately do not own a Kitchen Aid mixer. I know – the shame! It’s on the lists of “I’d really like…” but hasn’t quite made the list of “I REALLY NEED…”. Yet. If you’re like me and use a hand mixer, prepare for a little arm workout. If you have a Kitchen Aid mixer…well good for you. What color is it?!?

Back to frosting and cake. Locate your cake plate, or in my case, an upside down pizza pan. (I meant to buy a large cake stand last weekend and totally spaced it out. The humor here is I own three mini cake plates (for perfume, picture frames etc.) but not one that’s cake size. I know – little weird.) Either way, as long as the surface you use is flat, you should be good.

Slather frosting all over the top of whichever cake you’d like to be the bottom. I was told I should have put MORE frosting on for this middle frosting layer, but this is up to you and much you LOVE frosting. Set your other cake on top, face down. This gives you a nice, flat surface for the top of the cake and makes it easy if you wish to decorate. Layer on the frosting on all sides and the top until your satisfied with the both the coverage and depth of frosting. I didn’t use all of the frosting, but there wasn’t too much leftover.

Decorate as you’d like or be like me and just use candles. Here’s the birthday boy:

And here he is, in vanilla heaven:

All in all, a delicious cake and frosting recipe and a successful birthday celebration was had. I highly recommend both the frosting recipe and the cake recipe from yesterday’s post. This is no ‘boring vanilla’ cake . I’m a chocolate girl and loved this cake. Trust me.

Now go make some cake!

Vanilla Cake from Scratch

9 Mar

Today was such a bizarre day! I travel for work and my entire travel itinerary was thrown off today as my flight was cancelled. I drove home instead, arriving home (after a stop at a few grocery stores for ingredients) at 10 PM. I had planned on spending the evening getting things ready for my parents to stop by tomorrow for my dad’s birthday. I had a few errands to run for some last minute items for his gift and wanted to make this cake from Sweetapolita.

The author of that site, Rosie, has a wide array of cakes on her blog – all of which looked delicious. I had a craving for something really simple, fluffy and preferably with vanilla bean. (I’ve never cooked with it but love the taste.) I compromised with a fluffy, vanilla cake and a vanilla bean frosting. I didn’t vary any details or ingredients from her recipe, as I was too afraid I’d screw something up!

The one thing I didn’t follow to a ‘T’ was the sifting of the cake flour. I don’t own a sifter (I did look  tonight at two grocery stores) but googled some ways to also ariate the flour without sifting. One suggestion was to whisk the flour – which is the method I used. Hopefully my cake will be fluffy even without the sifting.

I unfortunately have only one cake pan – so I am practicing patience this evening by doing one at time for the two tier cake. My last one is  juuusssttt finishing up – the second of two is cooling right now.

As I didn’t vary any part of the recipe – this is Rosie’s, from Sweetapolita, exact wording, measurements, ingredients and ‘how to make’ process (when you see an ‘I’ that refers to Rosie, not to me):

***************************************************************************************************************************

Fluffy Vanilla Cake {modified}          

Yield: One 2-layer, 8-inch round cake or 9-inch round cake

*Very fluffy and light, but can be a bit more challenging if even a fraction too much liquid is added.

Ingredients

5 large egg whites (5 ounces/150 grams) at room temperature

3/4 cup whole milk (180 mL/6 liquid ounces), at room temperature

2 1/4 teaspoons pure vanilla extract (12.5 mL) — I use Nielsen-Massey Vanillas 8-oz. Madagascar Bourbon Vanilla Extract

2 1/2 cups sifted cake flour (10 ounces/285 grams–weighed after sifting)

1 3/4 cups sugar (12 ounces/350 grams)

1 tablespoon + 1 teaspoon baking powder (19.5 grams)

3/4 teaspoon salt (5 grams)

12 tablespoons unsalted butter (6 ounces/170 grams), at room temperature and cut into cubes

Method

1. Preheat oven to 350°F (180°C). Grease, line with parchment, and flour two round 8-inch pans.

2. In a medium bowl or measuring cup, combine and stir the egg whites, 1/4 cup of milk, and the vanilla. Set aside.

3. In the bowl of an electric mixer fitted with the paddle attachment, combine the dry ingredients together on low speed (I use the “stir” setting on my mixer) for 30 seconds.

4. Add the butter and remaining 1/2 cup of milk, and mix on low speed until just moistened. Increase to medium speed and mix for 90 seconds.

5. Scrape the sides of the bowl and begin to add the egg mixture in 3 separate batches; beat on medium speed for 20 seconds after each addition.

6. Divide the batter in two, spreading it evenly with a small offset palette knife. If you have a kitchen scale, weigh to ensure 2 even layers.

7. Bake 25-35 minutes or until a cake tester comes clean when inserted into the center. Be so careful to not overbake. Check cake at 20 minutes, but not before, and once you feel it’s almost ready, set the timer for 2 minute intervals. Let cool on racks for 10 minutes before loosening the sides with a small metal spatula, and invert onto greased wire racks. Gently turn cakes back up, so the tops are up and cool completely.

8. Wrap tightly and store at room temperature for up to 2 days, refrigerator for up to 5 days, or frozen for up to 2 months. Best eaten the same day as baked.

*Slightly adapted from Classic White Cake recipe on Baking Bites

******************************************************************************************************************************

If you notice some of the measurements are bolded, and the recipe is a modified one. If you go to the recipe you’ll see Rosie modified it from her orignal recipe a bit.

I’ll post more about the frosting and what the final product looks like, tomorrow!

Also sending a ‘Happy Birthday’ out to my Dad via the blogosphere!!