Tag Archives: Cookies

S&B Holiday Recipe Ideas

21 Dec

Hey crew! If you’re anything like me around the holidays, you’re trying to come up with some new cookie recipes or find a new food to have out at the holiday spread. Or maybe you’re hosting a big group and you need some ideas for breakfast in the morning?

I wanted to have a short, but helpful post for you guys to help you find some great options within the Spatulas and Buttons archive. I would also LOVE to hear some of your favorites! Leave a comment below with one of the holiday classics that you enjoy making, I’d love to try out new ideas from you all!

Classic cookies that everyone will love…

You guys know my love for trying out and posting cookie recipes here on the blog, so we’ll start there. These are a few of my favorites…

Mint Chocolate Chip Cookies:

These ARE my favorite and was my choice for cookie exchange contribution this year. They’re chewy and wonderful, not overly minty (unless you’re heavy-handed with the mint extract…I recommend to not be) and truly PERFECT for the holidays. Whenever I make these, they disappear FAST.

IMG_0185
Sugar Cookies:

This is a classic at the holidays, am I right?! This sugar cookie recipe is one that I personally prefer as it produces chewy wonderfulness. I got have ’em chewy! They’re wonderful when frosted but still tasty if eaten plain.
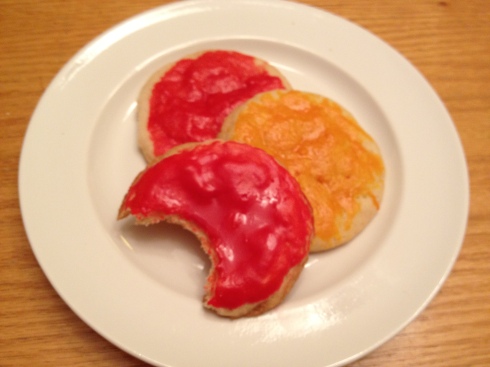
IMG_0712

Brownie Roll-out Cookies:

These look festive, they can be made into all sorts of shapes and when dusted with powdered sugar, well, let’s be real – it looks like snow. Perfect. No more explanation needed.

IMG_4239

Snacks to bring to that party you’re invited to…

It’s always great to have a few go-to’s for when you’re asked to bring something to the holiday get-together with family. Or, if you’re wanting to be creative and give a hostess gift that will double as snacks. Here are a few options that I’ve found to be delicious…

Chipotle & Rosemary Nuts:

Mixed nuts seem to be a staple at the holidays and this recipe just gives a little pizzazz to the mixed nuts bowl you put out on the table every year. It’s a little spicy, a little sweet with a great layer of rosemary throughout. Yum!

CIMG3432

Cake Batter Dip:

When trying to find a sweet dip to balance out all of their savory cousins (are dips cousins?!), this will win over anyone with a sweet tooth. It’s great with fruit or with plain cookies (e.g. Nilla Wafers).
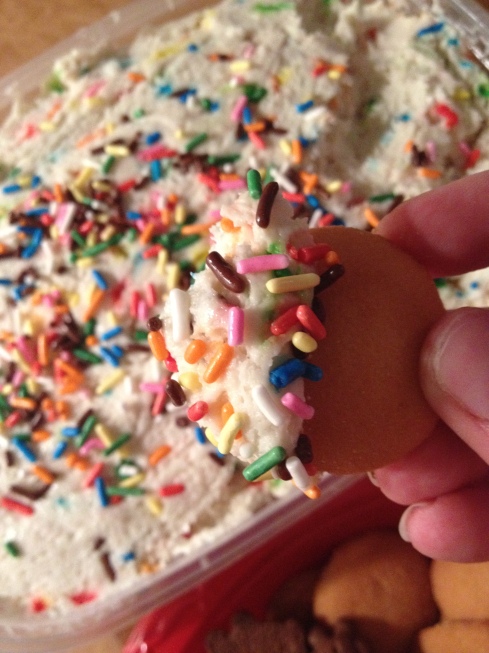
IMG_4773

Fruity Dark Chocolate Bark:

A different approach to the ‘bark’ that always seems to be out on the dessert table at this time of year. This one uses dried fruit to give a sweet and tangy flavor and a little crunch. It’s also very pretty and would work perfectly as a hostess gift!

IMG_4160

Breakfast for a crowd…

Are you planning on hosting family and friends throughout the next few weeks? If so, when it comes to breakfast, it’s essential to have a few plans in your back pocket. These options would be perfect to feed pajama clad folks and will be a tasty way to start your day…

New York Breakfast Casserole:

This casserole is a twist on the New York bagel, with everything bagels, cream cheese and endless possibilities to add your meat of choice (lox, sausage or bacon anyone?!) and/or veggies. I love this with the classic tomatoes and red onion combo, but you could add in some bell peppers, green onions, etc. It can even be prepped the night before, leaving you more time to snooze in the AM.

IMG_4112

Baked Oatmeal:

A fancier oatmeal that will warm everyone’s stomachs as they wake up for the day. You can add in whichever fruit strikes your fancy (raspberries and blueberries have worked well in my previous experiments). This goes well when paired with bacon and/or sausage (and makes your kitchen smell like the best breakfast restaurant in town).

IMG_6642

Raspberry Scones:

Looking for a bread/pastry (that doesn’t require you to wake up at the crack of dawn) to feed warm to your guests?! These scones are a cinch to throw together and you could easily make a few batches at once. They’d be great paired with some eggs in the morning, providing a perfect item to soak up those runny yolks. Sigh. Now I want one. AND a runny yolk for dipping.

IMG_6474

********************************

I’m finally going to get to try out some new recipes over the holiday season, with a break from work and plenty of time to experiment in the kitchen. Can’t wait to share these adventures with you!

And guess what?! This girl finally got herself a DSLR camera! SO excited to capture better and clearer pictures for you all in future posts. I know my iPhone photos won’t win any awards. But hey, I did the best I could with the technology I had. Looking forward to learning the in’s and out’s of the new camera so I can bring more mouth-watering pictures to the blog.

Wishing you all a wonderful holiday season, with time spent relaxing with those you love most, enjoying delicious treats and sipping libations that warm your belly.

Cheers!

Chewy Red Velvet Chocolate Chip Cookies

6 Sep

IMG_5974

As promised, it’s double-post Saturday and I’m bringing you one of my new favorite cookie recipes. This was featured in the recent Giveaway Boxes: Revealed! blog post as it was created and shipped off to Johnston, IA. I found this recipe after trying to find the perfect red velvet recipe that would be shipping friendly and have some great flavor. It’s a winner.

My thing with red velvet is that I was always unsure. I never really got why some people would go gaga for red velvet as I always felt there was some flavor lacking. I couldn’t put my finger on what additional flavor I wanted, but I just knew that if I had options between red velvet and something else, the something else usually won. But as I taste tested the batter and finished product of these cookies, my opinion has changed!

These cookies are great with mini chocolate chips – spreading out the chocolatey flavor in the cookie and also adding a little extra chewiness. Plus they look so great against the red color, don’t they?!

Whether you love red velvet or not, I really do think these are cookies you’ll love. If it helps to convince you, the extras made from my double batch went to Luke’s family in Wisconsin and they didn’t last more than 12 hours.

Convinced yet?

Excellent. I assume, yes.

This recipe makes 12-15 in standard form, so I definitely doubled to make enough for my giveaway box and to bring along to Wisconsin. This is a recipe that I tweaked slightly from the amazing blog, How Sweet Eats. Check out her blog for more delicious and creative twists on cookies and other sweets (lots of great shakes and smoothies on there that I’m dying to try out…particularly the boozy ones). I also just got her new cookbook Seriously Delish and am PUMPED to start working my way through it. She has some pretty fantastic recipes and this is just one of many that I’ve tried and put my own little spin on. (She also doesn’t know I exist, but I really do love her blog and cookbook. Big fan.)

And that Bacon Beer Cornbread I mentioned that Luke and I are making tomorrow? Her recipe too.

Ingredients (for 12-15 cookies, recipe is easily doubled):

  • 1/2 cup butter
  • 1/2 cup sugar
  • 1/2 cup brown sugar
  • 1 egg
  • 1 – 2 teaspoon vanilla (we used the good stuff, but the usual stuff we’ll do)
  • 1 1/2 cups all purpose flour
  • 1 teaspoon baking soda
  • 1/4 teaspoon salt
  • 1/3 cup cocoa powder
  • 2 – 4 Tbsp of red food coloring (the original recipe says 1 tsp but I wanted RED and kept adding until I got the color I wanted)
  • 1 cup of mini chocolate chips (or more if you LOVE chocolate chips)

How to Make:

Like with most cookie recipes, we start off creaming together the butter and both sugars. Throw ’em in the mixer until everything is light and fluffy, which takes a few minutes.

IMG_5953

IMG_5954

IMG_5955


Next in are the vanilla and egg. Cream those in for another minute or so (you can see we doubled the recipe with our two eggs in the photo below).

IMG_5956

One of our fun purchases on our honeymoon part 1 in Duluth, MN was a big bottle of Watkins Vanilla Extract. Gosh, I’m obsessed.

IMG_5957

IMG_5958

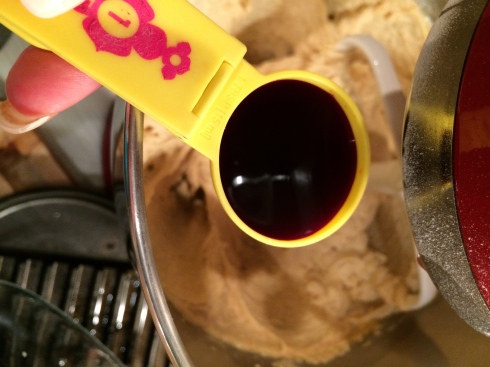
Next is my favorite part – adding the red food coloring! As I noted above, we added more than the original recipe because I really wanted RED cookies. I’m weird like that. I added slowly with the mixer going to I could get a sense of the color saturation as I went.

IMG_5960


Once I was convinced that the color was perfect, in went the remaining dry ingredients.

IMG_5963

IMG_5964

IMG_5965

IMG_5966

Final mix-in was the mini chocolate chips, until the batter looked perfectly spotted with chocolate throughout.

IMG_5969

IMG_5970

Now, the ice cream scoop is the perfect cookie dough scooping mechanism, a trick a learned a few years back. Use your ice cream scoop to put 3 x 4 balls of batter on a Pam sprayed cookie sheet and then pop into the oven at 375 for 10-12 minutes.

IMG_5971

Let ’em cool on a wire rack and then devour with a big glass of milk. Ooohhhh so good and totally changed my thoughts on all things red velvet.

IMG_5973

These pack super well and are easy to throw into Tupperware and mail or travel with. I can speak to that on both accounts!

IMG_5977

Giveaway Boxes: Revealed!

17 Aug

SO there’s been quite a delay in me sharing the contents of the two giveaway boxes. There was this wedding thing in the middle of the summer (BEST DAY EVER) that took a BIT of attention, but now I’m back and excited to share the wonderful boxes that went on their way to Seattle, Washington and Johnston, Iowa!

The fun thing was, both winners picked different food items so I got to make two very unique, but very delicious boxes. Hearing their excitement when the box was received and how the treats inside went over, was my favorite part. THAT is why these giveaways are so great. Nothing is more fun for me than getting to cook/bake for other people. It’s the BEST! Am I right?!?

So both winners received recipe cards of the items in their box (each received three items) and they also received two fun, colorful spatulas. Because of COURSE, that is the cooking portion of this blog AND who doesn’t need/want more spatulas?!? 🙂

Box #1 winner was Todd, a dental student in Seattle, WA. He picked the following:

  • Muffin/Cupcake: A new, not-yet-on-the-blog item! Delicious Blueberry Oatmeal Muffins that I’m excited to share with you guys in a future post. They turned out very moist, gorgeous with the purple/blue berries and definitely a keeper that I’ll be making again for my husband (<— new favorite word) and myself.
  • Snack: Spicy Caramel Popcorn featured in this post
  • Cookies: Snickerdoodles featured in this post

Had a great day of baking while we watched baseball in the background. Is there anything better than baking and baseball?! Nope. Really don’t think there is.

IMG_5540 IMG_5541


They got all packaged up and sent off to Todd!

IMG_5599
IMG_5603

IMG_5605

Next up was Teresa, a married mom of the cutest little guy you’ve ever seen. She and her husband, Josh came up with their box contents:

  • Muffin/Cupcake: The healthy twist on Chocolate Muffins featured in this post
  • Snack: Spicy Chipotle Rosemary Nuts featured in this post
  • Cookies: A great new challenge and one of my new favorites! Teresa and her husband Josh requested something red velvet and I found a great recipe from one of the blogs I read frequently that fit the bill. Really think you guys will love them as much I did, taste testing! Red Velvet Chocolate Chip Cookies will be coming soon to a post near you. These were chewy, had lots of flavor and mini chocolate chips ensured that every bite had some chocolate.

IMG_5950 IMG_5973 IMG_5975Off the box went to Johnston, Iowa to a lucky family of three!!


IMG_5986IMG_5987

IMG_5988Overall, definitely was great fun to send these off AND it was the perfect way to decompress after the wedding preparations that took up most of my free time in May and June and be in my happy place in the kitchen. I have LOTS of recipes all primed and ready to share with you guys so please do stay tuned! Luke and I have really enjoyed experimenting this summer in the new apartment kitchen and I have so many wonderful things to blog about.

Before you know it, we’ll do another one of these giveaways so keep your eyes on the posts for some delectable new treats, libations and maybe a few crafty projects too before we dive into another giveaway.

Off to draft my Fantasy Football team…simple goal is to beat my husband. 🙂

Oatmeal Chocolate No-Bake Cookies

15 Apr

Before I jump into this post about cookies that will knock your socks off…wanted to hint that we’re getting VERY close to another giveaway post. I’ll provide all of the details in my 60th post so everyone is aware of what’s IN said giveaway of treats and what level of excitement they should have (aka high excitement or HIGH EXCITEMENT). Being eligible to win the giveaway box o’ treats is super simple, you just need to be a follower of the blog. That means, you clicked the button in the upper right of the homepage to “follow”, confirmed you’re “following” via the email notification you received and now get lovely emails each time I post. I think it would be great fun to have two winners this time around, so your chances to win are even better than last time!

So if you’re not already a follower of the blog but you enjoy getting baked goods in the mail and enjoy the occasional blog post from me, now is time to make things official.

More details to come in my next post!

Enough with giveaways, let’s get to the baked goods…

IMG_4567

Ok, so I’m on this no-bake treats kick. Not sure where that came from but no complaints as I’ve discovered a plethora of tasty and SUPER easy recipes to share with you all that you can make in a snap. This particular awesome recipe is one that I think most everyone has had at some point. You may have had one at a past potluck, your 3rd grade classmate’s birthday treat, your coworker brought them in as they’re expecting a baby, I don’t know. (I had my first in Girl Scouts in Elementary School and they were called “monkey poop”…how appetizing)

Regardless, I bet some $ that you’ve had some form of this cookie before and now you shall know how to make it.

This recipe is from my soon-to-be Mother in Law (81 days to go until that’s official…not counting down or anything…) and I cannot articulate to you more clearly than to say that these are GOOD and SO addicting. I had coworkers who ate >5 because once they had their first, they couldn’t stop.

This is your forewarning. You can’t have just one. I don’t know if it’s physically possible. (Nor, do I think it’s that fun to have one and be done. C’mon!) What is it about oatmeal, chocolate and peanut butter that is so hard to resist?! As you recall with my other recent post on a very similar yet very different recipe (no coconut or additional nuts/dried fruit additions in these cookies) for no-bake bars, those are also hard to stop consuming. Ah well, we only live once right?!

So, hold on to your socks as we go through the super simple process of making one of the greatest cookies to grace our world.

Ingredients:

  • 2 cups sugar
  • 1/4 cup cocoa powder
  • 1/4 lb butter (aka 1 stick)
  • 1/2 cup milk
  • 1/2 cup crunchy peanut butter
  • 1 tsp vanilla
  • 1 3/4 – 2 1/2 cups of oats (you’ll need to eyeball it to see if it needs more or less oats…ready below to learn more)

How to Make:

This recipe starts off with the first four ingredients being combined in a medium saucepan over medium heat. So in goes the sugar…

IMG_4554

…cocoa powder (thought I’m sure you’re more neat than I was)…

IMG_4555

…butter…(I recommend slicing the butter into smaller chunks to aid in the melting process)…

IMG_4556

…and milk. Bring this mixture to a boil for 3 minutes, stirring constantly. You don’t want that sugar to burn!

IMG_4557

Once your 3 minutes are up, take off the heat and add in the peanut butter. Crunchy PB is the best as it gives the cookie not only a little crunch but also texture. Highly recommend, friends. (I failed to photography the PB going in…fail…but it’s in there!)

IMG_4558

After the PB comes the vanilla. Stir everything up to incorporate fully.

IMG_4559

Now, the oatmeal. Start off with 1 1/2 cups of oats and then add more, up to 2 cups, to reach the consistency you’re looking for. If the mixture seems too soupy, add more oats. Keep adding until the mixture doesn’t seem to be too soupy. Check out the pictures below if you’re uncertain what level of soupiness is okay and what means more oats.

IMG_4560

Mix everything really well before you begin scooping!

IMG_4561

I have found a new use for my ice cream scoop…perhaps I’m late the game everyone was already playing…but the ice cream scoop is perfect for grabbing cookie batter. PERFECT I tell you! However, before you begin your scooping, lay out wax paper on your counter-top.

IMG_4562

Now, scoop each cookie and plop on to the wax paper to harden. Be sure to leave space between each cookie! This will harden up really fast and are actually insanely delicious when they’re still somewhat moist and falling apart. So if you test one out too soon, it won’t be bad. I promise.

IMG_4563

Once these set (I checked mine after 30 minutes and they were all hard), you can store in Tupperware or feed to hungry humans nearby!

IMG_4564

Enjoy friends!!

And stay tuned for giveaway box details in the next post!!

Giveaway Box Revealed

1 Nov

For anyone out there that thought winning the Inaugural Blog Giveaway wouldn’t be exciting, this post is dedicated to you. Walid was the lucky winner and after I was informed of his particular food choices, the creation of the Giveaway box began.

This box was, if I do say so myself, pretty epic.

Let me explain through pictures…

First up is homemade granola (original blog post and recipe can be found here)

Then was Walid’s choice of cookie – I was informed to create something ‘healthy’ and something chocolate. I came up with double chocolate chip oatmeal cookies. I may have taste tested a few. Ok, maybe six. I’d like to share that these are fantastic. Recipe will be shared in an upcoming blog post!

Next, as promised, were all the ingredients to make Knock You Naked Brownies (minus the butter). I haven’t heard yet if he’s tackled them, but he’ll be stocked whenever he decides to do so. (I did include the chocolate chips however forgot to include them in the photo. Whoops.)

Very important addition of spatulas came next. What’s a Giveaway from the Spatulas & Buttons blog without spatulas?!? And I don’t know about you all, but I always seem to need more spatulas than I have.

Next are the recipe cards for the granola, the double chocolate chip oatmeal cookies and the KYN Brownies. Very important addition.

I threw in a few extra chocolate items as well. Why? Because as I’ve said before, surprises are fun.

Finally, recipes and card went into a little envelope sealed with….

…didn’t see that one coming, did ya? Ha. Who needs wax seals when you have buttons?!

I packed it all up and off went the box with all its goodies.

It was like counting down to Christmas as I waited to hear when it arrived! I was informed it arrived safely all the way over in DC, hopefully with much of its contents consumed at this point.

So the question now is…don’t YOU want to win the next Giveaway?!? I’m planning the next one, to be announced here in the next few weeks including all the details about how to enter, when the winner will be announced and what will be in THIS particular box. I hope you’re all as excited as I am!

Congrats again Walid for winning this first Giveaway – and best of luck to all of you for the next one!

Snickerdoodles

13 Sep

Before I dive into one of the best cookie recipes EVER, I have a few things I need to share with you (at least read #3 if you don’t want to read #1 and #2)…

1) Can I just say I love September? There are many reasons why this is such a glorious month (cough…birthday…cough, cough), but I truly think Fall foods are some of the most delicious, cozy foods ever. Get excited as I hope to have many blog posts of Fall foods to share with you soon, many I hope to whip up this weekend. This particular weekend is the first where I will not only be home long enough to eat something from my own fridge/cupboards, but I’ll have plenty of “me time” in the kitchen. I can’t tell you how happy that makes me!

2) I have exciting news! Well, exciting to me. I’ve mentioned how much I’ve wanted one of these in a multitude of blog posts…I’ve been staring at them in the store like a kid staring at the puppy section in the pet store. I’ve made the excuses: “it’s too much money”, “where would I store it” blah blah blah. But I give up. I want one!

Yes, yes, you may have already guessed it. A KitchenAid Mixer is going to be purchased this weekend. It’s my birthday present to myself and I’m going to love it to pieces. Now I just have to decide on a color (HELP)!

3) So…with it being Fall, the season of baked goods and with the upcoming purchase of my new BFF the KitchenAid Mixer…I’m going to have all these goodies that I will not be able to eat all by myself. And as it’s a month for cool kids to have birthdays, seems only right to have my first blog giveaway!

Yes, you read correctly. A GIVEAWAY.  Where YOU WIN things. I won’t tell you what is specifically in the giveaway yet, but I’ll have an upcoming post with all the details. It will probably consist of a variety of homemade goodies from me and most likely also involve a spatula or two. Probably some buttons involved somehow if I’m being completely honest. (You should have seen that one coming.)

I will say, all you will have to do to win the giveaway will be to be a follower on the blog. So if you’re one of those readers who has not clicked the ‘Follow’ button yet, this is the time to do it! The Giveaway Post will occur within the next week (I hope!) with details including when the winner will be announced etc…so stay tuned!

Now that all of THAT is out there…we can get to down to the cookies.

I have this thing for chewy cookies, don’t you? If a cookie is crispy or crunchy…meh…not my thing. But chewy cookies, um, YES please. Thus, I was on the mission to find a tasty, CHEWY version of snickerdoodles. And I dare say, I think I was successful. I do warn you, these are one of those cookies where you can’t have just one. Or two. You may find you’ve eaten five before lunchtime. It happens. I won’t judge you because well…that may have happened to someone I know. A friend of mine. Ok, to me. Whatever. I’m NOT ashamed. Nor will you be you be when you taste one!

Few last notes, I chose to use a recipe without cream of tartar (because I didn’t have any) and found this exact same recipe on multiple blogs. So, I’m not sure where the credit should go to, but just know many have tested it out, devoured them, blogged about it etc. TRUST in THEM. And me too I hope!

Ingredients:

  • 2 3/4 cups all purpose flour (I chose to use whole wheat flour, whatever you prefer)
  • 1/2 teaspoon of salt
  • 2 teaspoons of baking powder
  • 1 cup (2 sticks) unsalted butter, softened
  • 1 1/2 cups granulated white sugar
  • 2 eggs

**Important Cooking Notes added on 9/26/12:

  • I’ve had a few readers try out this recipe and would like to mention if you prefer sweeter cookies, adding a dash of vanilla will help with that. I made these without and loved them, but if you’re in need of real sweet taste beyond the cinnamon and sugar, the dash of vanilla will accomplish that.
  • Be sure to use unsalted butter or the cookies may turn out a bit salty. If you must use salted butter, then leave out the 1/2 teaspoon of salt.

Coating:

  • 2 Tablespoons of granulated white sugar
  • 2 teaspoons of ground cinnamon

This is a simple recipe, just requires some blending before you get to the fun part.

First things first – preheat the oven to 350. Grab a medium-sized bowl and mix your flour, salt and baking powder together. Make sure it’s all mixed up well and then set that bowl to the side. (Apologies for the lack of picture. I don’t know where my mind was.)

Grab the butter and make sure it’s SOFT. Trust me. Not kinda soft. Not a little bit soft. SOFT. Or it will stick to your mixer’s beaters and if you’re anything like me…you will get upset…spout off a few choice words…stop the blender…poke the butter out of all the beaters crevices…etc. etc. etc. Just trust me. 🙂

Now take that lovely, soft butter and mix it with your sugar using either your hand mixer or your electric mixer. It takes about 3 minutes, so set a timer, put on some good blending tunes (highly recommend “Don’t Wake Me Up” by Chris Brown…it’s perfect for kitchen tunage needs) and get mixing. It should look pale, fluffy and glorious when you’re finished.

Once the sugar and butter is all blended, mix in your eggs one at a time. When they’re all mixed in, slooooowllllly mix in your flour mixture.

Once it is ALL mixed together, get out a small plate or saucer and pour out your cinnamon and sugar “coating.” A small bowl works too, I just prefer the plate/saucer method.

Roll your dough into small balls, then roll them in your cinnamon/sugar mixture before putting them on a Pam-sprayed cookie sheet. I follow the 3 x 4  method, as you’ve likely seen in past posts.

Bake them for 12 – 15 minutes, until they have a hint of that lovely, golden brown color. Pull ’em out and let them cool. Or don’t let them cool and pop one in your mouth when they’re still warm. Either way, be prepared to be wowed.

Set them out for friends…or maybe just for yourself.

These are also great cookies to pack up and take to the office or a party as they don’t crumble in Tupperware. Trust me! I took these babies all the way to Chicago with me a few weeks ago on the plane and there wasn’t one broken cookie.

So bake yourself a batch and enjoy these delicious little morsels. They’ll be gone before you know it!

Mint Chocolate Chip Cookies

24 Jun

Mint and chocolate may be the best combination possible. Truly. Well, in my opinion at least.

I found this recipe a few years while flipping through a magazine. There was an advertisement for Betty Crocker sugar cookie mix with this little gem included. I ripped it out and made them immediately. And swooned.

Ok, that’s a bit dramatic, but they are pretty dang great. Betty Crocker knows their stuff. (FYI – I do not know/work for/represent Betty Crocker, I just appreciate this recipe and wanted to share it with you all.)

The best part – because you’re using a sugar cookie mix, these are ALWAYS chewy. No crunchy hard cookie nonsense. If you are into that sort of thing, this recipe isn’t for you. But…if you enjoy a wonderfully, chewy cookie…YOU, my friend, are in luck.

Also another bonus, there is a very simple ingredient list.

Ingredients (Makes approximately 36 cookies):

  • 1 pouch (1 lb 1.5 oz) sugar cookie mix (I use Betty Crocker brand, but if you have a different preferred brand I’m sure it’d work just as great.)
  • 1/2 cup butter or margarine, softened
  • 1/4 to 1/2 teaspoon mint extract (I’ve been told by even those who love mint, error on the side of the 1/4 tsp as these can get a little too minty otherwise.)
  • 6 to 8 drops green food color (I used about 6, which gets them a nice, pale green. If you want a heartier green, be a bit more aggressive with your drop quantities.)
  • 1 egg
  • 1 cup creme de menthe baking chips (I’ve used Andes mints roughly chopped before and they’re delicious. This time I used mint chocolate chips, which are a bit more subtle. Also tasty.)
  • 1 cup semisweet chocolate chunks (I used semisweet chocolate chips, but as long as there is a chocolate shape of some sort in there, I think you’re ok.)

How to Make: 

Preheat your oven to 350. Then, throw everything except the two types of chocolate chips into a bowl and mix thoroughly.

The green food coloring is the perfect indicator of when you’re done with the ‘thoroughly mixing’ piece.

Very helpful.

Then gently fold in the two types of chips until it looks very consistently ‘chippy’. You know what I mean.

Like this.

You may want to take time at this moment to taste the batter. You know, just in case. And yes, I know there’s raw egg in there. Be a daredevil. (But don’t get sick or I’ll feel terrible.)

I always spray my cookie sheets with Pam, although this recipe recommends using an ungreased cookie sheet. If you’re into that – go for it. Then, using the method you like best, place these guys on a 9×13 cookie sheet. (I think using your hands is always the best method but that’s me.)

I put these in a 3×4 pattern which worked perfectly.

Pop ’em in the oven for 8-10 minutes (These always seem to be done at about that 8 minute mark, so watch carefully!)

Cool them for a bit…


…pour a glass of milk…find hungry people…ENJOY!


PB&J Potato Chip Thumbprint Cookies

14 Apr

Were you the cool kid who put potato chips on your peanut butter and jelly sandwich? I bet you were! There’s just something great about the mix of the sweet jam and the salty chips…not to mention a nice, satisfying crunch every bite would create.

However, if you’re thinking – what the heck!? Chips and PB&J? Who ARE you?! I hope you take second to gather yourself, and then read on. These are cookies that bring the best of the sweet and salty worlds together and I sincerely believe you’ll like them. I made them over Easter and my sample group of friends and family (who are extremely blunt) told me they were very tasty. I even doubled checked with a few to be sure they weren’t ‘just being nice’. I wouldn’t dare blog about a recipe unless it would be delicious for YOU to try!

When the results were in – these were a winner. They’re not hard to make, but are more fun when you have sous chefs or visitors to chat with while making. You’ll see what I mean.

This is a recipe from a blog I LOVE to read – Spoon Fork Bacon. They have it all with great pictures, tasty recipes and my kind of humor.

Ok – lets get to the cookies:

Ingredients:

  • 1/2 cup butter
  • 1/2 cup sugar
  • 1/3 cup light brown sugar
  • 1 egg
  • 1 teaspoon vanilla
  • 1 1/2 cups flour
  • 3/4 teaspoons baking soda
  • 1/8 teaspoon salt
  • 2/3 cup creamy peanut butter (I don’t think crunchy would work as well for baking, but if you’re a rebel, give it a go!)
  • 1 egg white, lightly beaten
  • 2 cups potato chips, crushed (pop the chips into a Ziplic and pound them onto the counter top or roll on top of them with a rolling pin. Or find other demolition possibilities.)
  • ½ cup jam of your choice (I used a classic [in my opinion] – strawberry. Go with your favorite PB&J jam flavor and I’m sure it’ll be an excellent choice.)

How to Make:

Preheat your oven to 375. Don’t forget this step! (We all know I tend to do that. Oopie.)

Grab your hand mixer (if you’re a sad person like me) or a stand mixer (if you’re one of THOSE people…yes, yes we know I want to BE one of THOSE people…) and cream your butter. I highly recommend you don’t attempt to cream together very cold butter. That would be a rookie mistake right?!? Who does that?! I’m sure you see where this is going…don’t be like me. Work with warm, room temp butter or if needed, pop it into the microwave for a few seconds to soften it up. Butter creams so much better when it’s not cold. (Your butter should not be clumpy like my cold butter in the pic below. I did microwave it a bit after this pic and it actually ‘creamed’ instead of ‘clumped’ after that.)

Add in both of your sugars and cream those in with the butter (I was a space cadet and just added the white sugar…as you’ll see in the pictures. Don’t worry, I did eventually come to my senses and add in the brown sugar. But avoid this moment by just adding in both at the right moment.)  This will take you approximately 3 minutes to cream everything together.

Add in the 1 whole egg (save the 1 egg white for later) and vanilla. Keep up the mixing so these two new ingredients are thoroughly mixed in there.

Grab yourself another bowl and “sift together” (Those are the words of gals on Spoon Fork Bacon. I don’t sift due to lack of sifter and just mixed in all ingredients like normal. If you want authentic cookies as SFB describes…sift your little heart out.) your flour, baking soda and salt.

Once it’s all mixed together well – add it  into your other ingredients and stir it all up to combine, just right. At this point add the PB and make sure it’s thoroughly mixed in. You don’t want any cookies to not have the proper PB taste…so mix well people!

Now, the fun part! Find a little bowl for your egg white – this will be station #2. Put your crushed chips out on a cutting board or a big plate – this will be station #3. Spray your cookie sheet with some Pam and lay it nearby – this will be station #4. Ready?

Roll your dough into a ball (station #1)…

…drop into the egg white (station #2)… [ignore the terrible pic…I’m posting just to show what station #2 looks like]

…then pull it out and roll it in potato chips (station #3) … (the below pic is like ‘Where’s Waldo’ except it’s ‘Where’s the Cookie’?)

then place it on your baking sheet (station #4). Rinse, repeat. Oh wait, that’s something else. You know what I mean…repeat until you have 12-15 balls on your baking sheet. Make sure they’re all evenly spaced (laying them in a 3×4 or 3×5 pattern works best I think).

Now for the finishing touch – find your pinkie finger…the left one…or the right one…or your Mom’s…doesn’t matter. Gently press the pinkie into the center of each cookie ball. Now, they’re oven ready!

Put them in the oven for 12-15 minutes. With the egg white coating, you’ll know they’re done when they start to get that golden hue on top. When I pulled out my first batch, the little pinkie prints hadn’t remained as imprinted as I would have liked, so I just went through and gently pressed each one back down again. No fear if this happens to you too!

Place the cookies on a cooling rack or cutting board until they’re cooled completely.

Once they have, NOW is the time for the jam! Fill each cookie with a small amount of jam, just enough to fill up the pinkie indent. Let them sit with their jam filled tops for about an hour, so they can ‘set’ as best as they can. We covered them in Saran wrap (as these were made the night before Easter) and the jam sticks just a bit to the top of the  plastic. But make sure to leave them out for about an hour before wrapping – that should help.

Fill up a glass of milk…grab a cookie (or two!) and enjoy the goodness of sweet/salty heaven. 🙂