Tag Archives: Garlic

Lemon Orzo Salad

8 Sep

Aug-Sept 2014 051

Ok folks, back at you with another post. I’m a roll and I figured there was no reason to stop posting if I was in the mood to share food. (Unintentional rhyming.). This is another one that falls in the side dish category and I thought it was one worth sharing with you guys because it’s a great, QUICK, and healthy and it’s one that you can throw into any meal. It’s versatile and it’s not going to take much of any effort from you. What more can you ask for, right?!

As summer is winding down, it’s also a great last use for fresh veggies from a farmer’s market. If you like that sort of thing.

Before I start hitting you with photos, did want to mention how much I love seeing your likes and comments on these posts! I’m only writing these so that you all can hopefully find something fun and different to explore with in the kitchen, spark some creative juices and get you thinking about what YOU want to make tonight or…at bare minimum…make you smile and chuckle as you read. Never be shy about leaving a comment – those are my favorite! And if you don’t already follow me, click that lovely little button in the upper right on my page and you’ll be in the loop with every post that gets published.

AND…as history has shown…you’ll likely be entered into future blog giveaways! What fun!

So. How did I happen upon making Lemon Orzo Salad?

This one goes to my husband…I was trying to come up with a new and different option for a side the night we had my parents up for dinner a few weeks ago. He mentioned trying to do something with orzo, as we had a fairly ginormous container in our pantry that we haven’t used for anything in recent months. And maybe he just had a hankering for some orzo?! Regardless, I thought that was doable, so began my searching for what to throw in WITH said orzo to make it a true ‘side’. The goal was to be able to combine grains and veggies in a side that was NOT boring and tasted really good.

Key thing in making that happen is truly the lemon. TRUST me when I say, don’t skimp on the lemon. It’s essentially the ‘sauce’ of this dish and it makes the orzo incredibly tasty and it mixes very well with all the veggies. And I’m not a crazy “I LOVE LEMONS” type of person, but this did it for me. (Sorry for shouting, but I do assume there are some out there that have passionate love for lemons.)

This recipe was a true keeper and is a twist on the Two Peas and Their Pod (blog post of Lemon Orzo Salad with Asparagus, Spinach, and Feta (go check ’em out…LOTS of good grub featured on their site). Can’t wait to make this again…

Ingredients:

  • 1 cup orzo
  • Pinch of salt
  • 3 cloves garlic, chopped/minced (you better believe I used my new garlic press for this…and it was more exciting than it should have been…I’m easily excited)
  • 1 teaspoon olive oil (if you have Garlic infused Olive Oil…even better…this is a new favorite of mine in the kitchen!)
  • 10-12 asparagus spears, cut into 1 inch pieces (I wanted to add more than the original recipe, and I didn’t think it overpowered the orzo one bit)
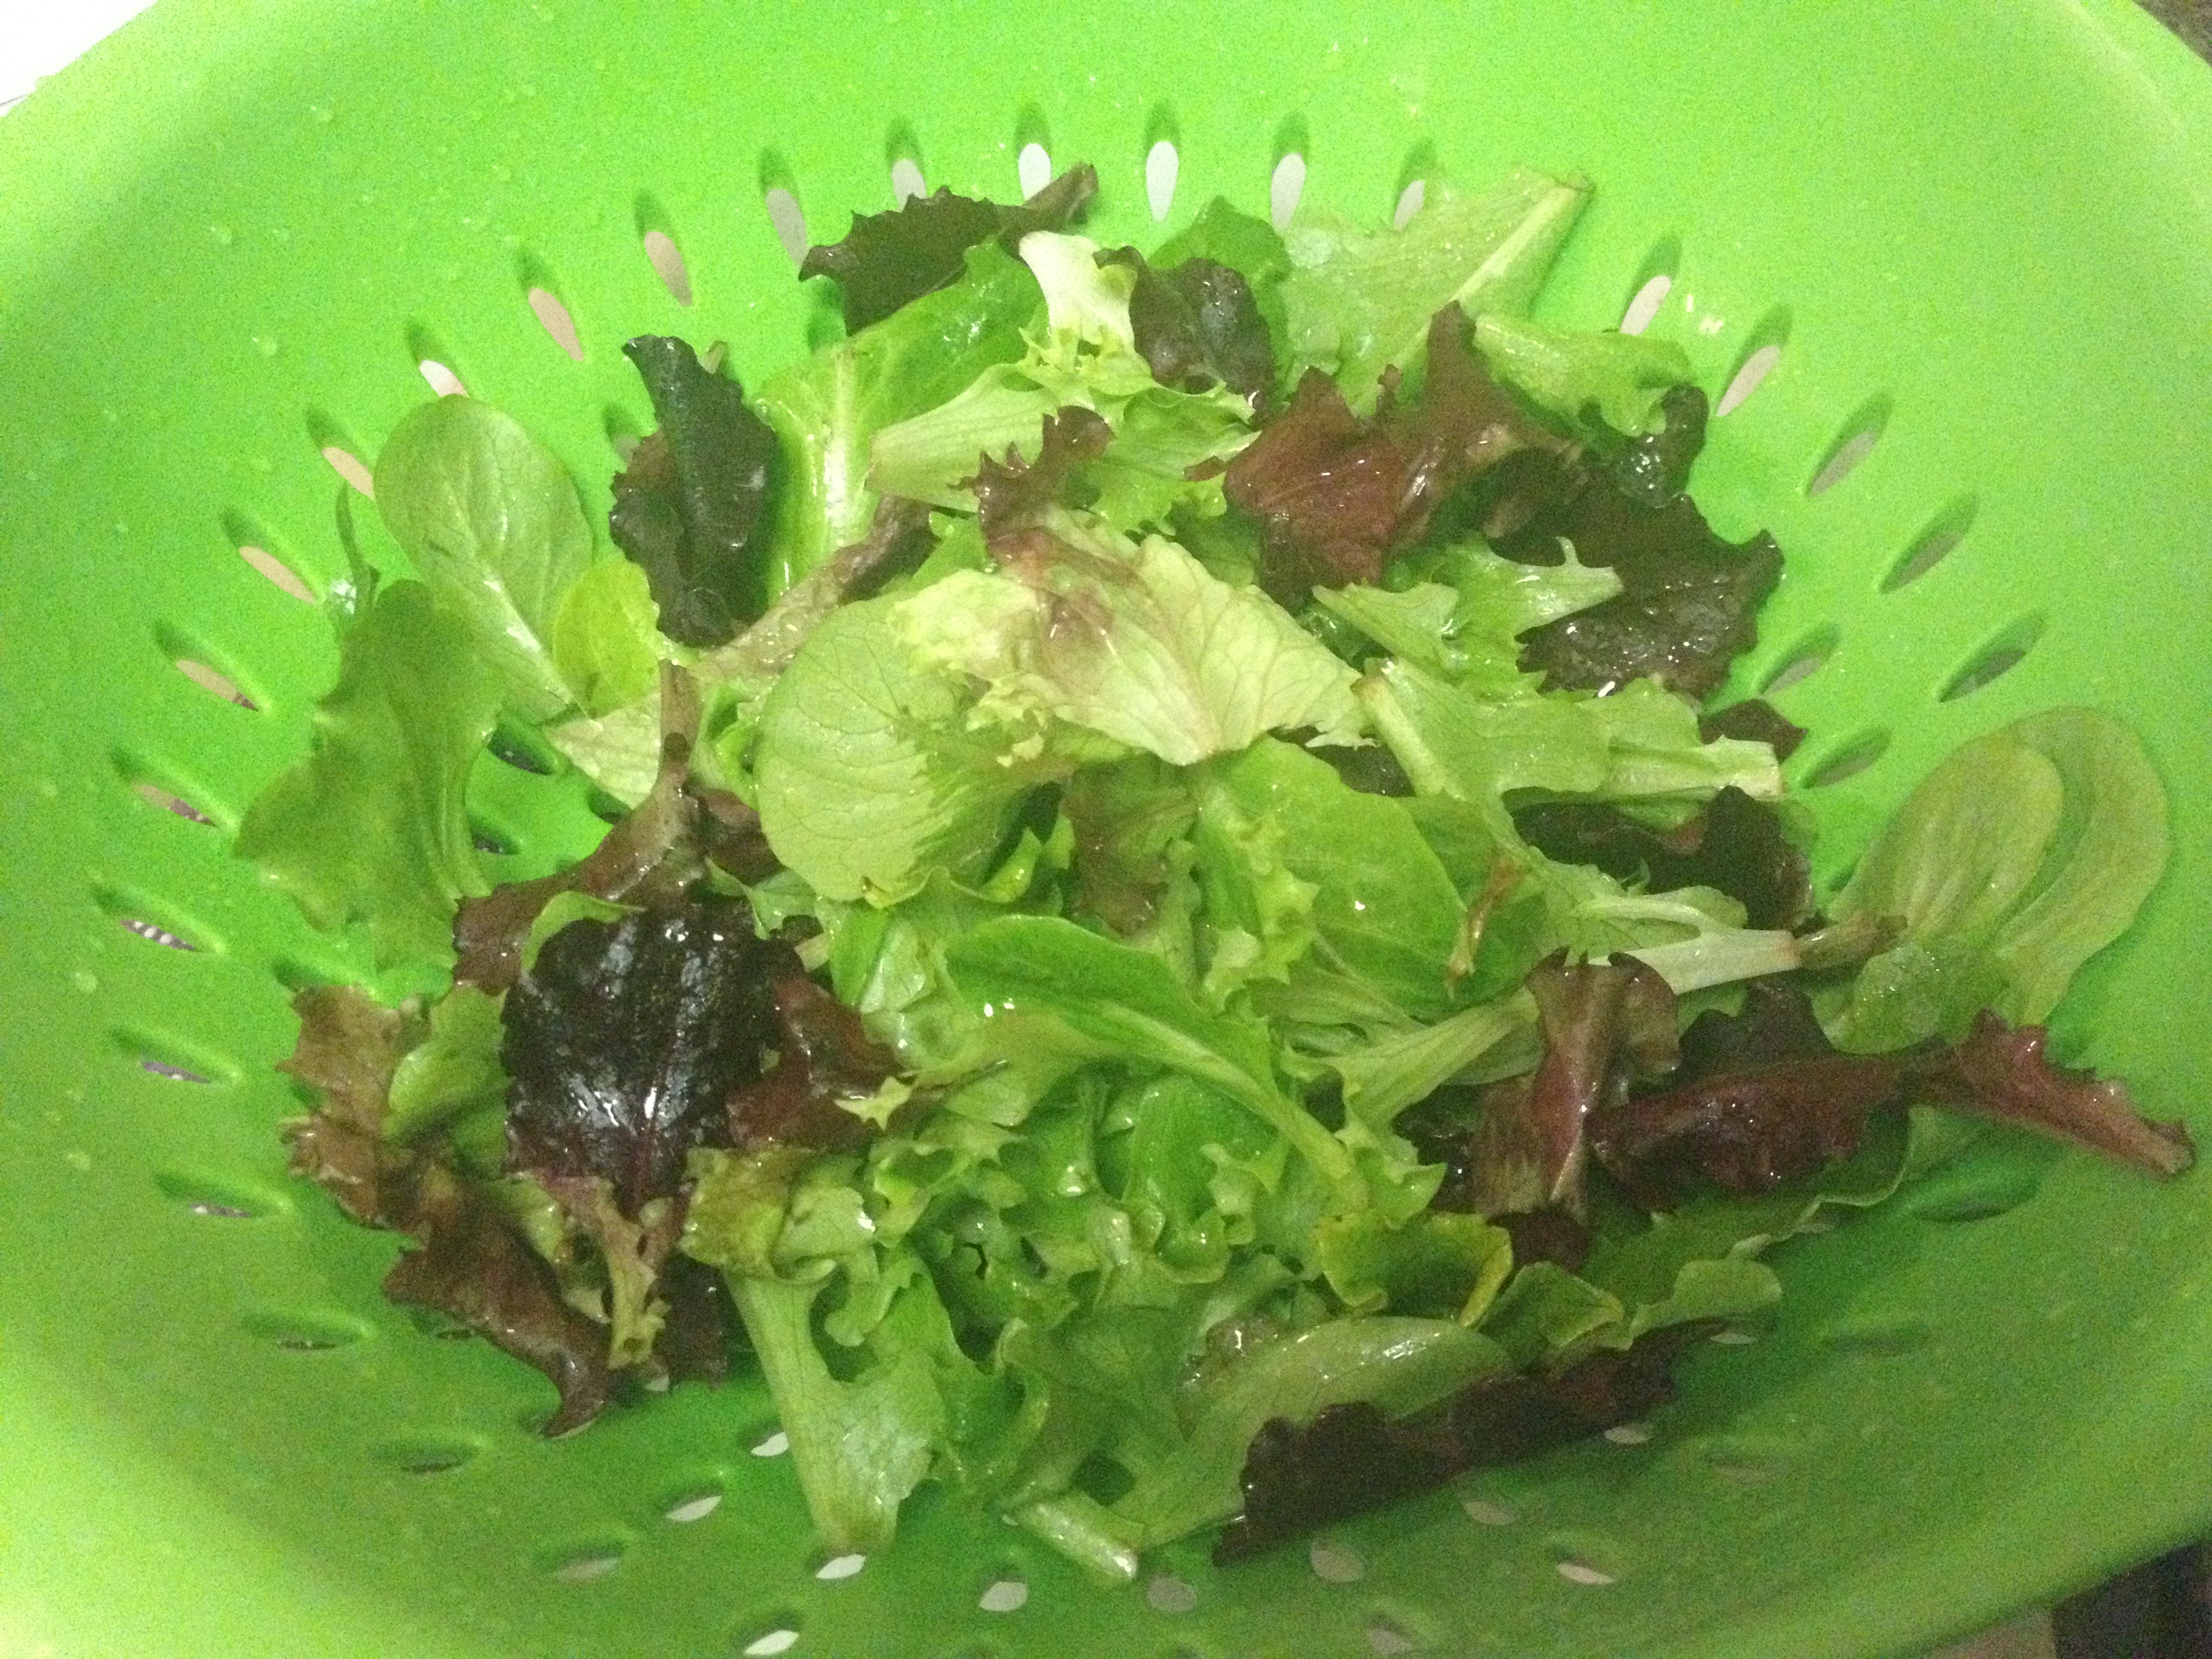
  • 1 cup/1 hearty handful of packed fresh spinach
  • Juice of 1 large lemon (yes…the whole lemon)
  • 1/2 cup feta cheese (added a bit more feta…because I wanted to)
  • Salt and pepper

How to Make:

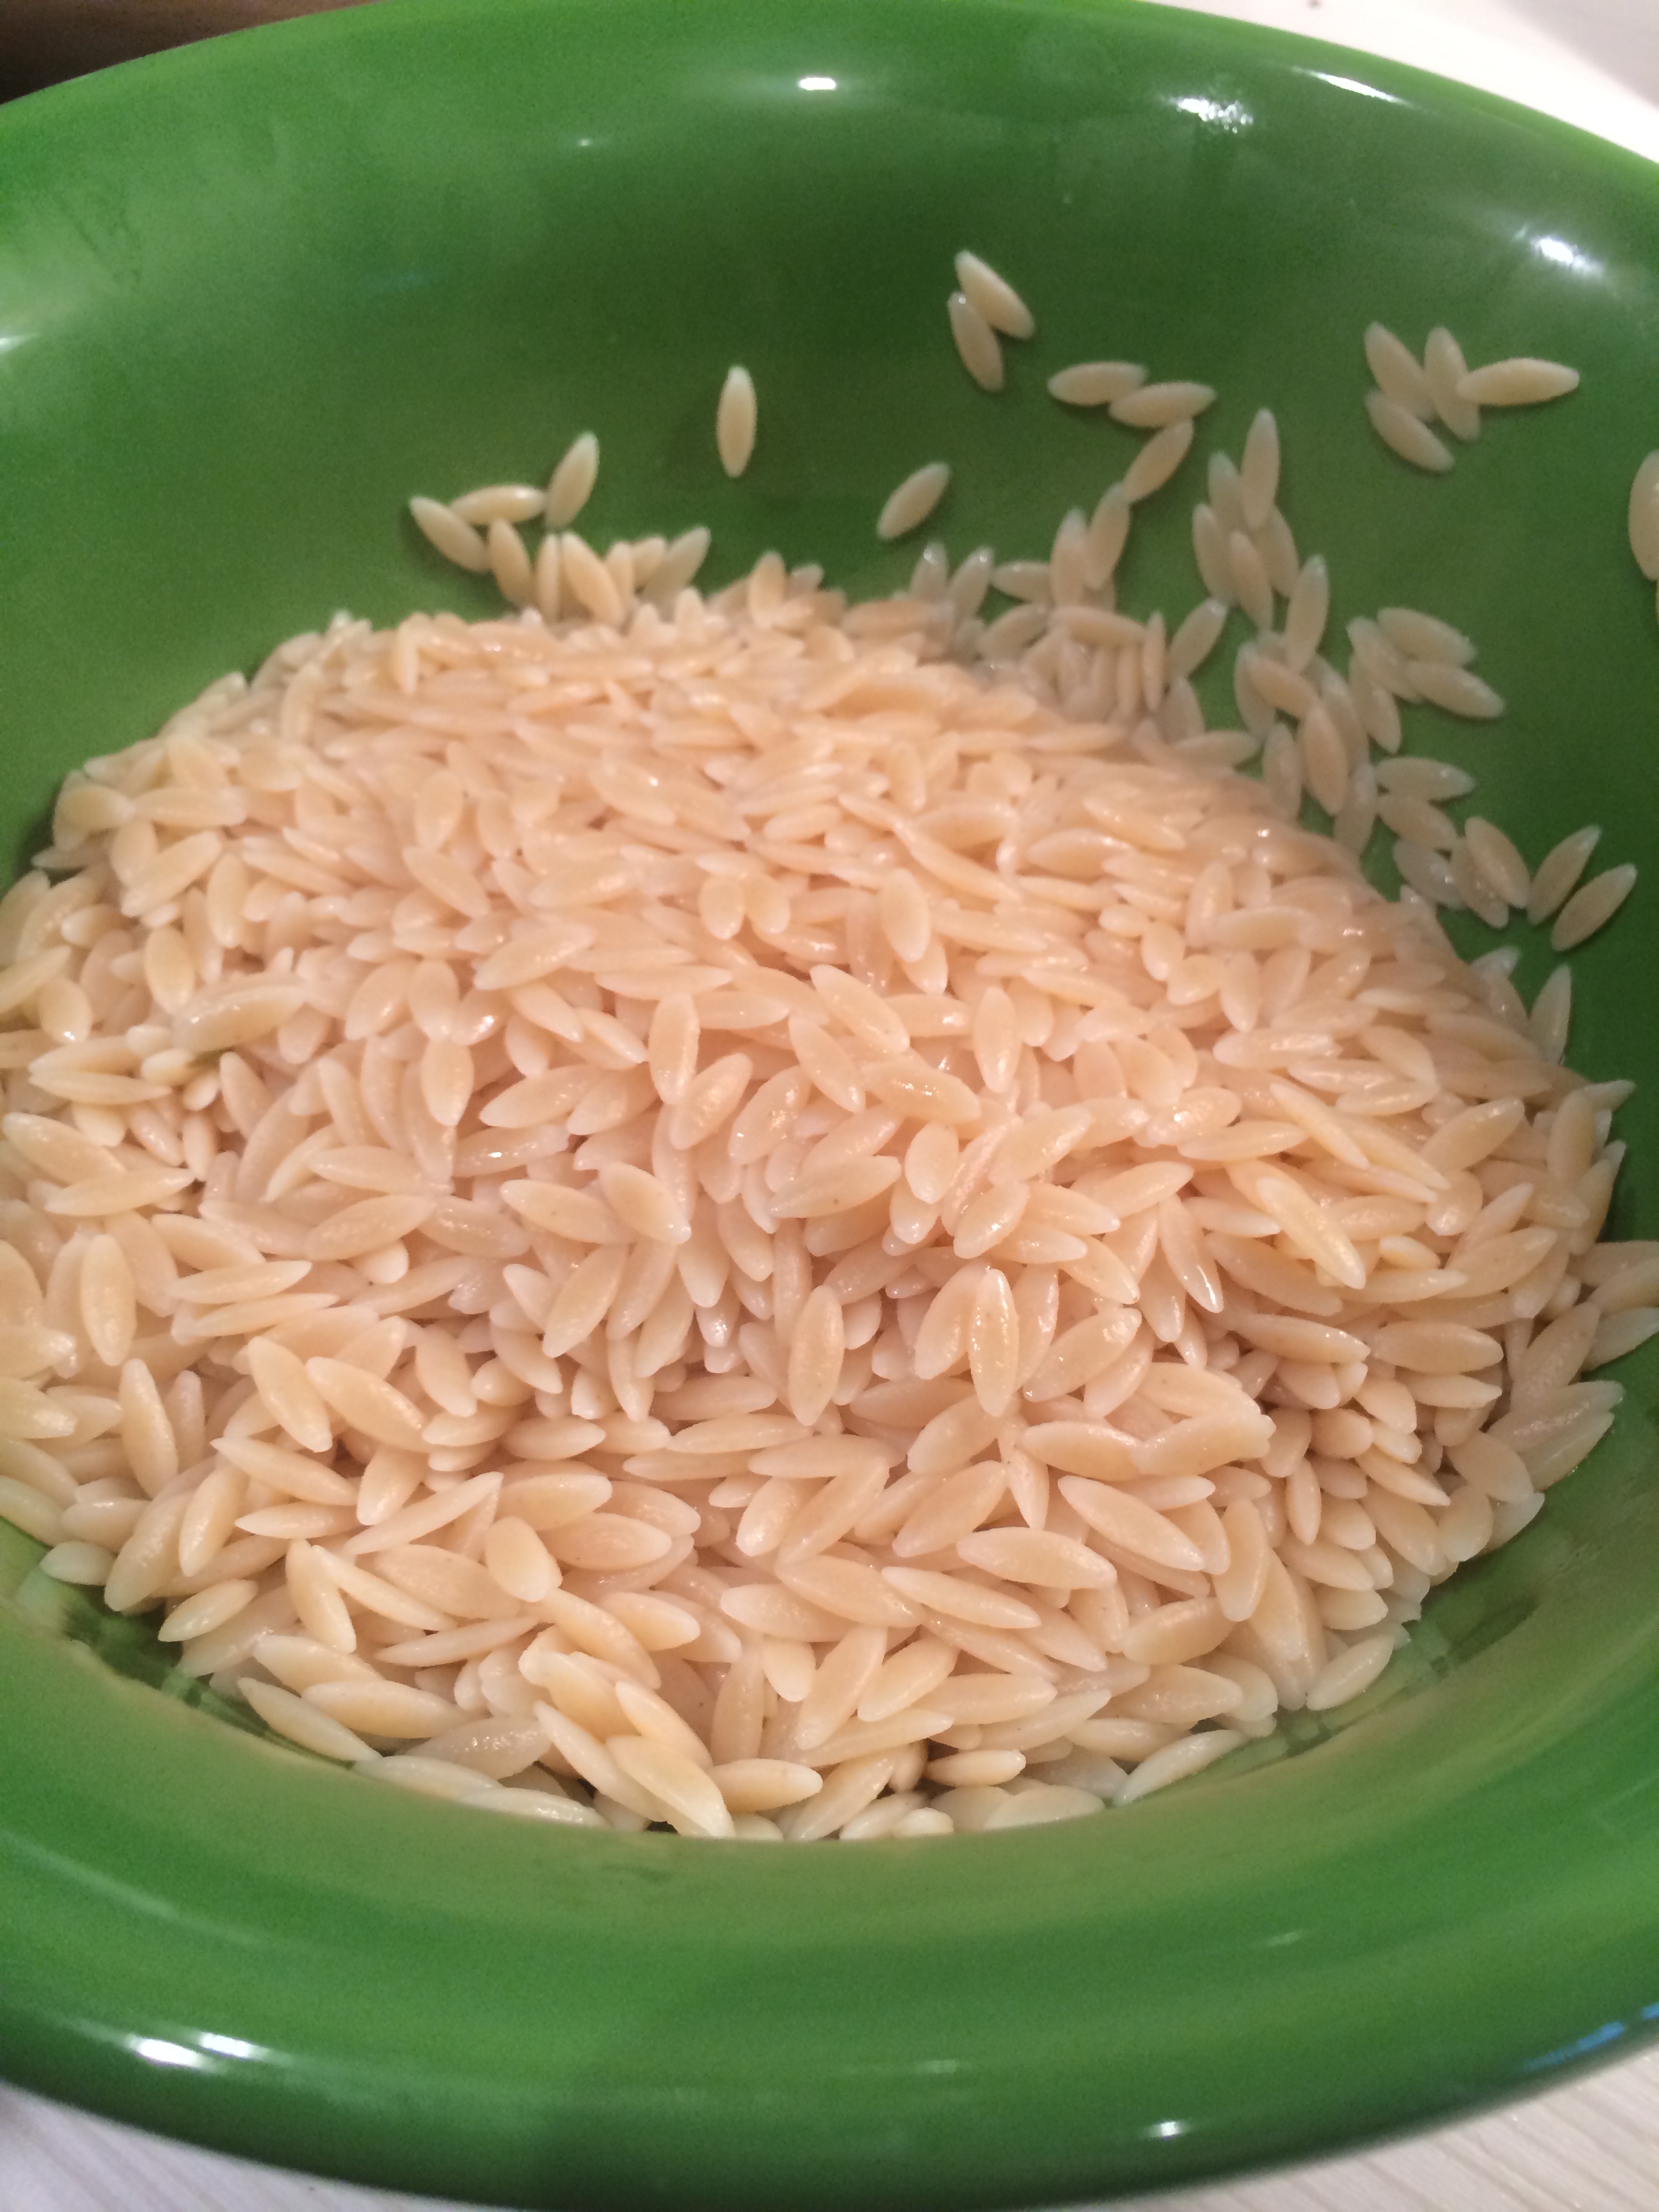
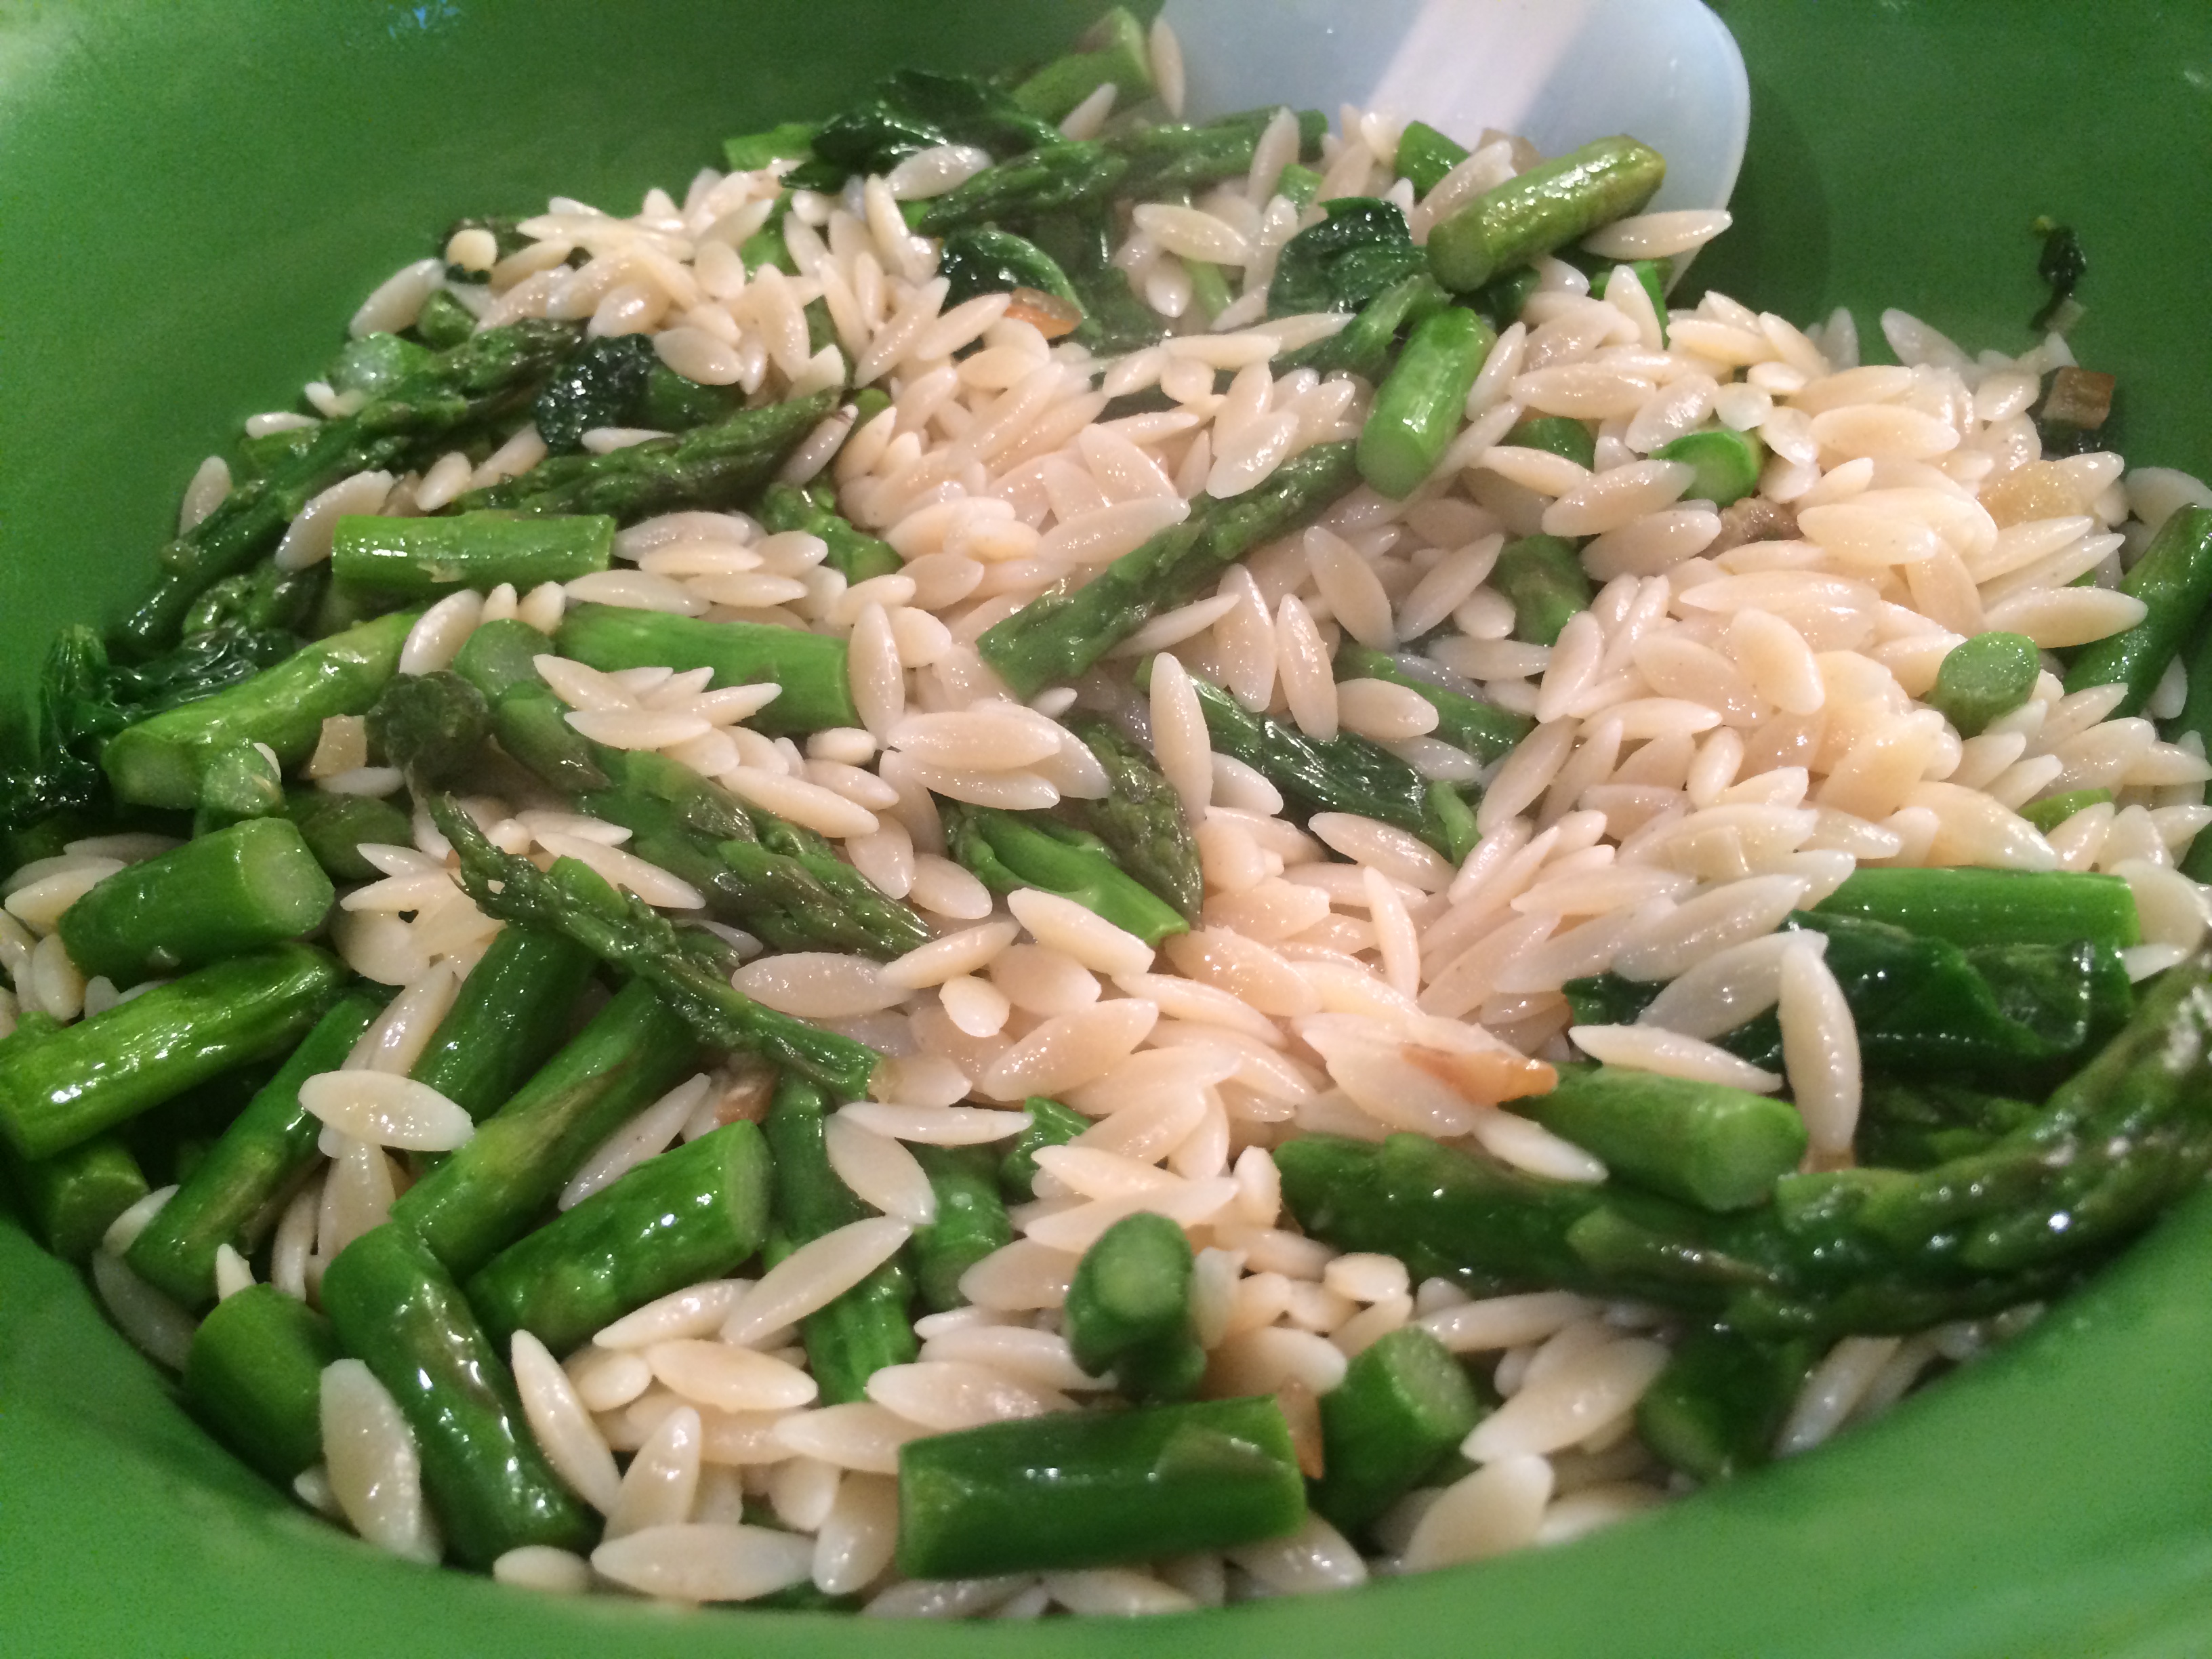
First, must cook up that orzo. I followed the directions on the side of my orzo container to figure out the water to orzo ratio, but Two Peas in a Pod recommends about 4 cups of water to the 1 cup of orzo. Bring the water to a boil, sprinkling in your pinch of salt. Then dump in the orzo. Like any pasta, it can get a bit sticky, so stir it every few minutes so it doesn’t get clumpy.

Once it’s tender (which I use the method of…if I take a piece and chew it, does it have the right texture?! Yes, very elaborate method), drain it over the sink and set it aside. You will now be moving on to the green stuff…

Aug-Sept 2014 048
Before you cook up the green stuff (also known as asparagus and spinach), you want to start sauteing the garlic in your olive oil. And is there ANYTHING better on this planet than the smell of garlic heating up?! I THINK NOT!

(I’m easily excited today…apologies.)

While the garlic is heating up, chop up the asparagus into easy to eat pieces (about 1-2″) and then add them into the garlic pan, swirling them around to start to soak up all of the garlic juices. You’ll saute those for roughly 3-4 minutes and then add in the spinach.

Aug-Sept 2014 046

I was not as experienced with cooking up spinach and forgot how crazy small spinach shrinks down to! It won’t take long and your puffy pile of spinach leaves (as seen in photo below) will be shrunken WAY down. Don’t cook much beyond the spinach getting down to its teeny tiny state, as you want the asparagus and spinach JUST cooked and still bright green. Don’t overcook here folks…no one likes mushy veggies!

Aug-Sept 2014 047

Now locate your orzo and pour into the serving bowl you wish to use. (Another aside…I was so excited to get to pull out serving dishes that we received as wedding presents. I mean, sadly, that was one of the best parts about making a fun dinner and hosting was getting to use some of these dishes for the first time! Ok, I realize my whole enthusiasm for things in the kitchen may be somewhat pathetic, but hey. It floats my boat, people.)

Into said bowl, pour the orzo and the freshly cooked veggies/garlic concoction. Toss it all around to coat all the orzo.

Aug-Sept 2014 049

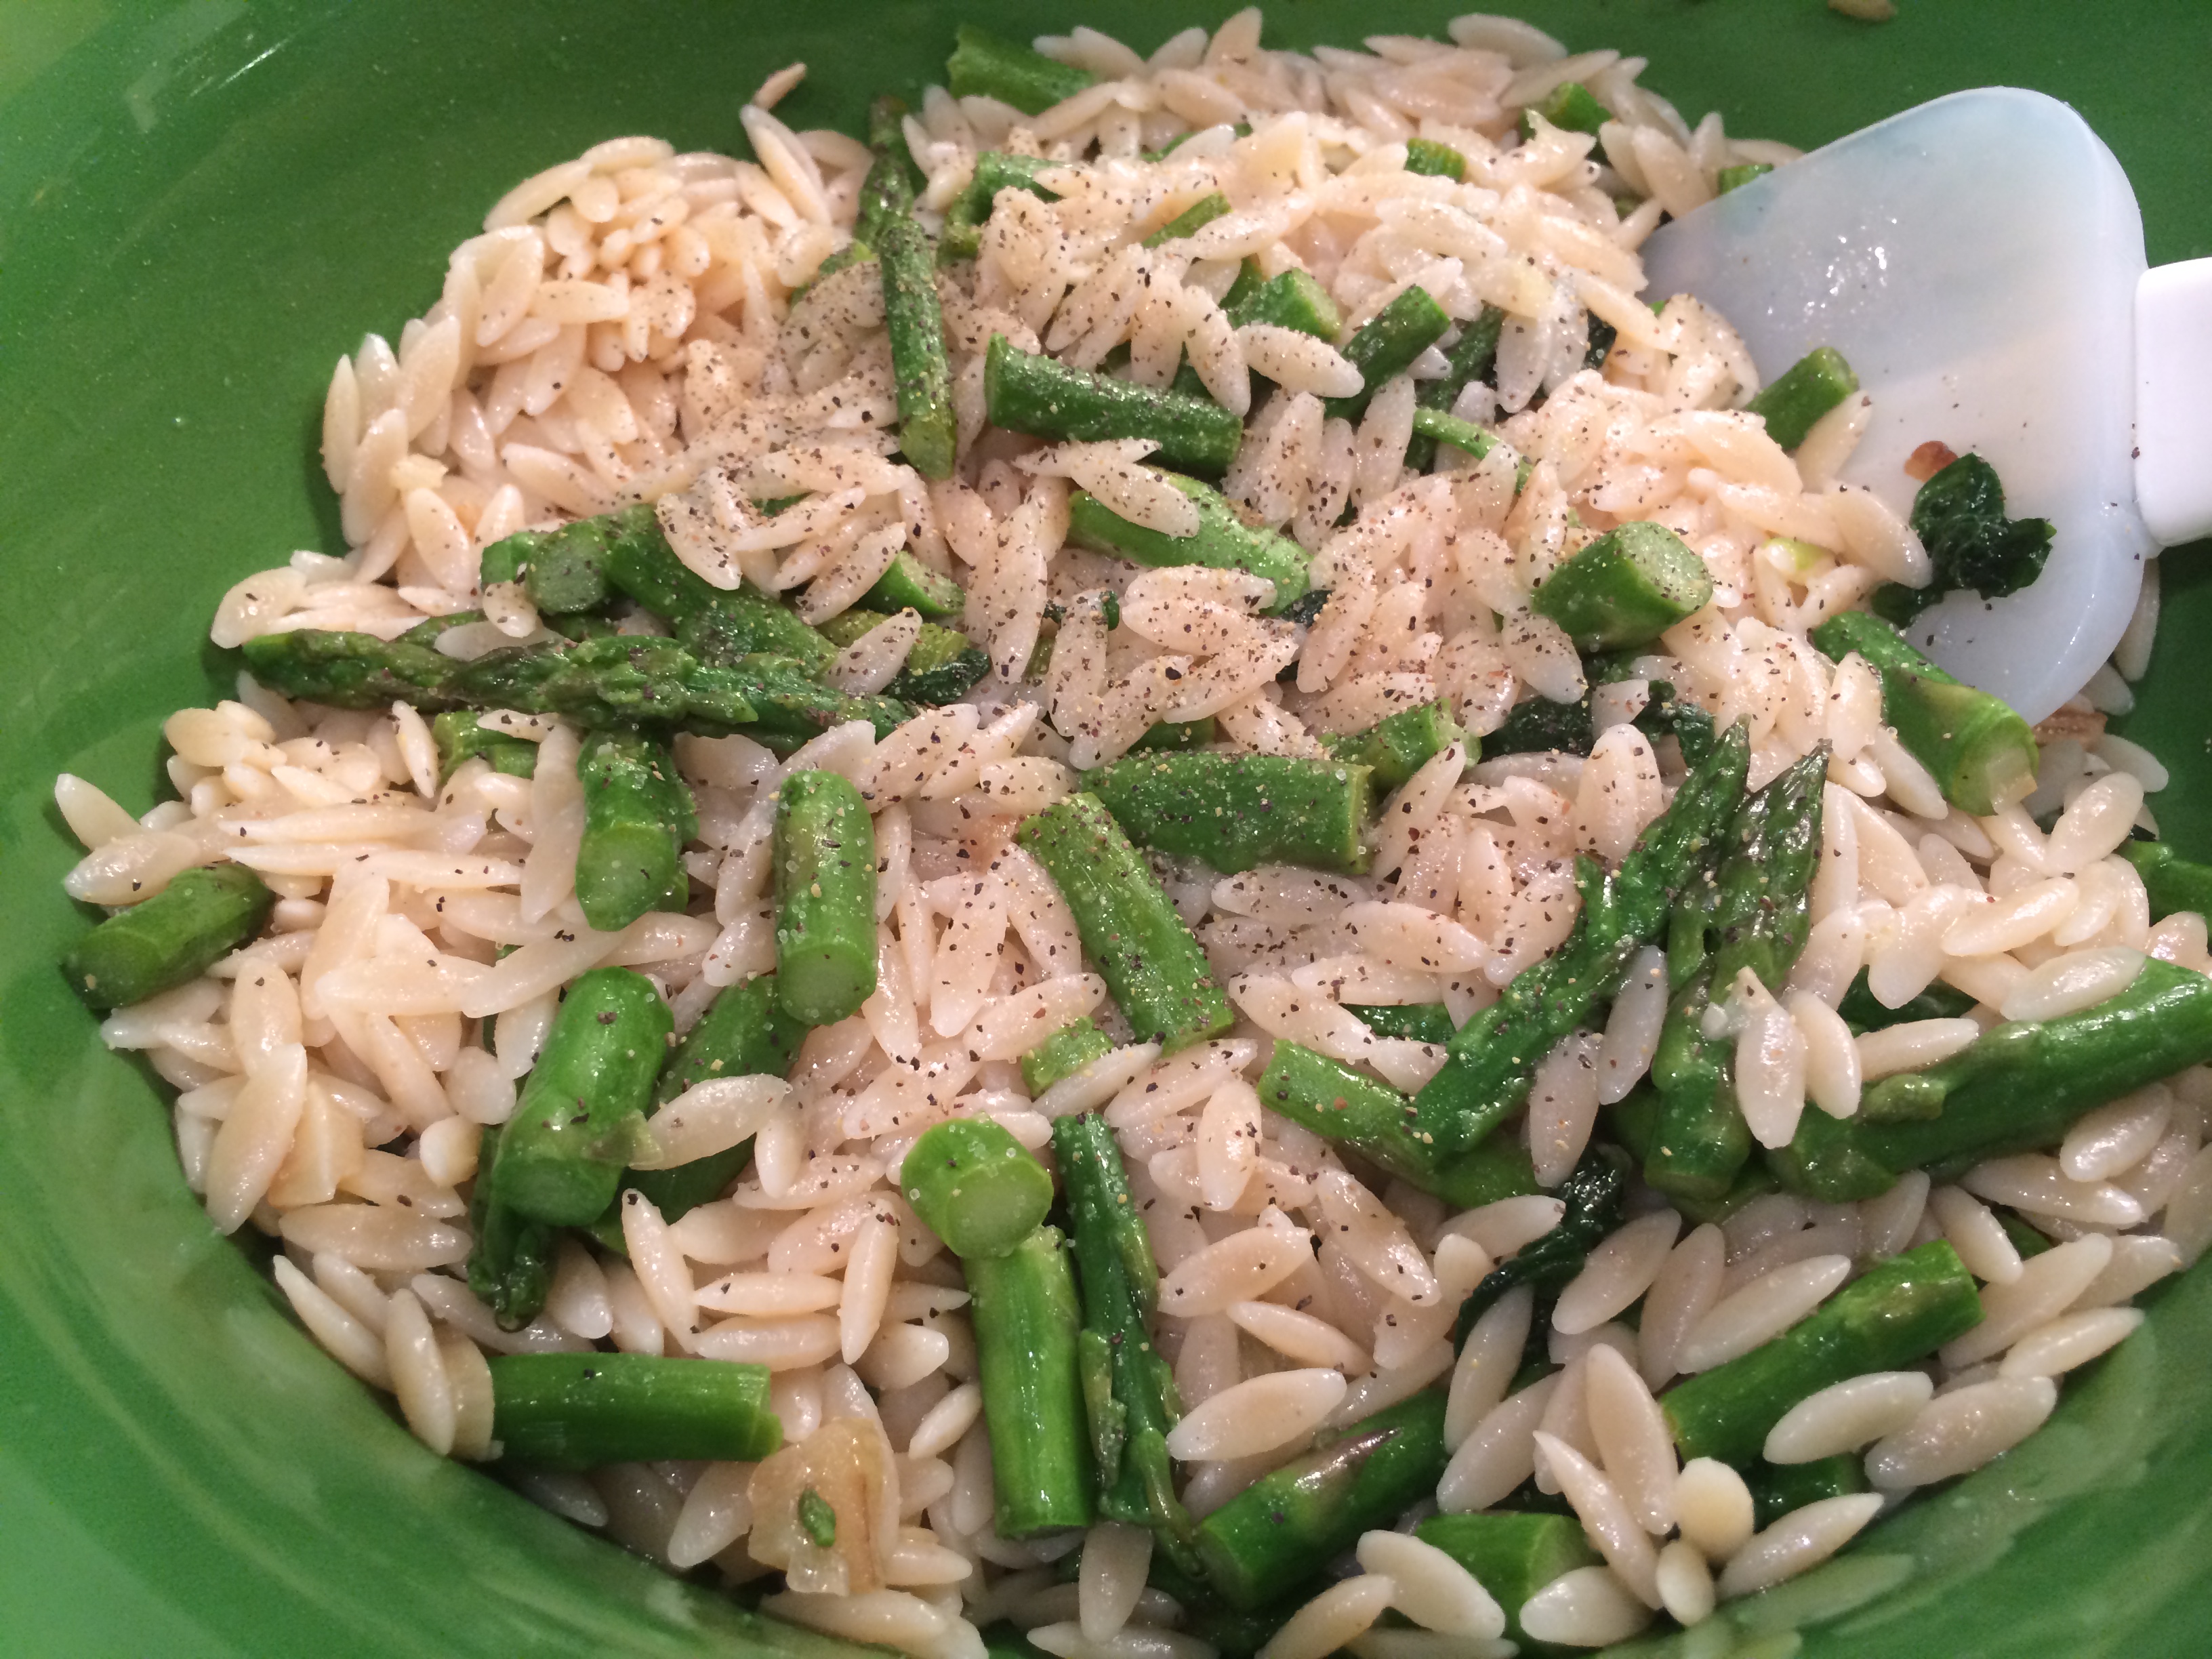
Slice a lemon in half and juice the WHOLE thing. Don’t be frightened by all the lemon juice…just trust me. It won’t be overly lemony and the veggies and orzo will soak it up and make every bite, sooooo sooo good. Don’t forget to add a few shakes of S&P to it too.

Aug-Sept 2014 050

Make sure to toss the lemon around to really get the whole mixture coated and before you serve – sprinkle that feta all over the top.

Aug-Sept 2014 051

NOM. Nom nom nom. Yes, you will be so happy to have this on your table. No more boring side dishes for you! And so simple, right?!

As a final aside, this is phenomenal the day after, whether you choose to warm it up or eat it straight from the fridge in it’s Tupperware container like yours truly. You can also easily double this recipe to make it for a larger group OR to ensure yourself some leftovers for dinner the next night.

Happy cooking and side dish making!

Advertisement

Rainbow Chicken Salad

24 Jan

Image

OH baby. I can’t begin to tell you how delectable this salad is. I literally am so excited about this salad that I made it a few hours ago and am writing the blog post now. And yes, that means I’m enjoying a wonderful Friday night in. Judge away, I’m fairly pleased about the situation.

But back to salad, delicious, wonderfully delicious salad.

So, what’s all in this salad, you may ask? You’ve got a mix of juicy fruits, tangy dressing, crunchy almonds, and a delicious feta cheese that cuts through it all. Oh yes, and the chicken! Juicy chicken to absorb all of the flavors.

If you can’t tell, I’m having a slight relationship with my chicken salad. Sigh.

Moving on!

I found this amazing little gem on Pinch of Yum, a great blog with so many recipes that I want to take a whack at. This will not be the last recipe of theirs that I try, I just know it. I’ve made a few tweaks to their original recipe in my list of ingredients below, but didn’t have to make too many changes. Love this recipe!

Prepare yourself….here we go…

Ingredients:

Salad:

  • 2 teaspoons olive oil
  • 2 boneless, skinless chicken breasts
  • ½ teaspoon salt
  • ½ teaspoon pepper
  • 1 teaspoon chili powder
  • 2 cups purple grapes, halved
  • 1 cup fresh blueberries
  • 2-3 big handfuls of lettuce, chopped (I used a spring mix but you can do what you wish!)
  • ½ cup feta cheese
  • ½ cup slivered almonds
Dressing:
  • 3 tablespoons almond butter
  • 1 tablespoon olive oil
  • 2 tablespoons orange juice
  • 3 tablespoons water
  • 1 tablespoon stoneground mustard
  • ½ tablespoon honey
  • ¼ teaspoon salt, more to taste
  • 1 teaspoon garlic

How to Make:

First up, season the chicken on both sides with salt and pepper and the chili powder. Get both sides nice and covered with seasoning. Heat the olive oil in a large pan over medium high heat, and sizzle up. Get the chicken nice and brown on the sides, flipping as needed to ensure the chicken is fully cooked.

Image

Once it’s done, remove to cool, then cut it up into chewable sized pieces. Yes, also known as bite-size pieces. But you knew what I meant.

Now, to prep the rest of the salad!

Slice the grapes in half…

Image

Measure the cup of blueberries…

Image

Measure the 1/2 cup of slivered almonds…

Image

Measure the 1/2 cup of feta…

Image

Wash, rinse and pat dry a few good hearty handfuls of lettuce…

Image

Then arrange as you desire in a large bowl. I went with the pretty route, taking a leaf out of the Pinch of Yum‘s book. Their picture on the blog looked similar which is what inspired me in the first place. This is also where the ‘rainbow’ in the title of the recipe comes from.

Image

Now as you make the dressing, you can refrigerate this beautiful bowl of salad. For the dressing, you’ll want to use a food processor to get things all creamy. You’ll add all of the dressing ingredients to the food processor and give a few seconds on full blast. I loved the taste as I stuck my finger into the bowl of the food processor (cord unplugged mind you) and basically swooned.

Image

Ok, ok, that’s dramatic. No swooning but i do believe there was a “yummmmmmmmm” noise that escaped. You will understand when you make this dressing.

Image

Now, all that’s left to do is grab the bowl of salad and drizzle on your dressing. Use a spatula to mix everything all up, get the dressing all coated over the chicken, the lettuce, all the other salad pieces.

Image

Then, serve up!

Image

Dig your fork in…and…

Image

Yes, you will see why I love this salad. You will love this salad too, friend. You will too.

New York Breakfast Casserole

12 Jan

Happy 2014! With the New Year starting, felt it would be a great time to get back into the blog. There hasn’t been a shortage of cooking/baking/crafting…there has only been a shortage of gumption to write another post. Shameful, I realize. But here I am, giving this a go with the full intention of keeping post-writing gumption intact. If I don’t post again until 2015, please don’t be furious. But feel free to give me the crap I deserve (a LOT).

So, the blog resurrection of 2014 is starting off with one of my new favorite breakfast recipes. The need for discovering a new breakfast recipe came about as Luke and I were hosting some good friends overnight at the end of December. Ideally we wanted to make a breakfast that we could prep the day before (so we could be sleepy and lazy in the morning with our friends and not have to be up at the crack of dawn) AND that would be fairly easy. We were making quite a bit of food for the weekend (including this Steakhouse Pizza and TBM Salad) and easy to make / prep in advance were our two key factors.

Luke and I are both big bagel fans, Everything bagels to be exact. How can you not love the flavorful goodness of an Everything bagel?! And Luke is a BIG breakfast person to begin with…so we were trying to think of something epic to make for breakfast and when we found this recipe in my Smitten Kitchen Cookbook, well, we were smitten. Breakfast casserole with Everything bagels?!? Done!

We prepped it the night before, baked it in the morning,and four of us just about devoured the whole pan in one sitting. Luke and I were so excited about this recipe that we made it AGAIN only a few days later, for Luke’s family. It’s been getting rave reviews from all who’ve eaten it so I thought it was the perfect thing to blog about for you all.

IMG_4112

We added some of our own twists to the recipe to make this our own, but I can’t take credit for the original wonderful creation that Deb over on the Smitten Kitchen blog and author of the Smitten Kitchen Cookbook crafted up. I highly encourage you to give this a whirl!

Ingredients (Serves 8-10…OR…4-5 very hungry people):

  • 8 cups (or so) of Everything or Sesame bagels, chopped into bite-size chunks (you can do a bit more than 8 cups if you’re using dense bagels…you just want enough to fill a 9×13 pan)
  • 8 oz. of cream cheese (you could go with a light cream cheese here if you want to make this a bit healthier)
  • 1/4 medium red onion, sliced in a half-moon shape
  •  1 pint of cherry tomatoes, cut in half
  • 8 large eggs
  • 2 1/3 cups of milk (healthier version) or half and half (the not so healthy but delectable version)
  • 1 tsp salt
  • 1 tsp chopped garlic (we used a jar of pre-chopped garlic but about 2-3 cloves would work too)
  • 4-6 slices of bacon, torn into bite-size chunks
  • Ground pepper to taste

How to Make:

This recipe is really very easy to make and definitely goes fast with a co-chef in the kitchen or even a little helper if you have any of those at home who’d like to help!

IMG_4106

First, you’ll need to prep all of the ingredients: chop/tear your bagels…

IMG_4086

…halve your tomatoes…

IMG_4084

…slice your red onion…

IMG_4085

…measure out your garlic (which you can see we did after our other prep…but you should just do it now to save time)…

IMG_4099

…and fry up/microwave your bacon. We went the microwave route to save some time and grease splatter and DEFINITELY went with the 6 pieces of bacon. We are bacon-loving people. However…if you’re not into bacon you could always leave this out. This was one of our additions to the recipe that wasn’t in the original.

IMG_4087

Also, bring your cream cheese out of the fridge for it to soften as working with it later will be a bit easier. Preheat your oven to 350 degrees if you plan to make this right away.

Now it’s time to start to layer your casserole.

IMG_4098

You’re going to be creating three layers, so will need to divide your ingredients into approximate thirds. Lay about 1/3 of your bagel chunks in a large 9×13 pan. Scatter 1/3 of the halved tomatoes and sliced red onions on top. Sprinkle about 1/3 of your chopped garlic all over. Then, tear 1/3 of the cream cheese off and break it into small dollops. Place said dollops throughout the pan, doting the bagels evenly. Finally, throw 1-2 slices of bacon (which is torn into bite size pieces) on top, scattered evenly throughout the pan. When you’ve finished this part, you’re going to start back at the beginning with the bagel pieces and complete the layering two more times. Not too tough, right?

IMG_4100 IMG_4101 IMG_4102

Once your 3 layers are complete, whisk together in a medium-sized bowl the 8 eggs…

IMG_4088

IMG_4089

…the milk or half and half…

IMG_4091

…and the salt and pepper. You’ll want to add as much pepper as you think needed to give your full casserole enough taste. As the Everything bagels are already seasoned, we didn’t go too crazy. But if you’re into lots of pepper, then pepper away. It is YOUR casserole after all!

IMG_4093

IMG_4092

IMG_4097

Once your egg mixture is all whisked, pour it over the entire casserole ensuring you get the egg in all of the crevices.

Done pouring? Excellent. Getting excited to bite into this later?! We sure were.

IMG_4103

Pop this guy in the fridge overnight if you’re prepping in advance (we covered it with aluminum foil overnight). If not, then pop this guy into your 350 degree oven for an hour to hour and 15 minutes. Ours was always done at the hour mark but your oven may take a bit longer. No need to cover this while baking.

You’ll know it’s ready when the top of the bagels starts to turn a little brown. And be prepared for a VERY pretty casserole. It’s definitely one of those times you’ll take a picture and want to share because it just looks so darn amazing. Those tomatoes and onions just add the right pop of color, I think. To double-check it’s ready to come out, insert a knife it the middle and check to see that if the knife is rotated a bit, no liquid comes out…meaning eggs are set).

IMG_4069

Now, this will smell so good that a bit of drool may start to go down you chin. But WAIT! Let the casserole set for about 10 minutes after you take it out of the oven. That will ensure ALL of the egg is fully set.

IMG_4111

Use a big spatula to slice this up – big squares work well. You will be amazed at how delicious this is, I promise.

IMG_4109

IMG_4113

Dang, I sure wish I had some of this right now. My stomach has started to growl remembering how GOOD this was. The cream cheese and the egg, mixed with the warm pop of tomatoes and the chewy, flavorful bagels…wow. Um, I’m hungry.

I hope you and whomever you serve this to find it as delectable as we did and mark it as a favorite to make for many breakfasts to come!

Enjoy!

%d bloggers like this: