Tag Archives: Greek Yogurt

Turkey Wrap with Thyme Onions and Cranberry Yogurt

11 Jan

DSC_0148

Well…the last year blog hiatus was unplanned. Lot of “life” things happened and the blogging fell on the back burner. The fun part is that all of the “life” things were good – a new house and a new baby came our way in 2015! I was pregnant for most of the last year and was REALLY tired the majority of my pregnancy, which really was silly because I sat all day for work (I commend any pregnant mama out there who is on her feet all day). Thus, I lost my drive for blogging as I spent many a night sprawled out on the couch with exhaustion from baking a human, or working alongside Luke to figure out the details / paperwork / DIY projects that come with a first house purchase, or making lists on lists on lists to prep for baby. Ruby Julaine arrived on October 2nd and it’s been a whirlwind of blow-out diapers, a hungry hungry baby, and giggles / cries / grins ever since.

Time does fly though and I’m now a mama to a three month old (what?!) and 9+ months into being a homeowner. I’m on my last few weeks of maternity leave and just love all the time I get with my little peanut. I’ve been finding time to have fun in the new kitchen while Ruby naps or while she’s strapped to my chest. Food is still VERY much one of my favorite things to read about, explore, talk about and share. I just have to be a bit more creative about how to sneak it into my day.

This blog started as a place where I could not only track the recipes that I knew would be “make again” for me because of how delicious they turned out, but to also share those recipes that I love, with you all. I’ve had a blast seeing what posts resonate with folks the most, creating and sending out Giveaway Packages and finding new and different ways to explore food.

As I prepared to delve back in to the blogging world, I knew that a different approach on the blog would be needed due to Ruby requiring so much of my free time. As all of my past posts will show, I used to photograph every step of a recipe. I always thought that was  cool on blogs that I read and I appreciated seeing those as I tried new recipes to ensure I was doing things the right way. But, I’ve realized that…

  1. it makes these posts crazy long at times
  2. often all of those pictures don’t provide anything better than a simple written description could

Thus – I’m trying a new approach going forward with a just a few summary pictures to capture a recipe and a more concise “How to Make” section.

Enough back story and rambling, what am I bringing to the blog today? This is a recreation of a “Twisted Turkey” wrap that I would get EVERY time it was offered at one of my past client’s cafeteria. It was a basic turkey wrap but with sautéed onions and cranberry mayo, which brought the wrap to another level. I always thought of it as a twist on a Thanksgiving dinner with elements of turkey and cranberry sauce used in a completely different way.

When I left that work project, I knew it was only a matter of time before I would have a craving for that wrap. So I made my own version, and I think you’ll LOVE it!

DSC_0151

I added my own healthy twist for the cranberries – making a cranberry yogurt instead of mayo. The base is a twist from my favorite cranberry sauce from Real Simple with Greek yogurt added in until the yogurt was smooth enough and the right taste. I also left out the bourbon from the base recipe (though you could keep it in and crank up the flavor even more!).

I also amped up the sautéed onions by taking a sub-recipe from my French Onion Soup Meatballs recipe, which I featured before on the blog. I have a vivid scent memory of making the onions the very first time I made those meatballs and I thought they’d be PERFECT for this wrap. I wasn’t disappointed!

I would recommend making a big batch of the sautéed Thyme Onions and Cranberry Yogurt in advance and then you’ll have both on hand to add to your wraps for the week and you can add these into other dishes too! The onions are great in sandwiches of all shapes and sizes or even on top of a steak and the cranberry yogurt is really tasty with granola and ice cream. 🙂

Ingredients (makes 1 wrap):

  • 1 tortilla
  • Handful of your choice of greens (I used iceberg lettuce in one wrap and spinach in another, up to you!)
  • 3-4 tomato slices
  • 1/2 cup of Thyme Onions (see below)
  • 3-4 slices of deli turkey breast
  • 2 Tbsp of Cranberry Yogurt

Thyme Onions:

  • 1 Tbsp olive oil
  • 2 white onions, halved and sliced
  • 1 tsp salt
  • 1/2 tsp pepper
  • 1/2 tsp dried thyme
  • 1/4 cup beef stock
  • 1/4 cup red wine (I used Shiraz)

Cranberry Yogurt:

  • 1 12-ounce bag of cranberries (I used fresh, but you can also do frozen)
  • 3/4 cup sugar
  • 1/2 cup grapefruit juice
  • Greek yogurt to taste (I used about 1½ cups)

How to Make:

I recommend starting off with the Thyme Onions. These smell utterly FANTASTIC as they cook. Have a snack to munch while you make these, or you may be tempted to eat your hand. Seriously.

Slice your white onions by halving them and then slicing them into half-moon shapes. Add the olive oil to a big skillet and heat up over medium heat. Add in the sliced onions and the S&P. Stirring often, cook the onions until they’re caramelized – about 15-20 minutes – then add in the thyme, beef stock and red wine.

Turn the heat down to medium low and stir the onions frequently until there is little to no liquid left. Turn off the heat and set the onions to the side. They’ll be a pretty light purple (from the wine) and will taste SO good.

DSC_0133

To make the Cranberry Yogurt (my spin on cranberry mayo), it’s a combination of making a traditional cranberry sauce, like you’d eat at Thanksgiving, and then adding in yogurt until the result is the taste and consistency you want.

Put the cranberries, sugar and grapefruit juice all into a saucepan and simmer the concoction over medium low heat. You want to let this go until the cranberries burst and the sauce starts to thicken up, which takes about 20-25 minutes.

It works great if you have the onions and the cranberries all going at the same time as both need similar total time to cook and you can then stir and keep an eye on both things.

Once your cranberries are thick and the berries have burst, you’re ready to add in the yogurt. I love the creaminess and taste of Greek yogurt (not to mention the extra protein), so that’s what I recommend. Pour the cranberry sauce into a food processor (blender would work well too) and slowly add in yogurt until you get the flavor you want and the consistency you want. I added yogurt in 1/4 cups increments to see how things tasted / looked after each addition. I ended up adding about 1 and 1/2 cups total. But, this is completely up to you! Once you’re done, it’s a gorgeous pink color.

DSC_0138

The time has come to assemble your wrap! Spread the Cranberry Yogurt in a line down the center of your wrap and then, using the back of the spoon, spread it all over the tortilla. You can’t feel guilty about using lots of this delicious stuff, as it’s NOT the usual condiment of mayo. Yay!

Down the center of your tortilla, add your greens of choice and the slices of tomato. Then, lay your slices of turkey. Lastly, spread out the Thyme Onions on top.

DSC_0154

Fold up the bottom and wrap up the tortilla by folding one side of the tortilla over your ingredients and then gently rolling it up. Slice in half and enjoy!

This takes your normal turkey wrap and really kicks it up a notch in flavor. One of my favorite lunches to purchase is NOW my favorite lunch to make at home. Cheers!

DSC_0144

Cake Batter Dip

7 Apr

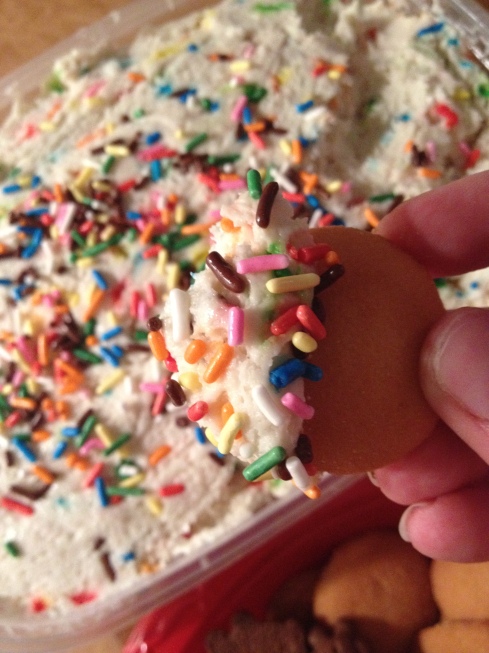
Holy cake batter heaven Batman! This may be one of the best dips I’ve ever made and I cannot WAIT for you try it! I’ve already memorized the recipe and know that Luke and I will always have this one in our arsenal when we’re having people over.

IMG_4773

Why is this so good?

I don’t know folks, but it just IS:

  1. Do you sneak cookie dough from the bowl as you’re SUPPOSED to be putting the cookies on baking sheets (you know who you are)?
  2. Do you always order cake batter ice cream when it’s an option (guilty)?
  3. Do you love finding an excuse to still eat teddy grahams (I forgot how AMAZING chocolate teddy grahams are friends…a travesty I realize)?
  4. Do you still enjoy finding ways to add sprinkles into things, just because (c’mon, they make everything more fun)?

If you answered yes to ANY of these things…you…must…try…this…dip.

I found this on Pinterest and was challenged by a friend to give this a go, blog about it so she’d know if this was worthy. Friends, it so is. This is worthy.

Thanks so much to Cassie Craves blog for bringing this joyous concoction to our attention! I made a few tweaks to the original recipe, but the basic concoction was from the aforementioned blog. Can’t wait to check out more of her posts!

Enough with the rambling, let’s get right into the thick of it!

Ingredients:

  • 1 package of Pillsbury Funfetti Cake Mix
  • 2 cups of Vanilla Greek Yogurt
  • 1 1/2 cups Whipped Topping
  • 1-2 tsp of Vanilla Extract
  • 2 Tbsp of colorful Sprinkles (plus extra for sprinkling on the top)

For Dipping:

  • Chocolate Teddy Grahams
  • Nilla Wafers
  • Other ideas: flat cookies, fruit, graham crackers

How to Make:

Locate a bowl and your mixer of choice. Then, prepare for some ingredient blending.

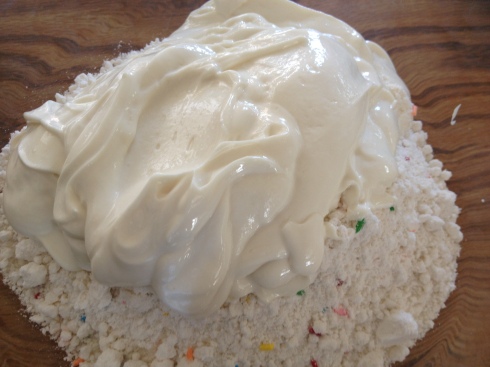
First pour in the Funfetti cake mix…

IMG_4729

…the 2 cups of Greek yogurt…

IMG_4731

…the cup and a half of whipped topping…

IMG_4732

…splash in the vanilla…

IMG_4734

…throw in the sprinkles…

IMG_4735

…and blend baby blend! This whips up nice and quick and the sprinkles create a really fun and colorful look too. Use a spatula to help get the dip off the sides if it starts to creep up. Then, spoon into some Tupperware as you need to pop it in the fridge for about 2 hours (minimum) before you dig in. (You can refrigerate longer too, it just needs a few hours to firm up a bit.)

IMG_4737

That does not mean that you can’t lick the beaters…and the extra spoon you just happened to have used…and the bowl that you used…

Sigh. So delicious.

Before you serve, scoop into your serving bowl of choice and have some sweet crispy snacks on hand to use to  dip. We chose Nilla Wafers and Chocolate Teddy Grahams. But plain graham crackers or fruit would work too, just be sure it’s durable so it holds up  as you pile on the goodness, forewarning.

IMG_4772

Make sure to add some sprinkles on top for garnish before you serve it up to all those excitedly lined up with their dipping mechanisms.

IMG_4773

I loved this, those who consumed it also gave it a thumbs up and I really, deeply think you will too.

Let me know what you think when you give this a whirl!!

Chocolate Muffins (with a Healthy Spin)

4 Aug

IMG_3254

A few facts to preface this post. Fact #1: I thoroughly enjoy chocolate. Fact #2: I thoroughly enjoy muffins, cakes, cookies etc. However, maybe like some of you, Fact #3, my metabolism no longer allows me to consume these items as much as I’d like without some consequences. Which…is unfortunate.

Thus – I was on Pinterest one day trying to find some healthier (note not healthy…health-IER) recipes and found this little gem. There’s no flour involved – there’s applesauce and plain greek yogurt that help to keep the muffins together AND keep them moist. I was intrigued enough to give these a try.

Also, Fact #4 – my boyfriend Luke has quite an affinity for baked goods that come from my kitchen. So like most treats I make, the plan was to make a big batch, have a few myself and then feed the rest to Luke. Muah hahaha.

(He has yet to complain so I think it’s a win-win situation for both of us.)

Thus, another episode of Thursday evening baking happened this last week and the resulting muffins were quite delicious. I highly recommend!

I will say I changed up the recipe a bit because of the ingredients I had available. I’ve linked to the recipe I based these off of (and the blog post about that recipe links to the original recipe too) above for those who want to try the full-on healthier version or you can follow what I used below. I trust both will work out nicely for you. And regardless, you end up with chocolate muffins. 🙂

Recipe makes about 24 small muffins or 12 larger muffins.

Ingredients:

  • 1 3/4 cup of oats
  • 3 egg whites
  • 3/4 cup cocoa powder (the recipe calls for unsweetened cocoa but I had cocoa powder on hand so that’s what I used)
  • 1/2 cup applesauce (the recipe calls for unsweetened but I used normal applesauce and they still turned out wonderfully)
  • 1 tsp vanilla extract
  • 1/2 cup plain Greek yogurt
  • 1/2 tsp cream of tartar (or 1-1/2 Tbsp. vinegar)
  • 1-1/2 tsp baking powder
  • 1-1/2 tsp baking soda
  • 1/4 tsp salt
  • 1 cup hot water
  • 1 cup sugar (the recipe calls for a healthy substitute like I cup of Splenda granular OR 1/4 cup + 2 Tbsp stevia but I had none of these options so plain white sugar it was for me)
  • 1/2 cup dark chocolate chips (or whatever other type of chips you’d like!) and an extra 1/4 cup for the muffin tops

How to Make:

Preheat your oven to 350 degrees and grab a blender (or a food processor) as you’ll need no mixer or beaters to clean in this recipe. I know, I know…I was puzzled by this too. But trust me – it works!

Now – if you want smaller muffins for a crowd, this makes 24 muffins (thus you’ll need 2 muffin pans). If you want larger muffins for a smaller crew (1 pan) this makes 12 muffins. I did line my muffin tins but this recipe has a tendency to stick a bit. If you’d these to appear aesthetically pleasing with wrappers off (for any reason) you may want to simply spray the pans with a little Pam. Otherwise, I’m sure those you feed these to will not mind a bit licking of crumbs from the wrapper. I doubt they’ll mind.

Now prepare for this next part…you’re going to mix…

…everything. Ok, not the chocolate chips quite yet, but everything else goes right into the blender.

Yup, you read that right. Everything. Into. The. Blender.

Here we go…

In go the oats…
IMG_3233

…then the egg whites…

IMG_3234

…and applesauce…(note my oat measuring was exceptionally neat and tidy)

IMG_3236

…and then the cocoa (I wasn’t worried that mine was a bit clumpy as the blender would be blending it all together anyway)…

IMG_3237

…and vanilla…

IMG_3238

…and the plain Greek yogurt…

IMG_3239

…and the cream of tartar…and baking powder…and baking soda…

IMG_3241

…and the salt (which I plain forgot to take a photo of, but believe me when I say…it’s in there!)…

IMG_3242

…and the cup of hot water (which causes this fun, little effect)…

IMG_3243

…and then finally, the sugar or your sugar substitute.

IMG_3244

Now blend that concoction until the mixture is smooth (not chunky on the bottom but the same consistency all the way through). I was a bit concerned as the batter seemed to be a bit thin at first. But keep blending until the oats, applesauce and yogurt are consistently blended and that will really help to thicken it up. Trust me!

Now pour into a medium-sized bowl and stir in the 1/2 cup of dark chocolate chips.

IMG_3245

IMG_3246

Then, time to pour into the pans. (I was a wee bit messy at this part so if you have the same problem, just dab the batter spots off the pan with a paper towel. No biggie!)

IMG_3247

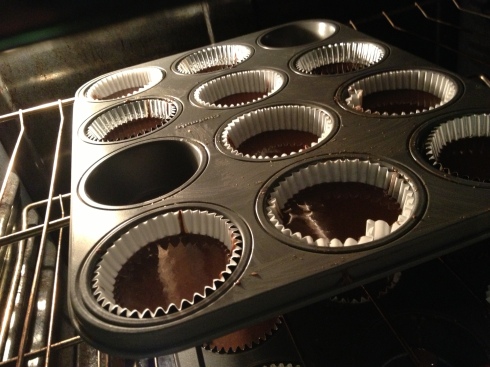
Now the muffins get baked for 10 minutes. Then, pull them out…

IMG_3248

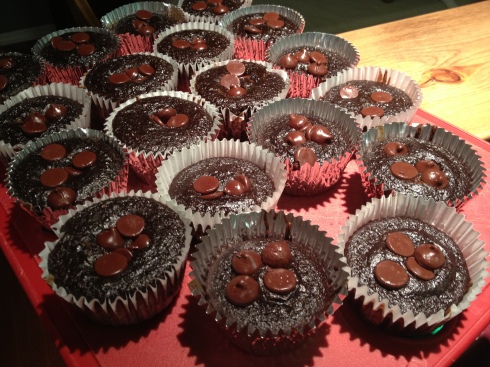
…and drop a few of the chips on the top of each muffin. Add as many as you’d like! Most of mine had about 3-6 chips as dark chocolate chips are bit bigger than the normal chocolate chip.

IMG_3250

Now pop these guys back into the oven for an additional 3-6 minutes, or until a toothpick comes out clean. (I had to pop mine back in for about 8 additional minutes as they were still wet when I tested with a toothpick at 6 minutes. So watch these carefully and don’t worry if they take more than 3-6 minutes. It shouldn’t be TOO much more oven time.)

IMG_3251

Once the toothpick comes out clean from a the center of a few muffins, let them cool for a few minutes in the pan. Then place the muffins on a cooling rack or a cutting board to cool completely.

IMG_3252

IMG_3253

I will share – these are delicious eaten while they’re still warm for the obvious melty-chocolate reason. But they’re also delectable eaten once fully cooled. I let them sit out to cool for a few hours and then kept them stored in Tupperware, separated into layers with some assistance from parchment paper.

IMG_3259

IMG_3260

Feed these to your family, your friends, your significant other or spouse or maybe yourself for a snack. (I had a few snacks the night I made these…couldn’t…help…myself.) They’ll disappear REAL fast…

IMG_3255

IMG_3256

IMG_3257


IMG_3258

Give these a try and let me know if they turn out as delicious for you as they did for me!

IMG_3254

Happy baking!

Yogurt Popsicles

27 Aug

Popsicles.

Let me tell you, popsicles are sometimes the perfect treat. When you crave something sweet, but not overly so. When you want something cold but are perhaps feeling too lazy (not sure that’s actually possible) to scoop ice cream/frozen yogurt. You want to feel like it’s summer at all times of the year. The list can go on and on.

Back-story: I was shopping at one of my favorite kitchen-y stores (Kitchen Window in Uptown…check it out…it will change your life…and your wallet’s size) shopping for a gift for a friend of mine. As I was perusing the aisles, these popsicle molds jumped into my hands. I swear it.

I came home, all excited about my popsicle molds and then realized…I had no popsicle ‘recipe’ in mind to make. This lasted a few weeks until I found this on pinterest. Success! Unfortunately our fridge/freezer took this particular day to stop working properly. The first round of popsicles never froze and I was stuck using a spoon to eat my semi-cold yogurt concoction. Recommendation – use a freezer that works. Who would have thought, right? I was determined to give them another try though and I can vouch that with a properly cold environment, you’ll have yourself some legitimate and tasty popsicles.

Here we go – three ingredients and some cold temperatures will result in a delicious treat you could legitimately eat for breakfast, a snack OR dessert. (Plus it’s fairly healthy!)Seriously, such a genius idea – thanks to Joylicious for this great recipe!

Ingredients (makes 6-8):

  • 12-16 oz. Greek yogurt, plain or vanilla ( I used a little less than 16 oz. to fill my 6 molds, but you may need more or less depending on the size/amount of your molds)
  • 1/2 cup raw honey
  • 1 cup mixed berries (Fresh or frozen)

Other items you need:

  • Popsicle molds (Hopefully there still available in stores! I would imagine Target, Costco or even Walgreens would have these.)

How to Make:

This is super simple – so it would be a great one to do if you have small people running around. Seeing the popsicles go into the freezer as liquid and come out as wonderfully solid deliciousness would be a fun experience for any kid. Or if you’re 23. Or 49. There’s no age limit on the glory of popsicles.

Mix together your yogurt and honey…


…then gently fold in the berries and ensure they’re not stuck together if you choose the frozen route.

Grab your popsicle molds and pour in your mixture. Some of my bigger berries were easier to push into the mold after I filled it up with the yogurt/honey mixture.

Once all the molds are full, wipe off any excess drips from overflowing, put the tops/bottoms (…is it the top? Or the bottom? Riddle me that.) and put these babies into the freezer. Give them about 3-4 hours, or have them in there overnight.

Aren’t they cute all locked together?

When you take the popsicles out of the molds, be gentle! You may have to warm up the mold a bit with your hands and twist a little with the handle, but it should come out pretty easily.

And look at how pretty this is.

Dig in and enjoy!