Tag Archives: Applesauce

Crockpot Applesauce

9 Nov

IMG_6996

Folks, before I dive in, I wanted to share some fun thoughts I have about sprucing up the blog. First, I want to infuse more creativity into what I post for you all (the “buttons” side of the blog, which is supposed to more about the crafty things and creative things I do outside the kitchen). I also wanted to create an easier way for you all to follow a recipe step-by-step instead of having to scroll the whole blog post to see each step. Don’t worry, I’ll continue to do my usual documentation of capturing photos as I go, but I also will now create a little recipe card summary for you all! I hope to make these creative and different for each recipe – all hand written by me! I hope this will make it event easier to replicate any of the recipes and have fun in your own kitchen, experimenting and producing delicious food. It will also allow some more creativity to hit the blog so it’s not ALL food ALL the time. Please let me know what you think about this! I love hearing from you, and I want to make this blog a place that you enjoy coming to, reading and having a chuckle…and then be inspired to go make something! Leave a comment below about the recipe card idea and if you think this would be something neat to go back and include as updates on all the old blog posts! 

This blog came about purely as a fun way to document the trials and adventures in the kitchen. I learn by doing and I love learning by finding other bloggers, cookbooks, cooking shows, etc. and trying out the fun foods I see on these blogs, cookbook pages or on the TV. I don’t always put my own twist on things (sometimes the original just doesn’t need any changes!), but I do always try to show you where I found the delicious recipes so you too can find some new places to go and read more about other tasty food concoctions you could try. I am doing my best to be more adventurous in the kitchen than when this blog started a few years ago. If I want to try my own twist on something – whether to be original and innovate or just because I don’t have all the ingredients something calls for – I will! Look forward to seeing more and more of those creative spins on recipes in the future blog posts coming to your computer/phone/iPad screen. 

Finally, last exciting thing I wanted to share with you guys…I think it’s a great time for another S&B Giveaway!! It’s been a few months since the last one, and with the holidays approaching – it just seems like a great way for me to say THANKS to my blog readers! I’ll post more details about the Giveaway later this week, but all you need to do to enter is to be a follower of the blog. Details to come, but get excited!

Alrighty, enough already. Let’s get to the applesauce! Don’t forget to scroll down to the bottom of the post for the recipe card that you can use to follow this as you make your own applesauce!

This recipe is adapted from Chocolate, Chocolate and More (a place I will HAVE to get more delicious recipe ideas, particularly for my sweet-tooth husband).

IMG_6998

Ingredients:

  • 7-8 apples (we had a variety from the apple orchard, but most were Courtland apples)
  • 2 tsp of ground cinnamon
  • 1 tsp nutmeg
  • 1/4 tsp Aztec seasoning (this is a specialty spice that Luke and I are currently obsessed with – gives a little extra ‘zing’. But if you don’t have it and your grocery store doesn’t have it, you can leave it out.)
  • 1 tsp allspice
  • 3/4 c. light brown sugar
  • 2-3 Tbsp lemon juice

How to Make:

This is super simple, guys. The beauty of a crockpot is it does all the hard work for you and the bonus – you get a kitchen that just smells DELICIOUS all day. Hard to top that!

First, chop up the apples into small bite-size pieces. Once all your apples are chopped, throw ’em into a crockpot.
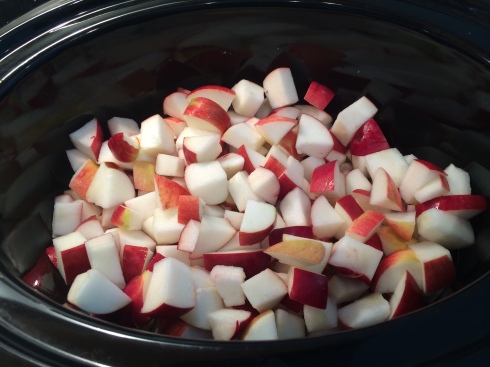
IMG_6933

Now, grab your spices and brown sugar. As you measure, just dump these right on top of the apples. Simple, right?!

IMG_6934

IMG_6935

Last, measure the lemon juice and sprinkle that over the top of everything.

IMG_6936

Last, use a big spatula to thoroughly mix all the spices/lemon juice/apples. Then, on goes the lid, set your crockpot on low and cook for 7-8 hours.

IMG_6937

I let mine go a bit longer than 8 hours which cooked things down even more (which I love). If you want less mushy applesauce, lean towards the 7 hour or even less. It’s all up to you!

IMG_6941

IMG_6943

I love applesauce cold, it’s a great snack and it’s the perfect Fall-spiced food to have at this time of year. However, you can also serve this up warm! It would be great on porkchops (warm) and also would be great with some crunchy granola (cold). Regardless how you serve it, you can store this easily in mason jars.

IMG_6944

IMG_6945

Here’s the helpful recipe card to assist you in your applesauce making! Cheers!

IMG_7003

Chocolate Muffins (with a Healthy Spin)

4 Aug

IMG_3254

A few facts to preface this post. Fact #1: I thoroughly enjoy chocolate. Fact #2: I thoroughly enjoy muffins, cakes, cookies etc. However, maybe like some of you, Fact #3, my metabolism no longer allows me to consume these items as much as I’d like without some consequences. Which…is unfortunate.

Thus – I was on Pinterest one day trying to find some healthier (note not healthy…health-IER) recipes and found this little gem. There’s no flour involved – there’s applesauce and plain greek yogurt that help to keep the muffins together AND keep them moist. I was intrigued enough to give these a try.

Also, Fact #4 – my boyfriend Luke has quite an affinity for baked goods that come from my kitchen. So like most treats I make, the plan was to make a big batch, have a few myself and then feed the rest to Luke. Muah hahaha.

(He has yet to complain so I think it’s a win-win situation for both of us.)

Thus, another episode of Thursday evening baking happened this last week and the resulting muffins were quite delicious. I highly recommend!

I will say I changed up the recipe a bit because of the ingredients I had available. I’ve linked to the recipe I based these off of (and the blog post about that recipe links to the original recipe too) above for those who want to try the full-on healthier version or you can follow what I used below. I trust both will work out nicely for you. And regardless, you end up with chocolate muffins. 🙂

Recipe makes about 24 small muffins or 12 larger muffins.

Ingredients:

  • 1 3/4 cup of oats
  • 3 egg whites
  • 3/4 cup cocoa powder (the recipe calls for unsweetened cocoa but I had cocoa powder on hand so that’s what I used)
  • 1/2 cup applesauce (the recipe calls for unsweetened but I used normal applesauce and they still turned out wonderfully)
  • 1 tsp vanilla extract
  • 1/2 cup plain Greek yogurt
  • 1/2 tsp cream of tartar (or 1-1/2 Tbsp. vinegar)
  • 1-1/2 tsp baking powder
  • 1-1/2 tsp baking soda
  • 1/4 tsp salt
  • 1 cup hot water
  • 1 cup sugar (the recipe calls for a healthy substitute like I cup of Splenda granular OR 1/4 cup + 2 Tbsp stevia but I had none of these options so plain white sugar it was for me)
  • 1/2 cup dark chocolate chips (or whatever other type of chips you’d like!) and an extra 1/4 cup for the muffin tops

How to Make:

Preheat your oven to 350 degrees and grab a blender (or a food processor) as you’ll need no mixer or beaters to clean in this recipe. I know, I know…I was puzzled by this too. But trust me – it works!

Now – if you want smaller muffins for a crowd, this makes 24 muffins (thus you’ll need 2 muffin pans). If you want larger muffins for a smaller crew (1 pan) this makes 12 muffins. I did line my muffin tins but this recipe has a tendency to stick a bit. If you’d these to appear aesthetically pleasing with wrappers off (for any reason) you may want to simply spray the pans with a little Pam. Otherwise, I’m sure those you feed these to will not mind a bit licking of crumbs from the wrapper. I doubt they’ll mind.

Now prepare for this next part…you’re going to mix…

…everything. Ok, not the chocolate chips quite yet, but everything else goes right into the blender.

Yup, you read that right. Everything. Into. The. Blender.

Here we go…

In go the oats…
IMG_3233

…then the egg whites…

IMG_3234

…and applesauce…(note my oat measuring was exceptionally neat and tidy)

IMG_3236

…and then the cocoa (I wasn’t worried that mine was a bit clumpy as the blender would be blending it all together anyway)…

IMG_3237

…and vanilla…

IMG_3238

…and the plain Greek yogurt…

IMG_3239

…and the cream of tartar…and baking powder…and baking soda…

IMG_3241

…and the salt (which I plain forgot to take a photo of, but believe me when I say…it’s in there!)…

IMG_3242

…and the cup of hot water (which causes this fun, little effect)…

IMG_3243

…and then finally, the sugar or your sugar substitute.

IMG_3244

Now blend that concoction until the mixture is smooth (not chunky on the bottom but the same consistency all the way through). I was a bit concerned as the batter seemed to be a bit thin at first. But keep blending until the oats, applesauce and yogurt are consistently blended and that will really help to thicken it up. Trust me!

Now pour into a medium-sized bowl and stir in the 1/2 cup of dark chocolate chips.

IMG_3245

IMG_3246

Then, time to pour into the pans. (I was a wee bit messy at this part so if you have the same problem, just dab the batter spots off the pan with a paper towel. No biggie!)

IMG_3247

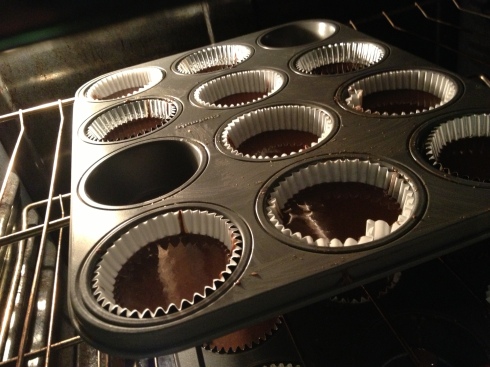
Now the muffins get baked for 10 minutes. Then, pull them out…

IMG_3248

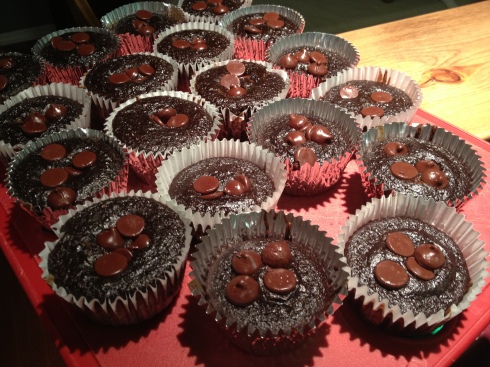
…and drop a few of the chips on the top of each muffin. Add as many as you’d like! Most of mine had about 3-6 chips as dark chocolate chips are bit bigger than the normal chocolate chip.

IMG_3250

Now pop these guys back into the oven for an additional 3-6 minutes, or until a toothpick comes out clean. (I had to pop mine back in for about 8 additional minutes as they were still wet when I tested with a toothpick at 6 minutes. So watch these carefully and don’t worry if they take more than 3-6 minutes. It shouldn’t be TOO much more oven time.)

IMG_3251

Once the toothpick comes out clean from a the center of a few muffins, let them cool for a few minutes in the pan. Then place the muffins on a cooling rack or a cutting board to cool completely.

IMG_3252

IMG_3253

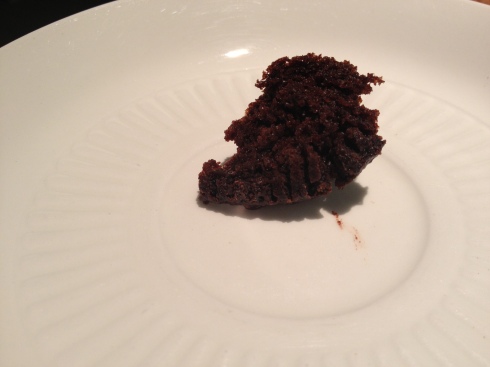
I will share – these are delicious eaten while they’re still warm for the obvious melty-chocolate reason. But they’re also delectable eaten once fully cooled. I let them sit out to cool for a few hours and then kept them stored in Tupperware, separated into layers with some assistance from parchment paper.

IMG_3259

IMG_3260

Feed these to your family, your friends, your significant other or spouse or maybe yourself for a snack. (I had a few snacks the night I made these…couldn’t…help…myself.) They’ll disappear REAL fast…

IMG_3255

IMG_3256

IMG_3257


IMG_3258

Give these a try and let me know if they turn out as delicious for you as they did for me!

IMG_3254

Happy baking!