Archive | Snacks RSS feed for this section

S&B Holiday Recipe Ideas

21 Dec

Hey crew! If you’re anything like me around the holidays, you’re trying to come up with some new cookie recipes or find a new food to have out at the holiday spread. Or maybe you’re hosting a big group and you need some ideas for breakfast in the morning?

I wanted to have a short, but helpful post for you guys to help you find some great options within the Spatulas and Buttons archive. I would also LOVE to hear some of your favorites! Leave a comment below with one of the holiday classics that you enjoy making, I’d love to try out new ideas from you all!

Classic cookies that everyone will love…

You guys know my love for trying out and posting cookie recipes here on the blog, so we’ll start there. These are a few of my favorites…

Mint Chocolate Chip Cookies:

These ARE my favorite and was my choice for cookie exchange contribution this year. They’re chewy and wonderful, not overly minty (unless you’re heavy-handed with the mint extract…I recommend to not be) and truly PERFECT for the holidays. Whenever I make these, they disappear FAST.

IMG_0185
Sugar Cookies:

This is a classic at the holidays, am I right?! This sugar cookie recipe is one that I personally prefer as it produces chewy wonderfulness. I got have ’em chewy! They’re wonderful when frosted but still tasty if eaten plain.

IMG_0712

Brownie Roll-out Cookies:

These look festive, they can be made into all sorts of shapes and when dusted with powdered sugar, well, let’s be real – it looks like snow. Perfect. No more explanation needed.

IMG_4239

Snacks to bring to that party you’re invited to…

It’s always great to have a few go-to’s for when you’re asked to bring something to the holiday get-together with family. Or, if you’re wanting to be creative and give a hostess gift that will double as snacks. Here are a few options that I’ve found to be delicious…

Chipotle & Rosemary Nuts:

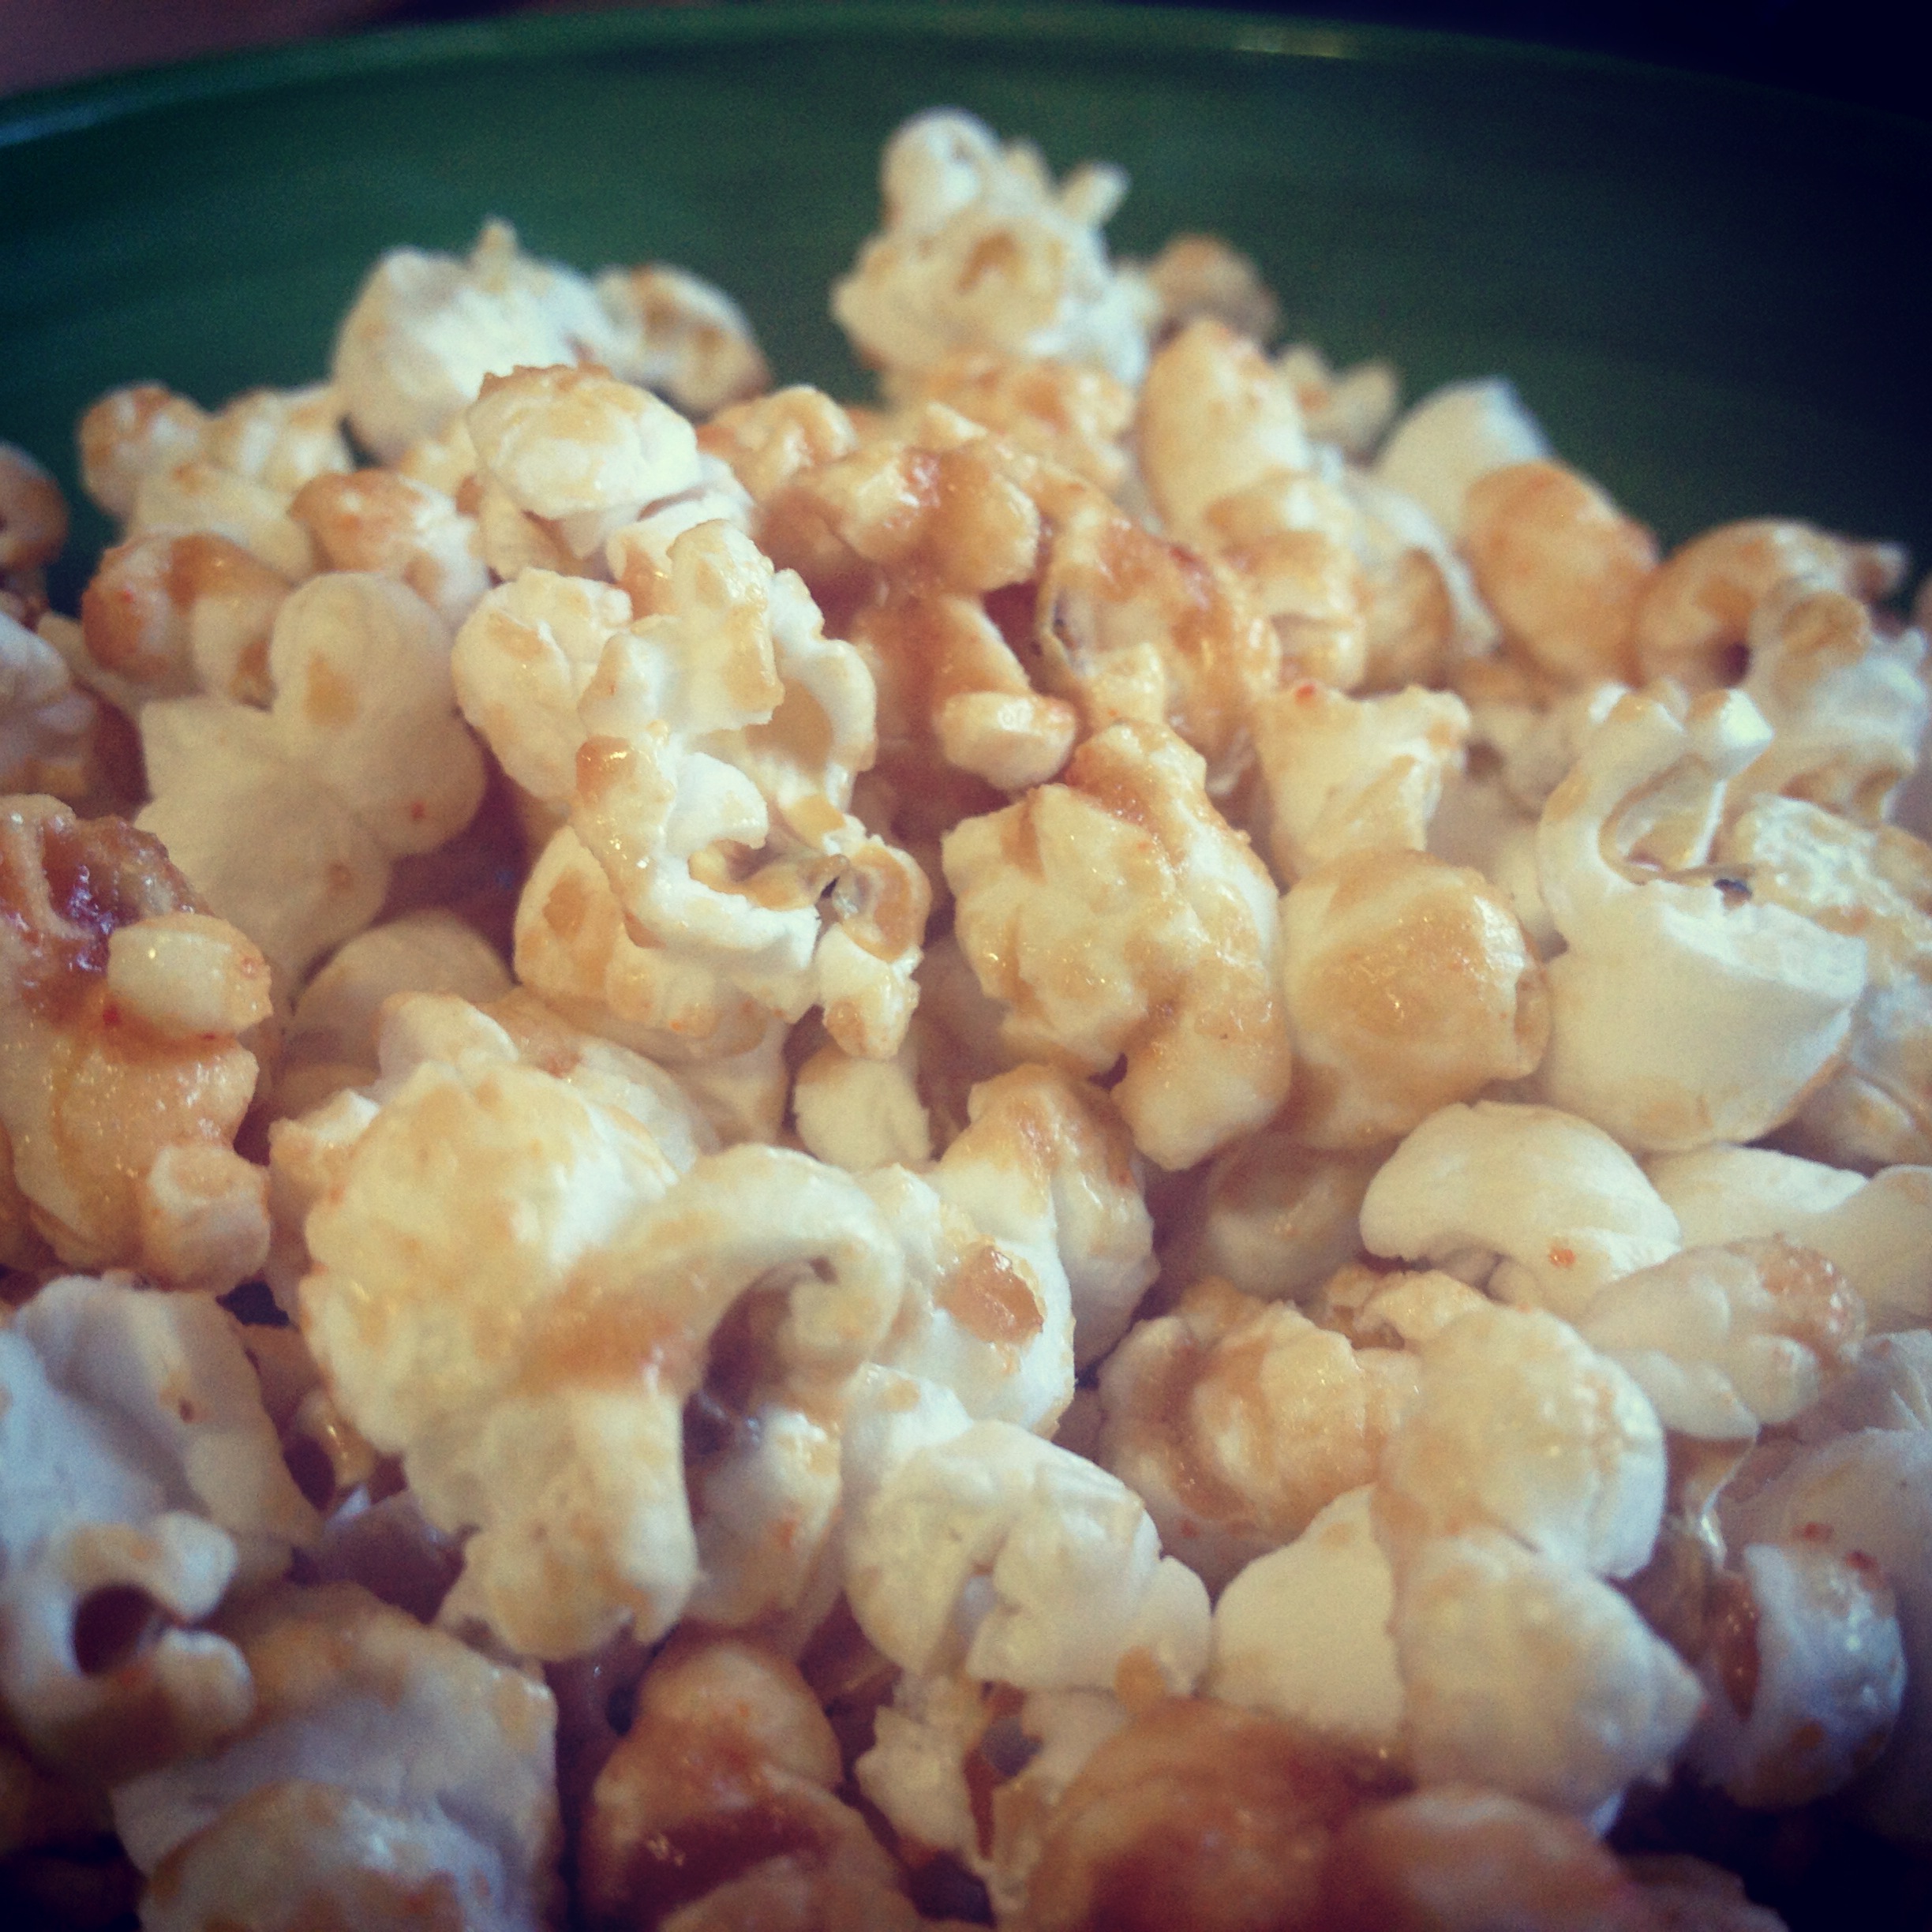
Mixed nuts seem to be a staple at the holidays and this recipe just gives a little pizzazz to the mixed nuts bowl you put out on the table every year. It’s a little spicy, a little sweet with a great layer of rosemary throughout. Yum!

CIMG3432

Cake Batter Dip:

When trying to find a sweet dip to balance out all of their savory cousins (are dips cousins?!), this will win over anyone with a sweet tooth. It’s great with fruit or with plain cookies (e.g. Nilla Wafers).

IMG_4773

Fruity Dark Chocolate Bark:

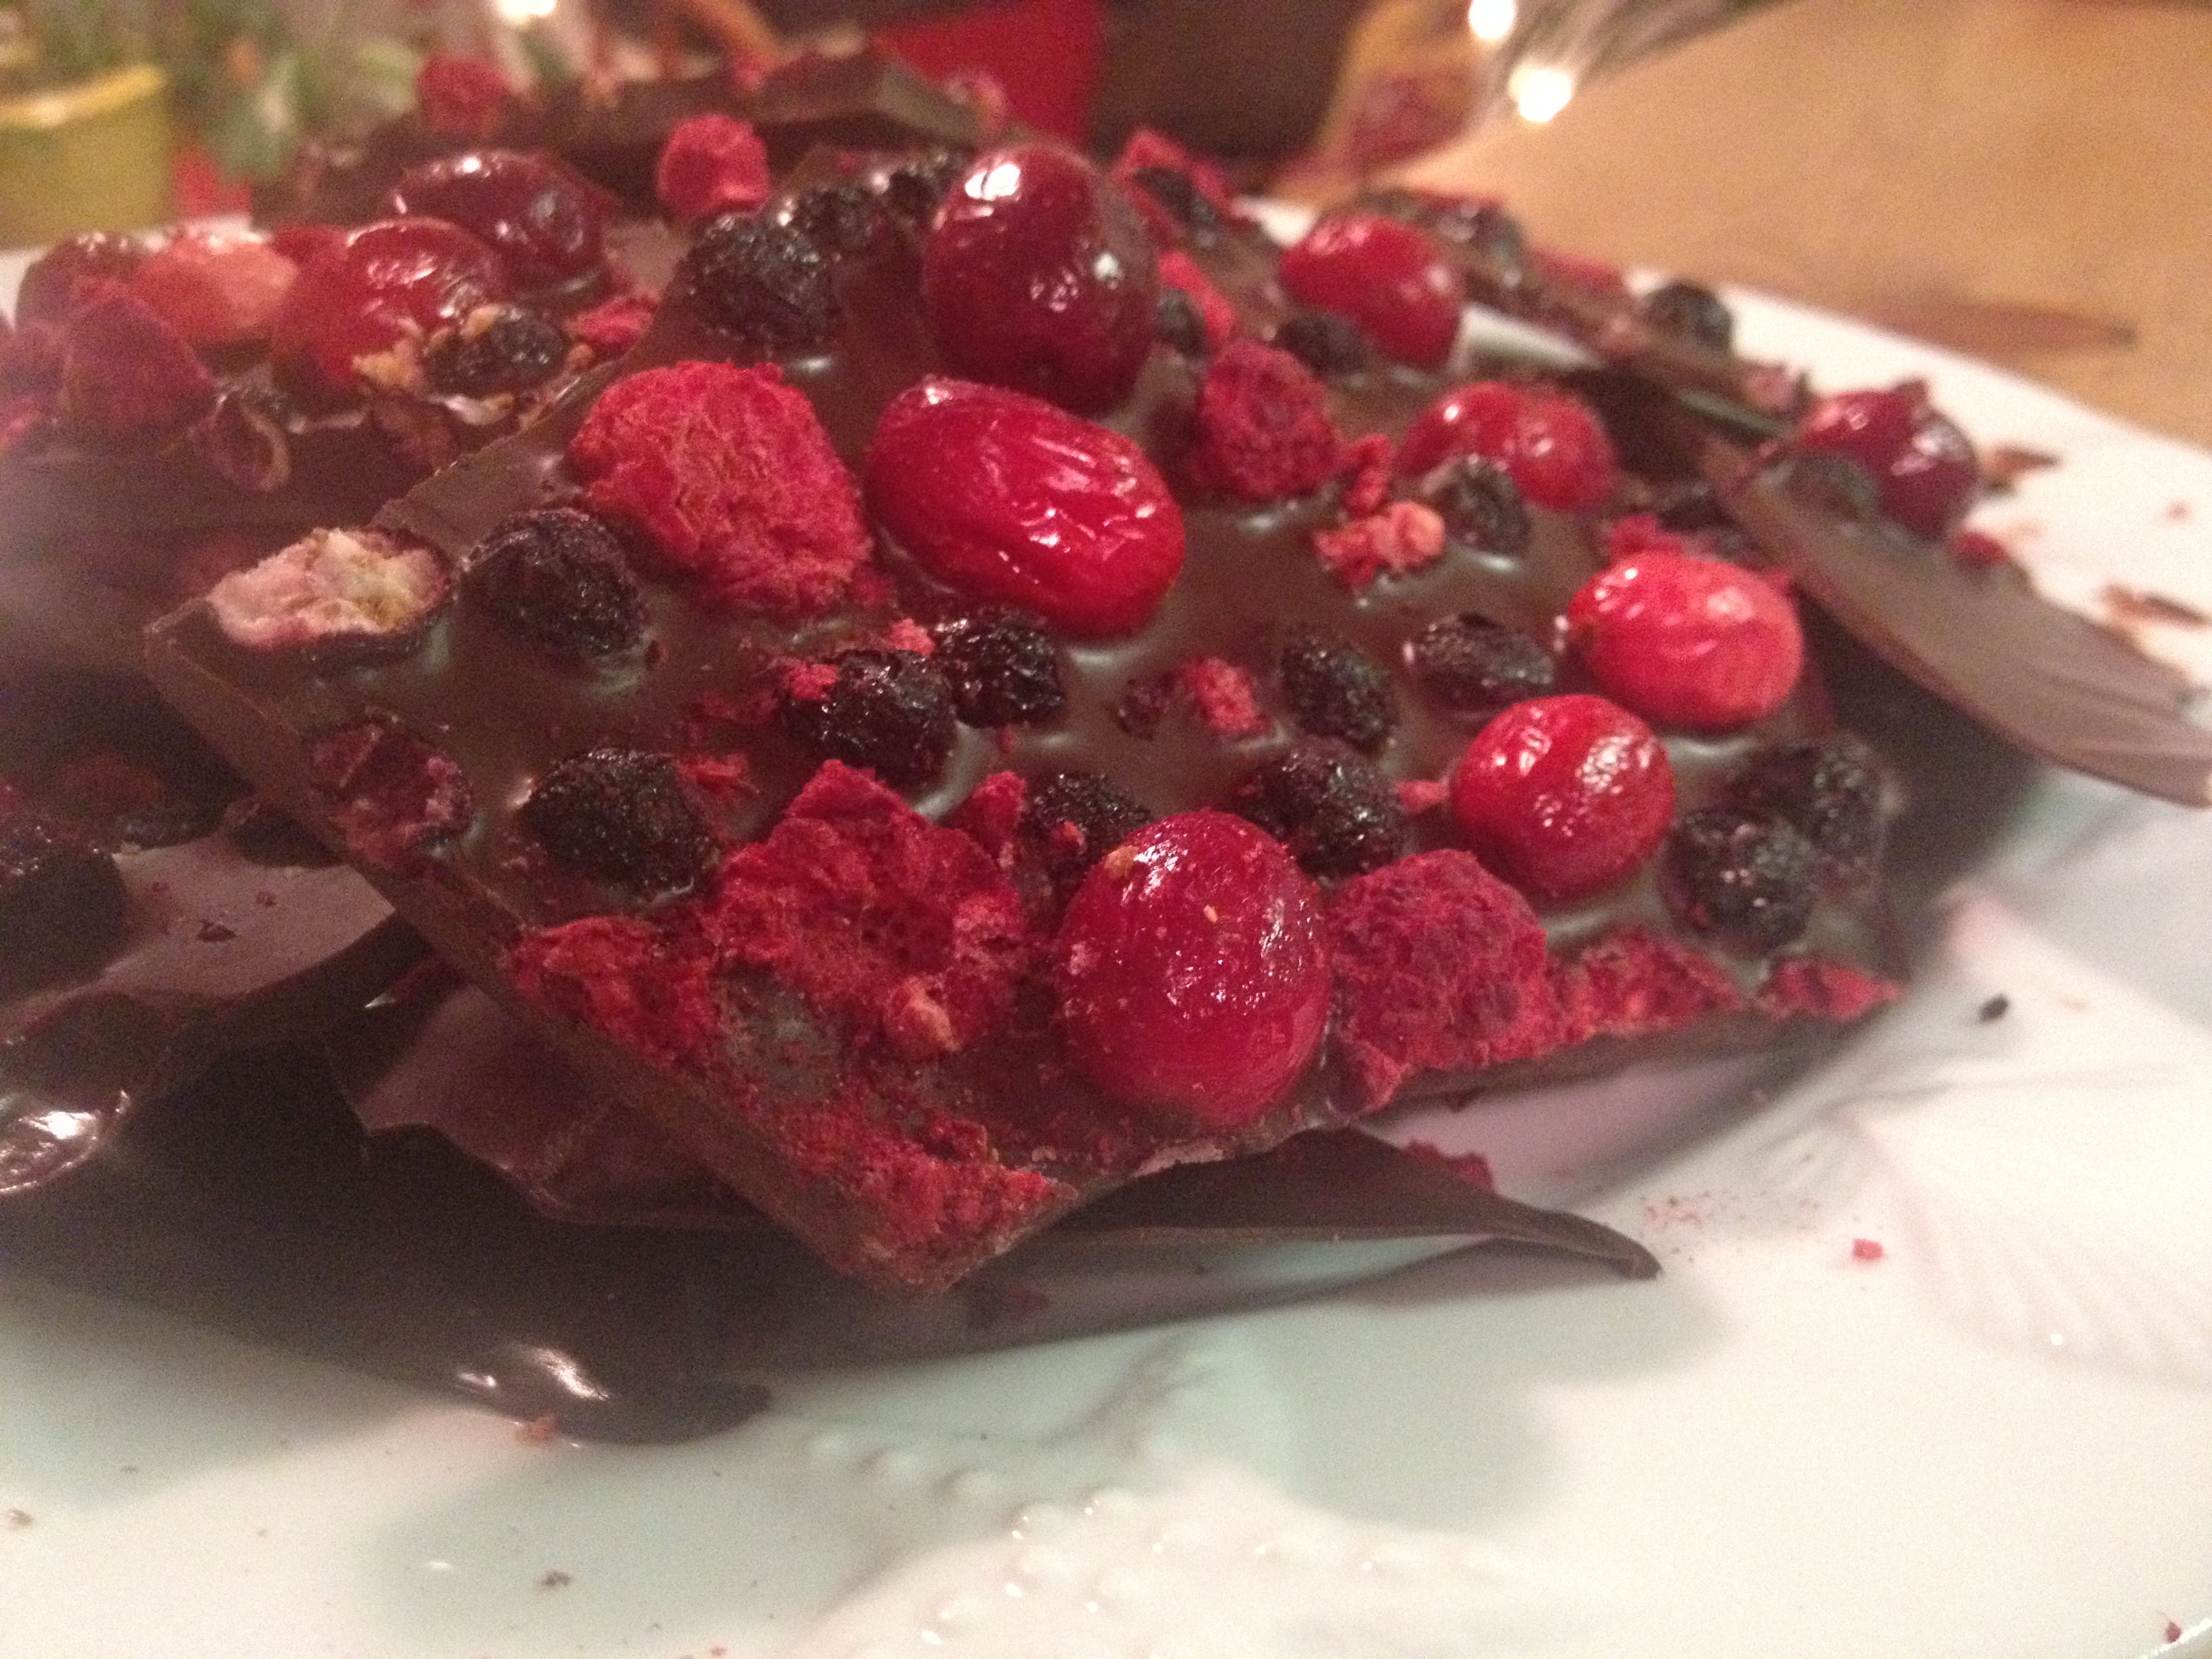
A different approach to the ‘bark’ that always seems to be out on the dessert table at this time of year. This one uses dried fruit to give a sweet and tangy flavor and a little crunch. It’s also very pretty and would work perfectly as a hostess gift!

IMG_4160

Breakfast for a crowd…

Are you planning on hosting family and friends throughout the next few weeks? If so, when it comes to breakfast, it’s essential to have a few plans in your back pocket. These options would be perfect to feed pajama clad folks and will be a tasty way to start your day…

New York Breakfast Casserole:

This casserole is a twist on the New York bagel, with everything bagels, cream cheese and endless possibilities to add your meat of choice (lox, sausage or bacon anyone?!) and/or veggies. I love this with the classic tomatoes and red onion combo, but you could add in some bell peppers, green onions, etc. It can even be prepped the night before, leaving you more time to snooze in the AM.

IMG_4112

Baked Oatmeal:

A fancier oatmeal that will warm everyone’s stomachs as they wake up for the day. You can add in whichever fruit strikes your fancy (raspberries and blueberries have worked well in my previous experiments). This goes well when paired with bacon and/or sausage (and makes your kitchen smell like the best breakfast restaurant in town).

IMG_6642

Raspberry Scones:

Looking for a bread/pastry (that doesn’t require you to wake up at the crack of dawn) to feed warm to your guests?! These scones are a cinch to throw together and you could easily make a few batches at once. They’d be great paired with some eggs in the morning, providing a perfect item to soak up those runny yolks. Sigh. Now I want one. AND a runny yolk for dipping.

IMG_6474

********************************

I’m finally going to get to try out some new recipes over the holiday season, with a break from work and plenty of time to experiment in the kitchen. Can’t wait to share these adventures with you!

And guess what?! This girl finally got herself a DSLR camera! SO excited to capture better and clearer pictures for you all in future posts. I know my iPhone photos won’t win any awards. But hey, I did the best I could with the technology I had. Looking forward to learning the in’s and out’s of the new camera so I can bring more mouth-watering pictures to the blog.

Wishing you all a wonderful holiday season, with time spent relaxing with those you love most, enjoying delicious treats and sipping libations that warm your belly.

Cheers!

Advertisement

Oatmeal Cookie Granola

22 Nov

IMG_7034

So I realize to many, granola is not the most exciting thing. To those people I say, you need to try THIS granola.

Now, I’ve posted a previous granola recipe on here (which I still thoroughly enjoy and still recommend), but this is granola with a different sort of twist – sweet and kicked up a notch, with different crunch, different flavors (hello again, browned butter) and CHOCOLATE. Yes, there is chocolate in this granola and I know it shouldn’t be my favorite part as at the heart of it all, granola is supposed to be “healthy-ish” (right?!)…but it is. I’m not even sorry about it.

I made this a few weeks back and our apartment smelled soooooooo good. I would make this solely to make my apartment smell like THAT again. If for nothing else, make this to infuse your home with smells of cookies, oatmeal, and browned butter.

Gah.

So. Delish.

Ironic choice of words (and still true words) as this recipe is from Seriously Delish, the cookbook I’ve raved about a few times (the Baked Oatmeal from a few posts back is from here too). I want to make just about every recipe in this cookbook, so this will NOT be the last time you read about it on this blog. Jessica wrote a masterpiece that has the right amount of creativity, taste, coziness AND her hilarious commentary throughout; it’s the perfect cookbook compliment to her blog How Sweet Eats. I’ve read Seriously Delish cover to cover a few times. (P.S. is that weird? I read cookbooks cover to cover. Ok, ok. Yes, that’s weird. Please reserve your judgment.)

So about that granola…

…here we go, in a recipe adapted from Jessica’s recipe in Seriously Delish.

Ingredients:

  • 2 1/4 c old-fashioned rolled oats
  • 1 c slivered almonds (other nuts would work great – pecans or walnuts, etc.)
  • 1/2 cup whole flaxseed (you can do ground flaxseed too)
  • 1 Tbsp brown sugar
  • 1 tsp ground cinnamon
  • 1/4 tsp salt
  • 1/2 cup honey
  • 2 Tbsp unsalted butter, browned
  • 2 Tbsp melted coconut oil
  • 2 tsp pure vanilla extract
  • 1/4 c  – 1/2 c semi-sweet mini chocolate chips (sprinkle in as much extra chocolate-y ‘sweet’ as you want!)

How to Make:

This is super simple guys, you can whip it up in no time. Whether you do this the morning you plan to enjoy it for breakfast (it’s excellent with some Greek yogurt) or make it the night before.

Before you start mixing, preheat your oven to 325 and line a cookie sheet with parchment paper. Set the cookie sheet away for now and locate a large bowl. Now to mix!

In said large bowl, combine the oats…

IMG_6697

…slivered almonds…

IMG_6698

…flaxseed (and I went with whole flax seeds to add some extra texture and crunch, but you can use ground flaxseed if you prefer too)…

IMG_6699

…brown sugar…

IMG_6700

…cinnamon…

IMG_6702

…sprinkling of salt…

IMG_6703

…then stir that all together and set aside. On to the liquids!

IMG_6704

The liquids will all get poured into a saucepan over low heat. Start with the honey…

IMG_6706

…then the coconut oil…

IMG_6707

…and then vanilla.

IMG_6708

Before adding in the butter, you want to brown this up. In a separate small saucepan, melt down the butter over medium/low heat, whisking continually until wonderful brown flecks appear on the bottom of the pan.

IMG_6709

Once it’s at that point, remove from heat and pour it in with the rest of the liquids.

IMG_6710

This liquid concoction smells like HEAVEN right now. Take a moment to take a deep breath in and savor that.

IMG_6711

Sigh.

Ok, now all that’s left is to mix up those liquids in with the dry ingredients. Use a spatula to mix everything and ensure all of the dry ingredients are coated.

IMG_6712

IMG_6713

Spread this out on the parchment paper and pop it in the oven. Bake for 3o minutes, stopping to stir at the 10 min, 20 min and 25 min marks. Stir again at the end when you pull it out. The granola should be golden brown and have succeeded in filling your kitchen with delicious smells. (See the pics below to see how this darkens over the cooking time.)

IMG_6714

IMG_6715

IMG_6716

IMG_6717

But wait! As you recall, we have one last ingredient to add in…mini chocolate chip time.

Let the granola cool for a bit before sprinkling the chocolate over the top. To cool, I used the parchment paper to lift the granola out of the pan and set the parchment paper on the counter. Once the granola has cooled for about 15 minutes, I sprinkled the mini chocolate chips throughout the granola and let the chocolate melt a bit (as the granola is still warm). But, I let the granola cool for an hour or two with the chocolate chips.

IMG_6718

IMG_6719

IMG_6722

I just scooped this it into Tupperware to store. It’s been delicious on ice cream for a sweet and crunchy dessert or mixed with Greek yogurt for a fancy (but easy) breakfast. It’s also great all by itself for a snack.

IMG_6724

Hope you guys give this a try, let me know what you think! And definitely encourage you to get creative and add any other little tidbits to the granola (ideas: spices [nutmeg], nuts [pecans or walnuts], dried fruit, etc.).

To print off this recipe for easy reference in the future, click here

Image

Crockpot Applesauce

9 Nov

IMG_6996

Folks, before I dive in, I wanted to share some fun thoughts I have about sprucing up the blog. First, I want to infuse more creativity into what I post for you all (the “buttons” side of the blog, which is supposed to more about the crafty things and creative things I do outside the kitchen). I also wanted to create an easier way for you all to follow a recipe step-by-step instead of having to scroll the whole blog post to see each step. Don’t worry, I’ll continue to do my usual documentation of capturing photos as I go, but I also will now create a little recipe card summary for you all! I hope to make these creative and different for each recipe – all hand written by me! I hope this will make it event easier to replicate any of the recipes and have fun in your own kitchen, experimenting and producing delicious food. It will also allow some more creativity to hit the blog so it’s not ALL food ALL the time. Please let me know what you think about this! I love hearing from you, and I want to make this blog a place that you enjoy coming to, reading and having a chuckle…and then be inspired to go make something! Leave a comment below about the recipe card idea and if you think this would be something neat to go back and include as updates on all the old blog posts! 

This blog came about purely as a fun way to document the trials and adventures in the kitchen. I learn by doing and I love learning by finding other bloggers, cookbooks, cooking shows, etc. and trying out the fun foods I see on these blogs, cookbook pages or on the TV. I don’t always put my own twist on things (sometimes the original just doesn’t need any changes!), but I do always try to show you where I found the delicious recipes so you too can find some new places to go and read more about other tasty food concoctions you could try. I am doing my best to be more adventurous in the kitchen than when this blog started a few years ago. If I want to try my own twist on something – whether to be original and innovate or just because I don’t have all the ingredients something calls for – I will! Look forward to seeing more and more of those creative spins on recipes in the future blog posts coming to your computer/phone/iPad screen. 

Finally, last exciting thing I wanted to share with you guys…I think it’s a great time for another S&B Giveaway!! It’s been a few months since the last one, and with the holidays approaching – it just seems like a great way for me to say THANKS to my blog readers! I’ll post more details about the Giveaway later this week, but all you need to do to enter is to be a follower of the blog. Details to come, but get excited!

Alrighty, enough already. Let’s get to the applesauce! Don’t forget to scroll down to the bottom of the post for the recipe card that you can use to follow this as you make your own applesauce!

This recipe is adapted from Chocolate, Chocolate and More (a place I will HAVE to get more delicious recipe ideas, particularly for my sweet-tooth husband).

IMG_6998

Ingredients:

  • 7-8 apples (we had a variety from the apple orchard, but most were Courtland apples)
  • 2 tsp of ground cinnamon
  • 1 tsp nutmeg
  • 1/4 tsp Aztec seasoning (this is a specialty spice that Luke and I are currently obsessed with – gives a little extra ‘zing’. But if you don’t have it and your grocery store doesn’t have it, you can leave it out.)
  • 1 tsp allspice
  • 3/4 c. light brown sugar
  • 2-3 Tbsp lemon juice

How to Make:

This is super simple, guys. The beauty of a crockpot is it does all the hard work for you and the bonus – you get a kitchen that just smells DELICIOUS all day. Hard to top that!

First, chop up the apples into small bite-size pieces. Once all your apples are chopped, throw ’em into a crockpot.

IMG_6933

Now, grab your spices and brown sugar. As you measure, just dump these right on top of the apples. Simple, right?!

IMG_6934

IMG_6935

Last, measure the lemon juice and sprinkle that over the top of everything.

IMG_6936

Last, use a big spatula to thoroughly mix all the spices/lemon juice/apples. Then, on goes the lid, set your crockpot on low and cook for 7-8 hours.

IMG_6937

I let mine go a bit longer than 8 hours which cooked things down even more (which I love). If you want less mushy applesauce, lean towards the 7 hour or even less. It’s all up to you!

IMG_6941

IMG_6943

I love applesauce cold, it’s a great snack and it’s the perfect Fall-spiced food to have at this time of year. However, you can also serve this up warm! It would be great on porkchops (warm) and also would be great with some crunchy granola (cold). Regardless how you serve it, you can store this easily in mason jars.

IMG_6944

IMG_6945

Here’s the helpful recipe card to assist you in your applesauce making! Cheers!

IMG_7003

Spicy Caramel Popcorn

22 Feb

IMG_4398

There’s been a plethora of fancy schmancy popcorn recipes floating around on Pinterest lately. I’ve definitely wanted to give some of them a try and finally had the chance over Super Bowl weekend. The Super Bowl and the need for Super Bowl type snacks was the perfect excuse.

Now, I knew if I ended up creating popcorn dripping in deliciousness, it would be tasty yes, but probably give a bit of gut rot as a result. Maybe it’s just me, but TOO much sweetness is overwhelming sometimes. I found a great-looking recipe called Sriracha Caramel Corn via pinterest over at I Am A Food Blog and then tweaked it a bit to go easy on the flavor:popcorn ratio. I’ve renamed this version just ‘Spicy Caramel Popcorn’ as we didn’t use Sriracha and I’ve changed up the amounts of ingredients a bit. But great base recipe, definitely go check out  I Am A Food Blog for more tasty recipes!

This popcorn turned out as a perfect compromise as each kernel definitely had spicy caramel on it but nothing was too saturated. I thought it was a true success (well, it took me two tries to get this right) and had to share it with you all. Here we go…

Ingredients:

  • 6-8 cups of plain popcorn (or roughly 1/2 cup of popcorn kernels)
  • 1 Tbsp of coconut oil
  • 6 Tbsp of butter
  • 1/2 cup packed light brown sugar
  • 1/2 tsp vanilla
  • pinch of sea salt
  • 1/8 tsp baking soda
  • 1-2 Tbsp of hot sauce of your choosing

How to Make:

As with many recipes I post on here, this one is not difficult. It’s great to make in advance for a party (i.e. Super Bowl), make for a late night snack or pack into several Ziplocs to bring to work/school as a mini treat. Possibilities are endless!

Now how to make this stuff? Right, right, that’s why you’re reading this. First, you gotta pop the corn. However you choose to do this with the kitchen appliances available to you, is your choice. I made this at Luke’s parents house and they have this awesome popcorn maker (is there a fancier name for that?!) that heats up your butter or oil (as noted above we used Coconut Oil) and then helps keep your popcorn contained as it heats up and pops. I was in awe. I realize this is likely not exciting to many of you but I was significantly entertained for the few minutes it took to pop this corn. (I may add this to the wedding registry…that’s how cool I think this is).

IMG_4302

IMG_4303

IMG_4304

IMG_4306

To get the ratio of caramel:popcorn that we were looking for, we did 1/2 cup or so of popcorn kernels. This made quite a lot of popcorn! Once your popcorn is all popped, set it aside while you dive into the caramel sauce.

Before we start caramel-ing, preheat the oven to 250 degrees and line a baking sheet (with sides, ideally) with parchment paper or spray it down with Pam or olive oil.

Now to caramel! Heat up the butter in a saucepan over medium heat.

IMG_4308

Mix in the packed brown sugar and stir constantly for about 3-4 minutes until it comes to a boil. Forewarning – this can very quickly burn so watch closely! I burned my first batch and had to start all over. Key is to not bring the heat too high, stir constantly and remove immediately once it boils and gets that caramel looking color to it.

IMG_4309

Remove from the heat as soon as the sauce gets that caramel color and set aside to cool.

IMG_4310

In a small bowl, mix the vanilla, salt, baking soda and the hot sauce you selected. If you’re going for more spice – aim for closer to 2 Tbsp (if you’re a real spice lover, you could do a bit more…at your own risk!) if you want less spice and more of a little ‘zing’ mixed in the caramel, aim closer to 1 Tbsp.

IMG_4311

Once this mixture is all combined, add this to the butter/sugar saucepan and stir together. It will likely bubble up quite a bit but have no fear – just stir until all combined and has a nice, silky sheen to it. Taste test it too just to be sure you have the spice level where you wanted.

IMG_4314

IMG_4316

Now to combine! Pour the popcorn into the pan you prepped and then slowly dribble in the caramel sauce, turning the popcorn with a spatula to coat everything as evenly as you can. It helps to continue to mix and stir with the spatula after all the caramel as been poured in to really get everything coated.

IMG_4319

IMG_4322

IMG_4324

IMG_4325

Pop this into the oven for an hour, stopping at 15 minute increments to stir and break apart any clumps.

IMG_4330

Once it’s all done, it’s ready to consume!

IMG_4329

Pour out into a large bowl for hungry humans to devour or into individual bowls so no one steals your portion! Or, you can also store this in airtight Ziplocs or containers for about a week.

IMG_4331

Seriously addicting popcorn and not overly sweet. I can promise you’ll love it! (Bold statement I realize, but prove me wrong if you think it’s too bold.)

IMG_4335

With that, I shall end another post. HOWEVER fun news to share…to tempt you to stay tuned…there will likely be another blog giveaway coming soon! The rules shall be the same as last time, all who are official blog followers (meaning you get email notifications when I post and are included in that total number in the upper right on the Home Page) will be eligible to win a treat box from me in the mail, filled to the brim with goodies! More details to come in the next few posts. But if you’re not already a follower, now is the time so you can be eligible! I’m thinking that two lucky individuals will win this time around…

Let me know how the popcorn attempts go, I always love your comments. 🙂

Cheers!

Yogurt Popsicles

27 Aug

Popsicles.

Let me tell you, popsicles are sometimes the perfect treat. When you crave something sweet, but not overly so. When you want something cold but are perhaps feeling too lazy (not sure that’s actually possible) to scoop ice cream/frozen yogurt. You want to feel like it’s summer at all times of the year. The list can go on and on.

Back-story: I was shopping at one of my favorite kitchen-y stores (Kitchen Window in Uptown…check it out…it will change your life…and your wallet’s size) shopping for a gift for a friend of mine. As I was perusing the aisles, these popsicle molds jumped into my hands. I swear it.

I came home, all excited about my popsicle molds and then realized…I had no popsicle ‘recipe’ in mind to make. This lasted a few weeks until I found this on pinterest. Success! Unfortunately our fridge/freezer took this particular day to stop working properly. The first round of popsicles never froze and I was stuck using a spoon to eat my semi-cold yogurt concoction. Recommendation – use a freezer that works. Who would have thought, right? I was determined to give them another try though and I can vouch that with a properly cold environment, you’ll have yourself some legitimate and tasty popsicles.

Here we go – three ingredients and some cold temperatures will result in a delicious treat you could legitimately eat for breakfast, a snack OR dessert. (Plus it’s fairly healthy!)Seriously, such a genius idea – thanks to Joylicious for this great recipe!

Ingredients (makes 6-8):

  • 12-16 oz. Greek yogurt, plain or vanilla ( I used a little less than 16 oz. to fill my 6 molds, but you may need more or less depending on the size/amount of your molds)
  • 1/2 cup raw honey
  • 1 cup mixed berries (Fresh or frozen)

Other items you need:

  • Popsicle molds (Hopefully there still available in stores! I would imagine Target, Costco or even Walgreens would have these.)

How to Make:

This is super simple – so it would be a great one to do if you have small people running around. Seeing the popsicles go into the freezer as liquid and come out as wonderfully solid deliciousness would be a fun experience for any kid. Or if you’re 23. Or 49. There’s no age limit on the glory of popsicles.

Mix together your yogurt and honey…


…then gently fold in the berries and ensure they’re not stuck together if you choose the frozen route.

Grab your popsicle molds and pour in your mixture. Some of my bigger berries were easier to push into the mold after I filled it up with the yogurt/honey mixture.

Once all the molds are full, wipe off any excess drips from overflowing, put the tops/bottoms (…is it the top? Or the bottom? Riddle me that.) and put these babies into the freezer. Give them about 3-4 hours, or have them in there overnight.

Aren’t they cute all locked together?

When you take the popsicles out of the molds, be gentle! You may have to warm up the mold a bit with your hands and twist a little with the handle, but it should come out pretty easily.

And look at how pretty this is.

Dig in and enjoy!

Chipotle & Rosemary Nuts

8 Apr

I’m back for an Easter morning post. (Happy Easter to all!)

This was a recipe I tasted for the first time back during my Memphis visit with my friend Marissa (can you tell we ate a lot of delicious food?!? Marissa knows her stuff, let me tell you.)

This is an Ina Garten (the Barefoot Contessa) appetizer/snack recipe from her cookbook How Easy is That (one of my new favorite cookbooks. It’s awesome. Go buy it.). It went over very well for the visitors we had at the Vose house this weekend, and the whole amount is almost gone. You can also keep these in Tupperware to pull out for another event days down the road.

Ingredients:

  • Vegetable oil
  • 3 cups whole roasted unsalted cashews
  • 2 cups whole walnut halves
  • 2 cups whole pecan halves
  • 1/2 cup whole almonds
  • 1/3 cup pure maple syrup (I used a mixture of pure and store-bought syrup. Mom mixes up a concoction of both so you get the best of both worlds.)
  • 1/4 cup light brown sugar, lightly packed
  • 3 tablespoons freshly squeezed orange juice (Mine was not freshly squeezed – I used Simply Orange and it was tasty. Use whatever orange juice you have, but if you can do freshly squeezed – DO! 🙂  )
  • 2 teaspoons ground chipotle powder (Took me a bit to locate this on the grocery store shelf as not all spice brands had it…but it’s worth the time of looking. This is the key ingredient.)
  • 4 tablespoons minced fresh rosemary leaves, divided (Highly encourage fresh> dry)
  • Kosher salt

How to Make:

Preheat the oven to 350 degrees. Locate a nicely sized sheet pan and rub it down with vegetable oil. Or Pam would work too. Up to you.

Now time to mix some nuts! Mix up your cashews, walnuts, pecans, almonds…

Add in 2 Tbsp of vegetable oil, maple syrup, brown sugar, orange juice and chipotle powder. All of those items were added though there aren’t pictures of all steps below.

I encourage you to mix it up in a bowl as it’s a bit easier than Ina’s direction of mixing it up on the pan. But perhaps you possess greater “mixing abilities” and the pan would work for you. Toss everything around so all nuts are evenly coated in tasty goodness.

Now grab the rosemary and mix that it too. Ina suggests adding 2 Tbsp now and 2 Tbsp after cooking. I plain forgot this and added 4 Tbsp right up front. It may make a difference adding it after, it may not. Up to you and your personal preferences with rosemary. But I think adding it all in prior to the oven works just fine. Add in 2 tsp of salt as well and toss everything evenly.

Spread the nuts in one layer, as best you can. Roast them in the oven for about 25 minutes, pulling them out to mix things about 2-3 times during that time. You’ll know everything is done when the top is “glazed and golden brown” – according to Ina. Below is the halfway point.

Once the 25 minutes is up or the nuts look done, pull ’em out of the oven. Add in 2 more tsp of salt and (if you didn’t add all 4 Tbsp in prior to the oven…) the remaining 2 Tbsp of rosemary.

Toss everything so the salt and rosemary (if you added it after) are evenly coating all the nuts. It will be sticky due to the maple syrup and brown sugar, so you’ll want to continue to mix the nuts around as they cool to prevent as much of the sticking together as possible. They will naturally clump a bit, which is alright, but you don’t want the whole thing to be one, big, massive pile. Which is what it will become if you don’t get in there and fix the situation. Serious.

I used wax paper to let everything cool while spread out and at the same time, not causing more unnecessary mess to the pan or another surface.

Store in Tupperware and pull it out to astound your guests with your amazing cooking skills (they don’t need to know there are only a few steps and it’s extraordinarily simple to make)! Enjoy!

Granola

7 Apr

This is the second of the flurry of posts that will be coming about due to Easter weekend cooking at the Vose house. This recipe is not a Vose recipe, but one that I wanted to make this weekend nonetheless. It’s excellent with yogurt – normal or frozen. You can also add whatever variety of ingredients you’d like.

I came across this recipe from a coworker of mine passing it along. I was in search of the perfect granola recipe and wasn’t having a ton of luck in my internet searches. Although hard to believe from some of my more caloric recipes previously posted, I do like to make healthier things to have on hand in my kitchen. Granola was something I wanted to be a healthy snack or dessert and many recipes are actually much higher in sugar and carbs than needed.

NOT saying this is the healthiest recipe on the planet, but it’s not terrible for you. Take it or leave it – but I think it’s very tasty. Course I only post things on here I think are tasty so perhaps I’m slightly biased. Oh well.

This recipe is taken from Leite’s Culinaria website with only slight variations from me.

Ingredients:

  • 4 cups old-fashioned oats
  • 1/2 cup unsweetened coconut flakes or shreds (this time I didn’t use the coconut as the individuals eating it weren’t huge fans. However, I’ve previously made this and enjoy adding this in. Your choice about your personal views on coconut.)
  • 1 cup whole raw almonds
  • 1/2 cup brown sugar
  • 1/2 teaspoon salt
  • 1 teaspoon ground cinnamon
  • 1/4 cup olive or vegetable oil (I’ve used both and found both to be similarly effective. Use what’s on hand.)
  • 1/4 cup mild honey or light agave nectar (I like honey, though agave nectar may be better for those more health conscious. I should be more of that…oh well.)
  • 1 teaspoon vanilla extract
  • 1 1/2 cups chopped dried fruit (I usually used dried cherries or cranberries. Cranberries was used in this version.)

How to Make:

Essentially all you need to do, is mix everything together. However, there’s a slight method that is suggested.

Preheat the oven to 300°F. I’m the master of forgetting to preheat and then have to sit around wait for the oven to heat up. Don’t be like me.

Grab yourself a nice large bowl and mix your oats, coconut, brown sugar, salt and cinnamon. I know my brown sugar usually gets a little chunky so try to break those up as best you can.

Next in a separate microwavable safe bowl, microwave the oil and honey for 20 seconds. Pour the heated mixture into the dry ingredient mixture and make sure everything is thoroughly coated. Add in the vanilla too and stir it in.

Once everything is all mixed up, pour it into a 9×13 baking pan and spread it out evenly (you want everything to bake evenly don’t you!?). Nicely done sous chef, nicely done.

I put the timer on for 25 minutes, but the original recipe says 25 – 40 minutes total. You want to bake it until the top turns golden brown. Also, pull out the pan about 2-3 times during the baking process to stir it around. You want all the granola to be baked well – not just the top. Below is the half-way point.

Your kitchen smells pretty dang good at this point. Serious.

Once you have a golden brown mixture, pull it out and mix in your dried fruit. Then it’s suggested that you push the granola to one side so that it cools in nice little clumps. If you’re into clumps then yes, follow this method. If you prefer clumpless (not a word, but it felt like it should be used here) granola, then spread it out evenly to cool.

Throw it into yogurt, ice cream, oatmeal or whatever other fun item you’d like!

Yogurt Covered Blueberries

25 Mar

It’s double-post Sunday! Not intentional, but I meant to post about the grits recipe last night and this gem this morning. Due to need of way too much sleep and other activities…they both are going up today. If this is too much, please hold off and read this post tomorrow. I understand. I needed a little pick-me-up this weekend, and this and the grits recipe sure helped with that. I’m also in the process of cooking up a delicious smelling item which I’ll share tomorrow. Either way – I will honestly admit that some tasty food helps me on those ‘blah’ days. I promise it’s not my only solution, but it sure helps.

For those still reading…greek yogurt + blueberries + your freezer = best snack ever! I found this idea on pinterest here and decided it’d be a great spring snack…and summer too now that I think about it. Frozen fruit is just always a good idea in my mind.

Yogurt Covered Blueberries:

Ingredients:

  • One carton of Blueberries (in theory, you can do as many blueberries as you want, but I used one little plastic carton.)
  • One 5.3 oz tub of Honey flavored Greek Yogurt (I used the recommended brand – Dannon’s Oikos, but any should work. I used honey flavor, but you could experiment with any flavor you’re craving. I have an inkling any flavor you’d pick out will work.)
  • Toothpicks (or any other dipping device you have on hand. Also, this is not an ingredient, I realize. But you need some sort of dipping mechanism, so I included it.)
How to Make:

I lack toothpicks currently…or perhaps just can’t find them. However, I had wooden skewers on hand which worked just as well. All you do is dip your blueberries one by one into the Greek yogurt and then plop them on a cooking sheet. (A pizza pan fit better in my freezer, so that’s what I used.) It’s a very cathartic process – dipping the blueberries. One small carton of blueberries used up the small tub of yogurt almost perfectly.
Stick the finished pan full of yogurt covered blueberries in the freezer. I checked mine after about an hour and a half and they were 97% finished up. Only the ones where I got a little enthusiastic with yogurt – those weren’t all the way frozen. No big deal though, I plucked them all off the pan and put them into one sandwich Ziploc…then stuck the Ziploc back in the freezer. They come off the pan very easily, so no worries there!
I’m now enjoying a handful as I type. Very tasty and a great snack for  any occasion…including lack of occasion. Like today. A Sunday afternoon where you need something to make you smile. These will do the trick. Enjoy!


%d bloggers like this: