Tag Archives: Chocolate

Oatmeal Chocolate No-Bake Cookies

15 Apr

Before I jump into this post about cookies that will knock your socks off…wanted to hint that we’re getting VERY close to another giveaway post. I’ll provide all of the details in my 60th post so everyone is aware of what’s IN said giveaway of treats and what level of excitement they should have (aka high excitement or HIGH EXCITEMENT). Being eligible to win the giveaway box o’ treats is super simple, you just need to be a follower of the blog. That means, you clicked the button in the upper right of the homepage to “follow”, confirmed you’re “following” via the email notification you received and now get lovely emails each time I post. I think it would be great fun to have two winners this time around, so your chances to win are even better than last time!

So if you’re not already a follower of the blog but you enjoy getting baked goods in the mail and enjoy the occasional blog post from me, now is time to make things official.

More details to come in my next post!

Enough with giveaways, let’s get to the baked goods…

IMG_4567

Ok, so I’m on this no-bake treats kick. Not sure where that came from but no complaints as I’ve discovered a plethora of tasty and SUPER easy recipes to share with you all that you can make in a snap. This particular awesome recipe is one that I think most everyone has had at some point. You may have had one at a past potluck, your 3rd grade classmate’s birthday treat, your coworker brought them in as they’re expecting a baby, I don’t know. (I had my first in Girl Scouts in Elementary School and they were called “monkey poop”…how appetizing)

Regardless, I bet some $ that you’ve had some form of this cookie before and now you shall know how to make it.

This recipe is from my soon-to-be Mother in Law (81 days to go until that’s official…not counting down or anything…) and I cannot articulate to you more clearly than to say that these are GOOD and SO addicting. I had coworkers who ate >5 because once they had their first, they couldn’t stop.

This is your forewarning. You can’t have just one. I don’t know if it’s physically possible. (Nor, do I think it’s that fun to have one and be done. C’mon!) What is it about oatmeal, chocolate and peanut butter that is so hard to resist?! As you recall with my other recent post on a very similar yet very different recipe (no coconut or additional nuts/dried fruit additions in these cookies) for no-bake bars, those are also hard to stop consuming. Ah well, we only live once right?!

So, hold on to your socks as we go through the super simple process of making one of the greatest cookies to grace our world.

Ingredients:

  • 2 cups sugar
  • 1/4 cup cocoa powder
  • 1/4 lb butter (aka 1 stick)
  • 1/2 cup milk
  • 1/2 cup crunchy peanut butter
  • 1 tsp vanilla
  • 1 3/4 – 2 1/2 cups of oats (you’ll need to eyeball it to see if it needs more or less oats…ready below to learn more)

How to Make:

This recipe starts off with the first four ingredients being combined in a medium saucepan over medium heat. So in goes the sugar…

IMG_4554

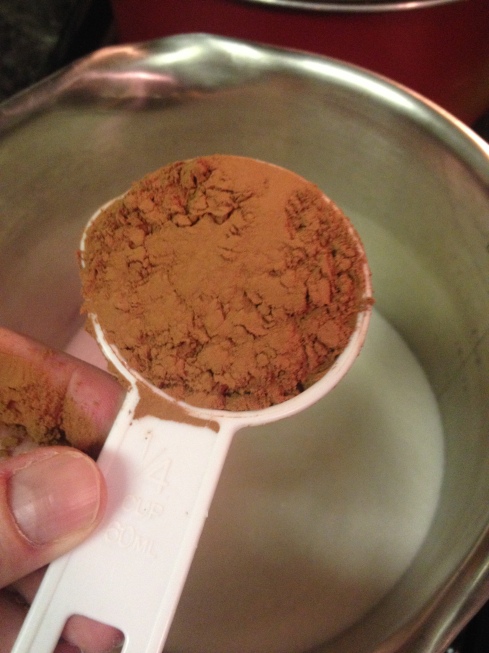
…cocoa powder (thought I’m sure you’re more neat than I was)…

IMG_4555

…butter…(I recommend slicing the butter into smaller chunks to aid in the melting process)…

IMG_4556

…and milk. Bring this mixture to a boil for 3 minutes, stirring constantly. You don’t want that sugar to burn!

IMG_4557

Once your 3 minutes are up, take off the heat and add in the peanut butter. Crunchy PB is the best as it gives the cookie not only a little crunch but also texture. Highly recommend, friends. (I failed to photography the PB going in…fail…but it’s in there!)

IMG_4558

After the PB comes the vanilla. Stir everything up to incorporate fully.

IMG_4559

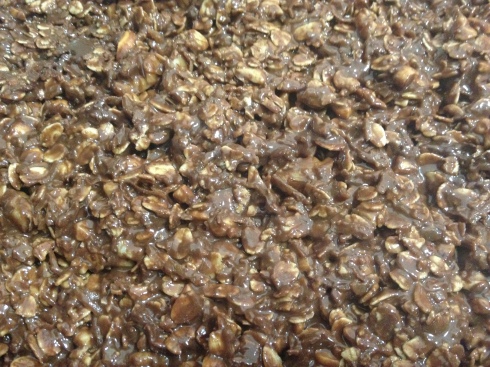
Now, the oatmeal. Start off with 1 1/2 cups of oats and then add more, up to 2 cups, to reach the consistency you’re looking for. If the mixture seems too soupy, add more oats. Keep adding until the mixture doesn’t seem to be too soupy. Check out the pictures below if you’re uncertain what level of soupiness is okay and what means more oats.

IMG_4560

Mix everything really well before you begin scooping!

IMG_4561

I have found a new use for my ice cream scoop…perhaps I’m late the game everyone was already playing…but the ice cream scoop is perfect for grabbing cookie batter. PERFECT I tell you! However, before you begin your scooping, lay out wax paper on your counter-top.

IMG_4562

Now, scoop each cookie and plop on to the wax paper to harden. Be sure to leave space between each cookie! This will harden up really fast and are actually insanely delicious when they’re still somewhat moist and falling apart. So if you test one out too soon, it won’t be bad. I promise.

IMG_4563

Once these set (I checked mine after 30 minutes and they were all hard), you can store in Tupperware or feed to hungry humans nearby!

IMG_4564

Enjoy friends!!

And stay tuned for giveaway box details in the next post!!

Oatmeal Chocolate No-Bake Bars

5 Apr

Okay my friends, are you looking for a sweet treat (for a Final Four party perhaps?) that doesn’t take you long to pull together and doesn’t completely throw you off of your “eating-healthy” plan? Something sweet enough to truly make you want to have two but won’t make you feel guilty about eating “bad”?

IMG_4437


You have found the perfect treat!! Plus, these are truly DELICIOUS! There’s a subtle coconut flavor (which can be replaced if you so choose…so sad for you if so) , peanut-buttery goodness and the typical amazing concoction of oatmeal and chocolate to contend with. You cannot NOT like these. I challenge you!

Found these bad boys on Pinterest and featured on the Money Saving Mom blog and wanted to give them a try. I’ve had something similar (which will be shared in a future blog post) from my future mother-in-law – she makes the BEST no-bake oatmeal chocolate cookies. These are similar but slightly different with a coconut spin and are in bar form. You can also customize these guys to be however you’d like with dried fruit and nuts. And if you’re not into coconut, you can leave that out!

And I don’t know why I keep referring to them as ‘guys’, apparently these bars are male?!? Ha anyways, I digress…

Ingredients:

  • 1 c. peanut butter
  • 1/2 c. honey
  • 1/2 c. coconut oil
  • 2 c. old fashioned oats
  • 1 c. shredded coconut (if you’re anti-coconut, I swear this consistency isn’t too weird…my anti-coconut fiance loved it!)
  • 1/2 c. chopped walnuts (insert in here any nut you choose OR dried fruit)
  • 1 1/4 c. dark chocolate chips
  • 1 tsp vanilla extract

How to Make:

Prepare yourself for the easiest bar making on the planet! No need for an oven, you just need a stove top. That’s it!

First, you’re going to melt together the first three ingredients. The cup of peanut butter…

IMG_4412

…the 1/2 cup of honey…

IMG_4413

…the 1/2 cup of coconut oil (butter works too if you don’t have coconut oil on hand).

IMG_4414

Melt all of the ingredients together but stirring over medium to low heat. Once thoroughly warmed and mixed, turn down to low and grab another bowl for mixing the remaining ingredients.

IMG_4415

Measure out 2 cups of oats…

IMG_4416

…a cup of shredded coconut (or another dried fruit if you’re REALLY anti-coconut)…

IMG_4417

…the 1/2 cup of chopped walnuts (or another chopped nut of choice)…

IMG_4421

…the 1 and 1/4 cup of dark chocolate chips…a few may escape and end up consumed, it happens…

IMG_4420

…and the teaspoon of vanilla extract.

IMG_4422

Mix all of these dry ingredients up and then slowly pour in your melted warm ingredients on top. Stir, stir, stir! You need to thoroughly coat everything!

IMG_4427


IMG_4428

Then, pour into a greased 9×13 baking pan (higher sides would be better) and spread as evenly as you can on the bottom.

IMG_4430

IMG_4431

Then pop this into the fridge until it hardens! Ours was ready to go in about an hour or so, but just keep checking in on it to see if it’s ready to go! Then, slice these up with a sharp knife and serve ’em up to your favorite people…or if you desire after having one, hoard them for yourself 😉

IMG_4433

IMG_4434

IMG_4435

Regardless, these are delicious, addicting and you really can’t feel too terribly bad about having a treat or two of these.

Enjoy!!

Brownie Roll-out Cookies

26 Jan

IMG_4239

So being home for the weekend means more often than not, when bored and not sure what to do with myself…I end up in the kitchen trying something new. I wanted to do some true baking this weekend, as in recent weeks it’s been more about cooking than baking. What to try…what to try…

I opened up my Smitten Kitchen cookbook for inspiration, as I remembered many a glossy page with cookies and breads on them. I wasn’t disappointed when I turned to this page with these little guys.

IMG_4205

Brownie roll-out cookies is what she called them (here’s her original blog post with the recipe), but essentially they’re chewy chocolate sugar cookies.

I accept! Nothing about that description sounds bad to me! Bonus, I had everything needed in my kitchen. That’s usually what sells me on a recipe that I begin to tackle after 9:30 at night. Call me lazy but it’s crazy cold outside and I didn’t feel like a late night trip to Lunds.

So, this whole recipe is incredibly simple and doesn’t take a lot of time for mixing/cooking. However, do note that this requires the dough to chill for an hour before baking, so factor that into your baking plan of attack. I also didn’t switch up the recipe at all, loved it just the way she wrote it! However, I did add my own finishing touch at the end, which you’ll just have to read about to find out what that was…

Ready to make some VERY tasty and VERY pretty little cookies? I sure hope you said yes, because I’m planning to tell you anyway.

Ingredients (makes approximately 24 cookies):

  • 3 cups all-purpose flour
  • 1/2 teaspoon salt
  • 1/2 teaspoon baking powder
  • 2 sticks unsalted butter, softened
  • 1 1/2 cups sugar
  • 2 large eggs
  • 1 teaspoon vanilla extract
  • 2/3 cup unsweetened cocoa
  • powdered sugar for dusting the tops

How to Make:

Nothing to this recipe! First things first (after pre-heating the oven to 350), mix up the flour…

IMG_4207

…cocoa…

IMG_4208

…salt…

IMG_4209

…and baking powder.

IMG_4210

Whisk all of these items together and then set aside.

IMG_4211

Now, soften the butter (if you haven’t had it set out to soften in advance, which I never do) for a bit in the microwave and then mix the butter and sugar together using your mixer of choice.

IMG_4212

IMG_4213
IMG_4214

You’ll want it to be light yellow and fluffy. That’s the green light that you’re ready to add the eggs, one at a time.

IMG_4215
Mix that all in and then add in the vanilla. Use a spatula to scrap down the sides if the liquid starts to creep up the sides at all.

IMG_4222

IMG_4224

Last, gradually add in the dry ingredients, a bit at a time. I was a bit aggressive and ended up breathing in puffs of chocolate flour dust quite a bit. I do not recommend that situation so be gentle when adding your dry ingredients. Trust me. And also…the dough will get very thick, forewarning.

IMG_4225

IMG_4226

Grab some plastic wrap and lay the batter on the plastic wrap and then wrap up all of the dough, nice and tight. Then set that in the fridge for an hour to chill. Turn on some tunes, do the dishes…or turn on some Netflix, don’t the dishes..regardless do something to pass the hour!

Then, time to roll out the dough. This works best on a floured surface and with a floured-up rolling-pin. I use a cutting board for rolling out dough and as it’s small, I did this in batches. You’ll have to modify your method based on what amount of counter space/cutting board space you have. And no fear with the white flour speckles being on the dough, you can rub them off with your fingers and any smudges that remain should bake off in the oven.

IMG_4230

These cookies are best with some thickness – aim for between 1/8 and 1/4 inch thick. Use whatever fun cookie cutter you’d like! I thought it’d be fun to make these look like wafer cookies, so I used a cookie cutter with a flowing edge. I loved the way they turned out! Reminded me of the cookies that are on either side of an ice cream sandwich (which then had me thinking THAT would be a good experiment. I shall report back on how that experiment goes!).


IMG_4231
But back to cookies. Place parchment paper on cookies sheets and give them a good spray with Pam. Then set your cut-out cookies on the parchment paper, nicely spaced out. These get baked for 8-11 minutes, the thinner cookies will be closer to 8 minutes and the thicker ones closer to 11 minutes.

IMG_4233

When they’re done you’ll have firm edges and a softer center. Perfect cookie!

IMG_4239

Set them out to cool, though you must sneak one just to be sure they’re done. It’s the job of the baker!

IMG_4245

Now, my addition to this original recipe of Smitten Kitchen’s is to dust the tops with powdered sugar. It gives the perfect amount of sweetness as I thought the cookies themselves needed just a little something extra. Powdered sugar does the trick!

IMG_4249

You’ll love these, chewy, delicious chocolate and the sweetness of the powdered sugar make these a cookie I’m definitely going to make them again.

IMG_4250

Hope you all enjoy these as much as I did! I’m bringing most of the batch down to the team in Texas this week, I hope you share your batch with a good group of folks too!

Chocolate Muffins (with a Healthy Spin)

4 Aug

IMG_3254

A few facts to preface this post. Fact #1: I thoroughly enjoy chocolate. Fact #2: I thoroughly enjoy muffins, cakes, cookies etc. However, maybe like some of you, Fact #3, my metabolism no longer allows me to consume these items as much as I’d like without some consequences. Which…is unfortunate.

Thus – I was on Pinterest one day trying to find some healthier (note not healthy…health-IER) recipes and found this little gem. There’s no flour involved – there’s applesauce and plain greek yogurt that help to keep the muffins together AND keep them moist. I was intrigued enough to give these a try.

Also, Fact #4 – my boyfriend Luke has quite an affinity for baked goods that come from my kitchen. So like most treats I make, the plan was to make a big batch, have a few myself and then feed the rest to Luke. Muah hahaha.

(He has yet to complain so I think it’s a win-win situation for both of us.)

Thus, another episode of Thursday evening baking happened this last week and the resulting muffins were quite delicious. I highly recommend!

I will say I changed up the recipe a bit because of the ingredients I had available. I’ve linked to the recipe I based these off of (and the blog post about that recipe links to the original recipe too) above for those who want to try the full-on healthier version or you can follow what I used below. I trust both will work out nicely for you. And regardless, you end up with chocolate muffins. 🙂

Recipe makes about 24 small muffins or 12 larger muffins.

Ingredients:

  • 1 3/4 cup of oats
  • 3 egg whites
  • 3/4 cup cocoa powder (the recipe calls for unsweetened cocoa but I had cocoa powder on hand so that’s what I used)
  • 1/2 cup applesauce (the recipe calls for unsweetened but I used normal applesauce and they still turned out wonderfully)
  • 1 tsp vanilla extract
  • 1/2 cup plain Greek yogurt
  • 1/2 tsp cream of tartar (or 1-1/2 Tbsp. vinegar)
  • 1-1/2 tsp baking powder
  • 1-1/2 tsp baking soda
  • 1/4 tsp salt
  • 1 cup hot water
  • 1 cup sugar (the recipe calls for a healthy substitute like I cup of Splenda granular OR 1/4 cup + 2 Tbsp stevia but I had none of these options so plain white sugar it was for me)
  • 1/2 cup dark chocolate chips (or whatever other type of chips you’d like!) and an extra 1/4 cup for the muffin tops

How to Make:

Preheat your oven to 350 degrees and grab a blender (or a food processor) as you’ll need no mixer or beaters to clean in this recipe. I know, I know…I was puzzled by this too. But trust me – it works!

Now – if you want smaller muffins for a crowd, this makes 24 muffins (thus you’ll need 2 muffin pans). If you want larger muffins for a smaller crew (1 pan) this makes 12 muffins. I did line my muffin tins but this recipe has a tendency to stick a bit. If you’d these to appear aesthetically pleasing with wrappers off (for any reason) you may want to simply spray the pans with a little Pam. Otherwise, I’m sure those you feed these to will not mind a bit licking of crumbs from the wrapper. I doubt they’ll mind.

Now prepare for this next part…you’re going to mix…

…everything. Ok, not the chocolate chips quite yet, but everything else goes right into the blender.

Yup, you read that right. Everything. Into. The. Blender.

Here we go…

In go the oats…
IMG_3233

…then the egg whites…

IMG_3234

…and applesauce…(note my oat measuring was exceptionally neat and tidy)

IMG_3236

…and then the cocoa (I wasn’t worried that mine was a bit clumpy as the blender would be blending it all together anyway)…

IMG_3237

…and vanilla…

IMG_3238

…and the plain Greek yogurt…

IMG_3239

…and the cream of tartar…and baking powder…and baking soda…

IMG_3241

…and the salt (which I plain forgot to take a photo of, but believe me when I say…it’s in there!)…

IMG_3242

…and the cup of hot water (which causes this fun, little effect)…

IMG_3243

…and then finally, the sugar or your sugar substitute.

IMG_3244

Now blend that concoction until the mixture is smooth (not chunky on the bottom but the same consistency all the way through). I was a bit concerned as the batter seemed to be a bit thin at first. But keep blending until the oats, applesauce and yogurt are consistently blended and that will really help to thicken it up. Trust me!

Now pour into a medium-sized bowl and stir in the 1/2 cup of dark chocolate chips.

IMG_3245

IMG_3246

Then, time to pour into the pans. (I was a wee bit messy at this part so if you have the same problem, just dab the batter spots off the pan with a paper towel. No biggie!)

IMG_3247

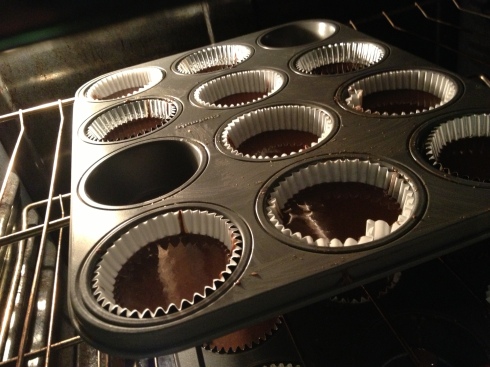
Now the muffins get baked for 10 minutes. Then, pull them out…

IMG_3248

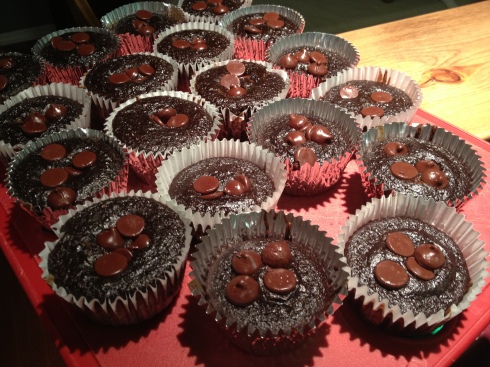
…and drop a few of the chips on the top of each muffin. Add as many as you’d like! Most of mine had about 3-6 chips as dark chocolate chips are bit bigger than the normal chocolate chip.

IMG_3250

Now pop these guys back into the oven for an additional 3-6 minutes, or until a toothpick comes out clean. (I had to pop mine back in for about 8 additional minutes as they were still wet when I tested with a toothpick at 6 minutes. So watch these carefully and don’t worry if they take more than 3-6 minutes. It shouldn’t be TOO much more oven time.)

IMG_3251

Once the toothpick comes out clean from a the center of a few muffins, let them cool for a few minutes in the pan. Then place the muffins on a cooling rack or a cutting board to cool completely.

IMG_3252

IMG_3253

I will share – these are delicious eaten while they’re still warm for the obvious melty-chocolate reason. But they’re also delectable eaten once fully cooled. I let them sit out to cool for a few hours and then kept them stored in Tupperware, separated into layers with some assistance from parchment paper.

IMG_3259

IMG_3260

Feed these to your family, your friends, your significant other or spouse or maybe yourself for a snack. (I had a few snacks the night I made these…couldn’t…help…myself.) They’ll disappear REAL fast…

IMG_3255

IMG_3256

IMG_3257


IMG_3258

Give these a try and let me know if they turn out as delicious for you as they did for me!

IMG_3254

Happy baking!

Knock You Naked Brownies

19 Jul

Yes, that’s the title of this brownie variety. You wouldn’t be surprised why once you sink your teeth into these. Seriously.

This title I can’t take credit for at all. Though it is pretty perfect. This is a Pioneer Woman recipe and she named these so appropriately.

All you must know is these brownies are excellent. You may lose some socks…your right earring…your Twins hat. Who knows.

A friend of mine made these for a camping trip a few months ago, and they were devoured throughout the weekend. A panful of brownies between three of us girls. Not ashamed. I may have had one for breakfast itself one day.

Ingredients:

  • 1 box (18.5 Ounce) German Chocolate Cake Mix (I Used Betty Crocker as that was literally the only brand of German Chocolate cake mix at my grocery store. I had to scan the shelf for an embarrassing length of time)
  • 1 cup Finely Chopped Pecans
  • 1/3 cup Evaporated Milk
  • 1/2 cup Evaporated Milk (to be added at a separate time)
  • 1/2 cup Butter, Melted
  • 60 whole Caramels, Unwrapped (The bag I found had only 50 in the bag, so I sucked it up and bought 2 bags. 60 is better than 50. Right?)
  • 1/3 cup Semi-Sweet Chocolate Chips
  • 1/4 cup Powdered Sugar

How to Make:

Preheat your oven to 350 degrees and  flour a 9 x 9 square pan. My parents taught me, when in doubt, flour the pan. Especially with brownie/cakes. So flour away!

Then grab yourself a big mixing bowl. Mix up the 1/3 cup evaporated milk…

and the cake mix…

…the melted butter…

…and the chopped pecans (I bought the pre-chopped variety…yes…I’m lazy).

The batter will get a little hard to stir and it will be quite tasty. Forewarning.

Now, to make the first layer of the brownies, split up this batter into two equal halves.

Take one half and press that into the bottom of your floured pan. Pop it into the oven for 8-10 minutes. When it’s all done, set it aside to cool for a bit.

Now, time for some double boiler madness! If you’re a double boiler newbie like me, this is setting a glass bowl (or other heatproof bowl) over a saucepan of boiling water. We’re going to melt some caramels.

First though, you get to peel these suckers. Put on some tunes or press play on your favorite show. The unwrapping (which I took at a leisurely pace) took me about 16 minutes.

1 down…

halfway…

DONE.

Once unwrapped, pour the rest of the evaporated milk (the other 1/2 cup) over the caramels in your heatproof bowl. Set it over your saucepan of boiling water and watch the double boiler effect take place. I stirred fairly consistently to get the whole mixture to melt evenly and to avoid burning.

Once it’s liquid gold like, pour that on top of the first baked brownie layer. If needed, help spread out the caramel with a spatula.

Your third layer is going to be the chocolate chips. Sprinkle those over the caramel.

Yes…it’s going to taste good.

And it gets better.

The rest of the brownie batter is now going to go on top of these three layers. The Pioneer Woman suggests flattening out the top brownie layer on a work surface (I used wax paper) into just about the size of the 9×9 pan. Then transfer the batter to the pan.

I’m not a good transfer-er of brownie batter. Not even close.

I transferred pieces of the batter and then kind of made it look normal-ish once it was all in the pan.

I don’t think you can really tell though, right?!? Plus the peek-a-boo caramel is kinda fun, right?? This is what I told myself at least.

Now…this whole concoction is going in the oven for 20-25 minutes. Your kitchen will smell delicious. Try to contain the drool and spend the 20-25 minutes being productive….doing the dishes…eating string cheese…watching ABC Family shows that you can’t share with the world that you watch (Pretty Little Liars…cough, cough). Either way, when it’s ALL cooked through, pull it out of the oven.

You must let this cool before you eat it. Serious. Ideally, cool to room temperature first and then put it into the fridge to harden. I feed a brownie square to my roomie prior to the fridge step and it was kind of a molten pile of goo. It was tasty goo, mind you. But goo. Definitely refrigerate before you cut and serve them.

After a few hours of you pacing in front of your refrigerator…pull ’em out and sprinkle them with powdered sugar. Cut them into squares…serve them to people you really enjoy.

I chose a pool-ful of people who each had two. Didn’t matter that it was hot out and the brownies were a little melty. They were divine.

Now – your turn. Go make yourself some brownies.

Thin Mint Protein Smoothie

29 Jun

Ok, so you know my feelings about mint and chocolate. I’m for their union. All the time. Even in healthy recipes.

This lovely concoction is brought to you today by a wonderful blog I found recently – Rabbit Food For My Bunny Teeth. I posted about it in my Top Five post…in the 2) category. This blog is full of inspiration to eat and just ‘be’ a healthy person. One of my favorites to read everyday.

And yes, I know I just posted a not-so-healthy cookie recipe (though it did include bff’s mint and chocolate), but I actually embrace eating food that’s good for me. You may not believe me. That’s ok. Sometimes I don’t believe me either. Then I eat a cookie.

Back to the smoothie…

This is a great way to jump-start your morning. I didn’t have any coffee today (a rarity) and I was still awake and energized throughout the day. It also is surprisingly sweet (it does taste similar to a Thin Mint!) and extremely filling. All around a win-win.

I didn’t change any part of Catherine’s recipe, so the ingredients list is fully hers. I simply wanted to share it here for you all to also enjoy.

Ingredients:

Smoothie:

  • 1 cup almond milk (never thought I’d be the person buying this…yesterday I was that person)
  • 1 cup frozen spinach (you can also use 2 cups of fresh spinach according to Catherine’s recipe)
  • 1/4 rolled oats
  • 1/8 tsp peppermint extract
  • 2 scoops chocolate protein powder (I used Biggest Loser’s brand, but I think this can be substituted with whatever brand you prefer)

Garnish:

  • 1 Tbsp walnuts
  • 1 Tbsp dark chocolate chips

How to Make:

You can whip this up in about 3 minutes, depending on how close together you store all of the ingredients in your kitchen. I took 5.7 minutes as I had to search for my walnuts in the hall closet. Don’t ask me why I put them there.

First grab your blender and as Catherine recommends for those blenders that are a big challenged (like mine), blend up the milk and frozen spinach first.

Then I dumped in the protein powder…

…and the oats…

and the peppermint extract (the one item that doesn’t really photograph well). Then push the button that says ‘blend’. I let mine go until everything looked fairly smooth, about 23 seconds. Not 22.

Measure out your two ‘garnish’ items and delicately place them on top. They will eventually sink so if you feel the need to photograph your food (who does that?) ensure you have your camera ready to snap a photo of your beautiful beverage.

Dig in with a spoon or sip – either way I think you’ll be surprised how delicious this is and how full you are when you’re finished. At least I was!

Thanks RFFMBT for a great recipe! Now go check out Catherine’s blog for more delicious, healthy recipes!

To print off the recipe for easy reference in the future, click here

Thin Mint Protein Smoothie_Recipe Card

Mint Chocolate Chip Cookies

24 Jun

Mint and chocolate may be the best combination possible. Truly. Well, in my opinion at least.

I found this recipe a few years while flipping through a magazine. There was an advertisement for Betty Crocker sugar cookie mix with this little gem included. I ripped it out and made them immediately. And swooned.

Ok, that’s a bit dramatic, but they are pretty dang great. Betty Crocker knows their stuff. (FYI – I do not know/work for/represent Betty Crocker, I just appreciate this recipe and wanted to share it with you all.)

The best part – because you’re using a sugar cookie mix, these are ALWAYS chewy. No crunchy hard cookie nonsense. If you are into that sort of thing, this recipe isn’t for you. But…if you enjoy a wonderfully, chewy cookie…YOU, my friend, are in luck.

Also another bonus, there is a very simple ingredient list.

Ingredients (Makes approximately 36 cookies):

  • 1 pouch (1 lb 1.5 oz) sugar cookie mix (I use Betty Crocker brand, but if you have a different preferred brand I’m sure it’d work just as great.)
  • 1/2 cup butter or margarine, softened
  • 1/4 to 1/2 teaspoon mint extract (I’ve been told by even those who love mint, error on the side of the 1/4 tsp as these can get a little too minty otherwise.)
  • 6 to 8 drops green food color (I used about 6, which gets them a nice, pale green. If you want a heartier green, be a bit more aggressive with your drop quantities.)
  • 1 egg
  • 1 cup creme de menthe baking chips (I’ve used Andes mints roughly chopped before and they’re delicious. This time I used mint chocolate chips, which are a bit more subtle. Also tasty.)
  • 1 cup semisweet chocolate chunks (I used semisweet chocolate chips, but as long as there is a chocolate shape of some sort in there, I think you’re ok.)

How to Make: 

Preheat your oven to 350. Then, throw everything except the two types of chocolate chips into a bowl and mix thoroughly.

The green food coloring is the perfect indicator of when you’re done with the ‘thoroughly mixing’ piece.

Very helpful.

Then gently fold in the two types of chips until it looks very consistently ‘chippy’. You know what I mean.

Like this.

You may want to take time at this moment to taste the batter. You know, just in case. And yes, I know there’s raw egg in there. Be a daredevil. (But don’t get sick or I’ll feel terrible.)

I always spray my cookie sheets with Pam, although this recipe recommends using an ungreased cookie sheet. If you’re into that – go for it. Then, using the method you like best, place these guys on a 9×13 cookie sheet. (I think using your hands is always the best method but that’s me.)

I put these in a 3×4 pattern which worked perfectly.

Pop ’em in the oven for 8-10 minutes (These always seem to be done at about that 8 minute mark, so watch carefully!)

Cool them for a bit…


…pour a glass of milk…find hungry people…ENJOY!