Flavored Vodka

30 Jul

Upload May 28, 2013 916

Well, I think it’s about time the blogging break ended. I lost the urge to write these posts a few months back and I didn’t want to put forth blog posts that lacked enthusiasm or fun topics…both I feared if I was blogging just to blog. But the last month I’ve been getting that creative bug back and tonight I decided enough was enough. I’m back! How often I’ll post after this, who knows. But I’ll put a few out there whenever I can because creating this little blog has actually been loads of fun. And that’s what it’s about after all, right?

So, this idea came to me as I was thinking of creative gifts at Christmas time. (Yes, this is a post I meant to write months ago. Sincere apologies.) I thought it would be fun to create something that was part food, part craft and my Real Simple magazine inspired the mash-up of the two – flavored vodkas.

Truly, I thought flavoring your own vodka must be a cumbersome task. Would take lots of time, blood, sweat and tears (though read on and some of that happened by mistake.)

Boy was I wrong.

This is amazingly simple and I think you’ll want to give it a try once you see just how easy it is. These also DO make great gifts and show that yes, you can come up with a creative, out-of-the-box gift and impress your family and friends. Or, dang it, you can make these for your own enjoyment! Everyone loves a good libation now and then.

I decided to make three different varieties and followed Real Simples’ suggestions for amounts. I’ve added in my own notes below for those who’d like to give these a go.

Side note – there is an entertaining story buried below which includes a forewarning. If you read on I can assure you a slight giggle, chuckle, chortle, or whatever sort of laugh sounds you make. 

Ingredients/Supplies:

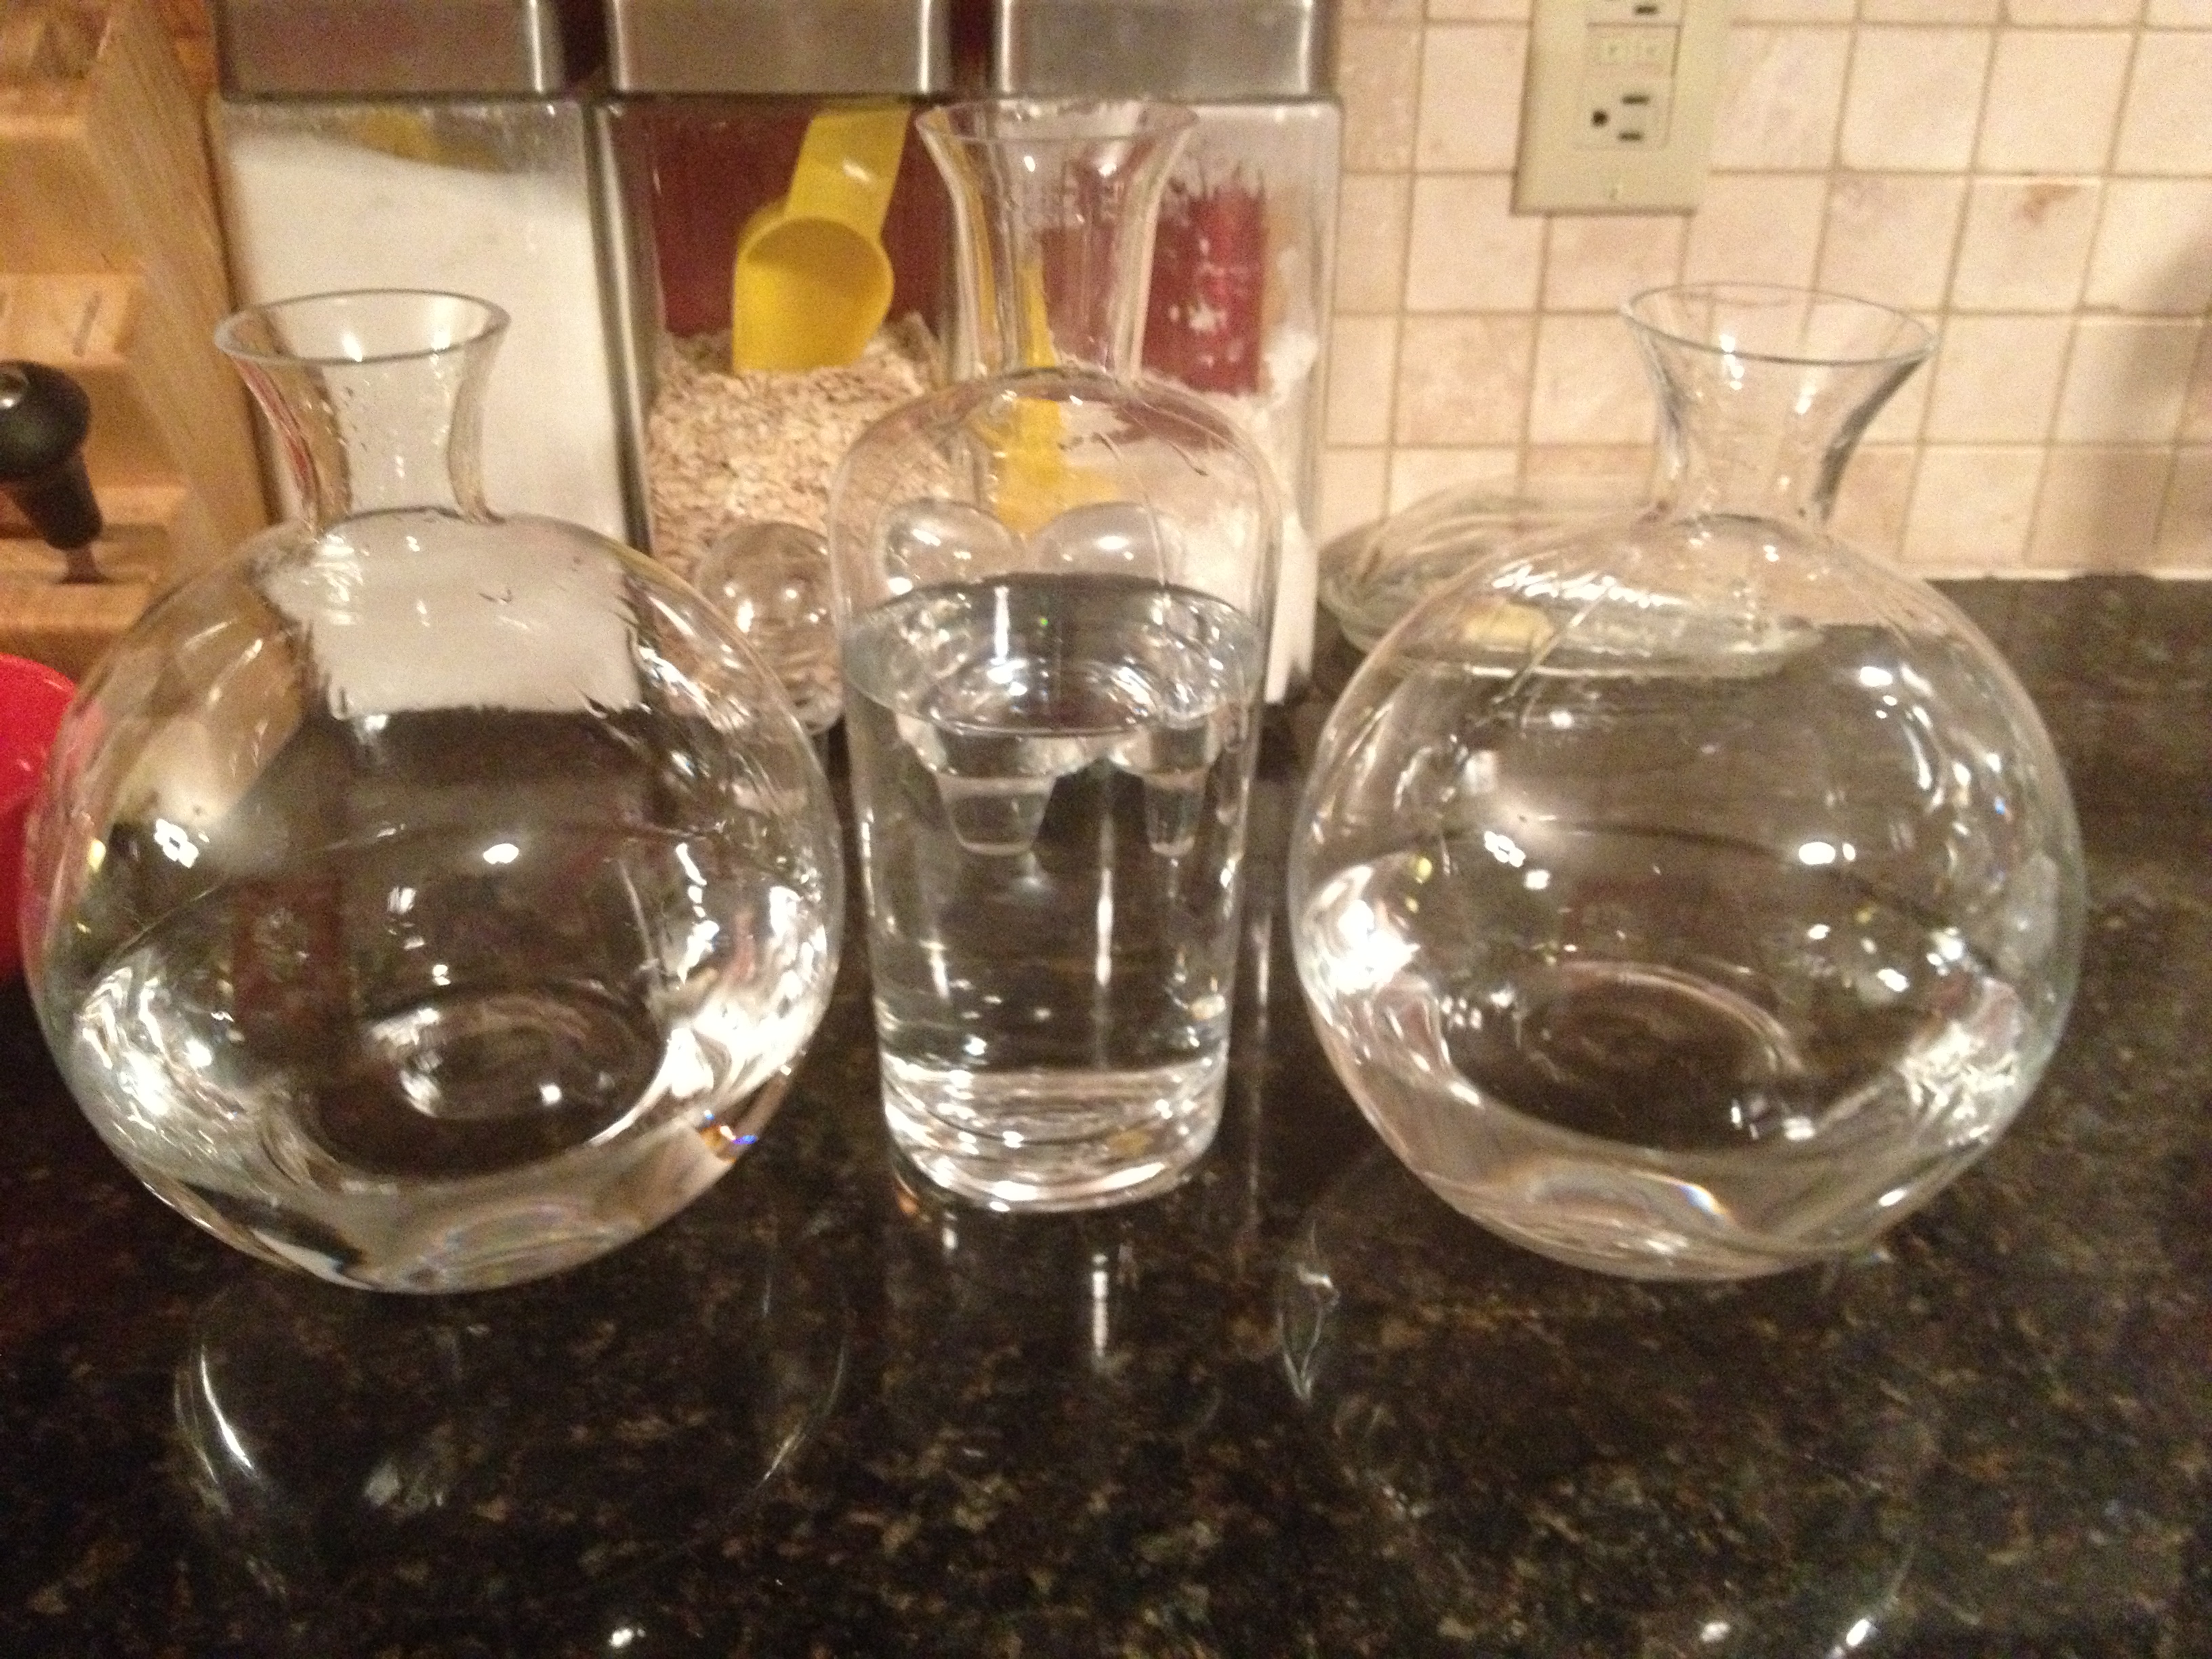
  • For each flavored vodka you decide to make, you’ll need a large, clear vessel with a stopper. I found some fun shaped ones at good ole’ Target and they worked perfectly and they were very affordable.
  • Wooden tags, so you can let your recipients know what flavor their wonderful booze contains. Although I found mine at a little boutique, you could likely find these at any craft store.
  • Twine to tie on your tags
  • Felt pen or permanent marker to label your tags with
  • 1 liter of plain, unflavored Vodka. I split this 3 ways to make the three vodkas below. You can make 1 liter of all one flavor or use 1/3 of a liter for each, whatever floats your boat

Pineapple Vodka:

  • 1.5 cups of fresh pineapple chunks

Vanilla Vodka:

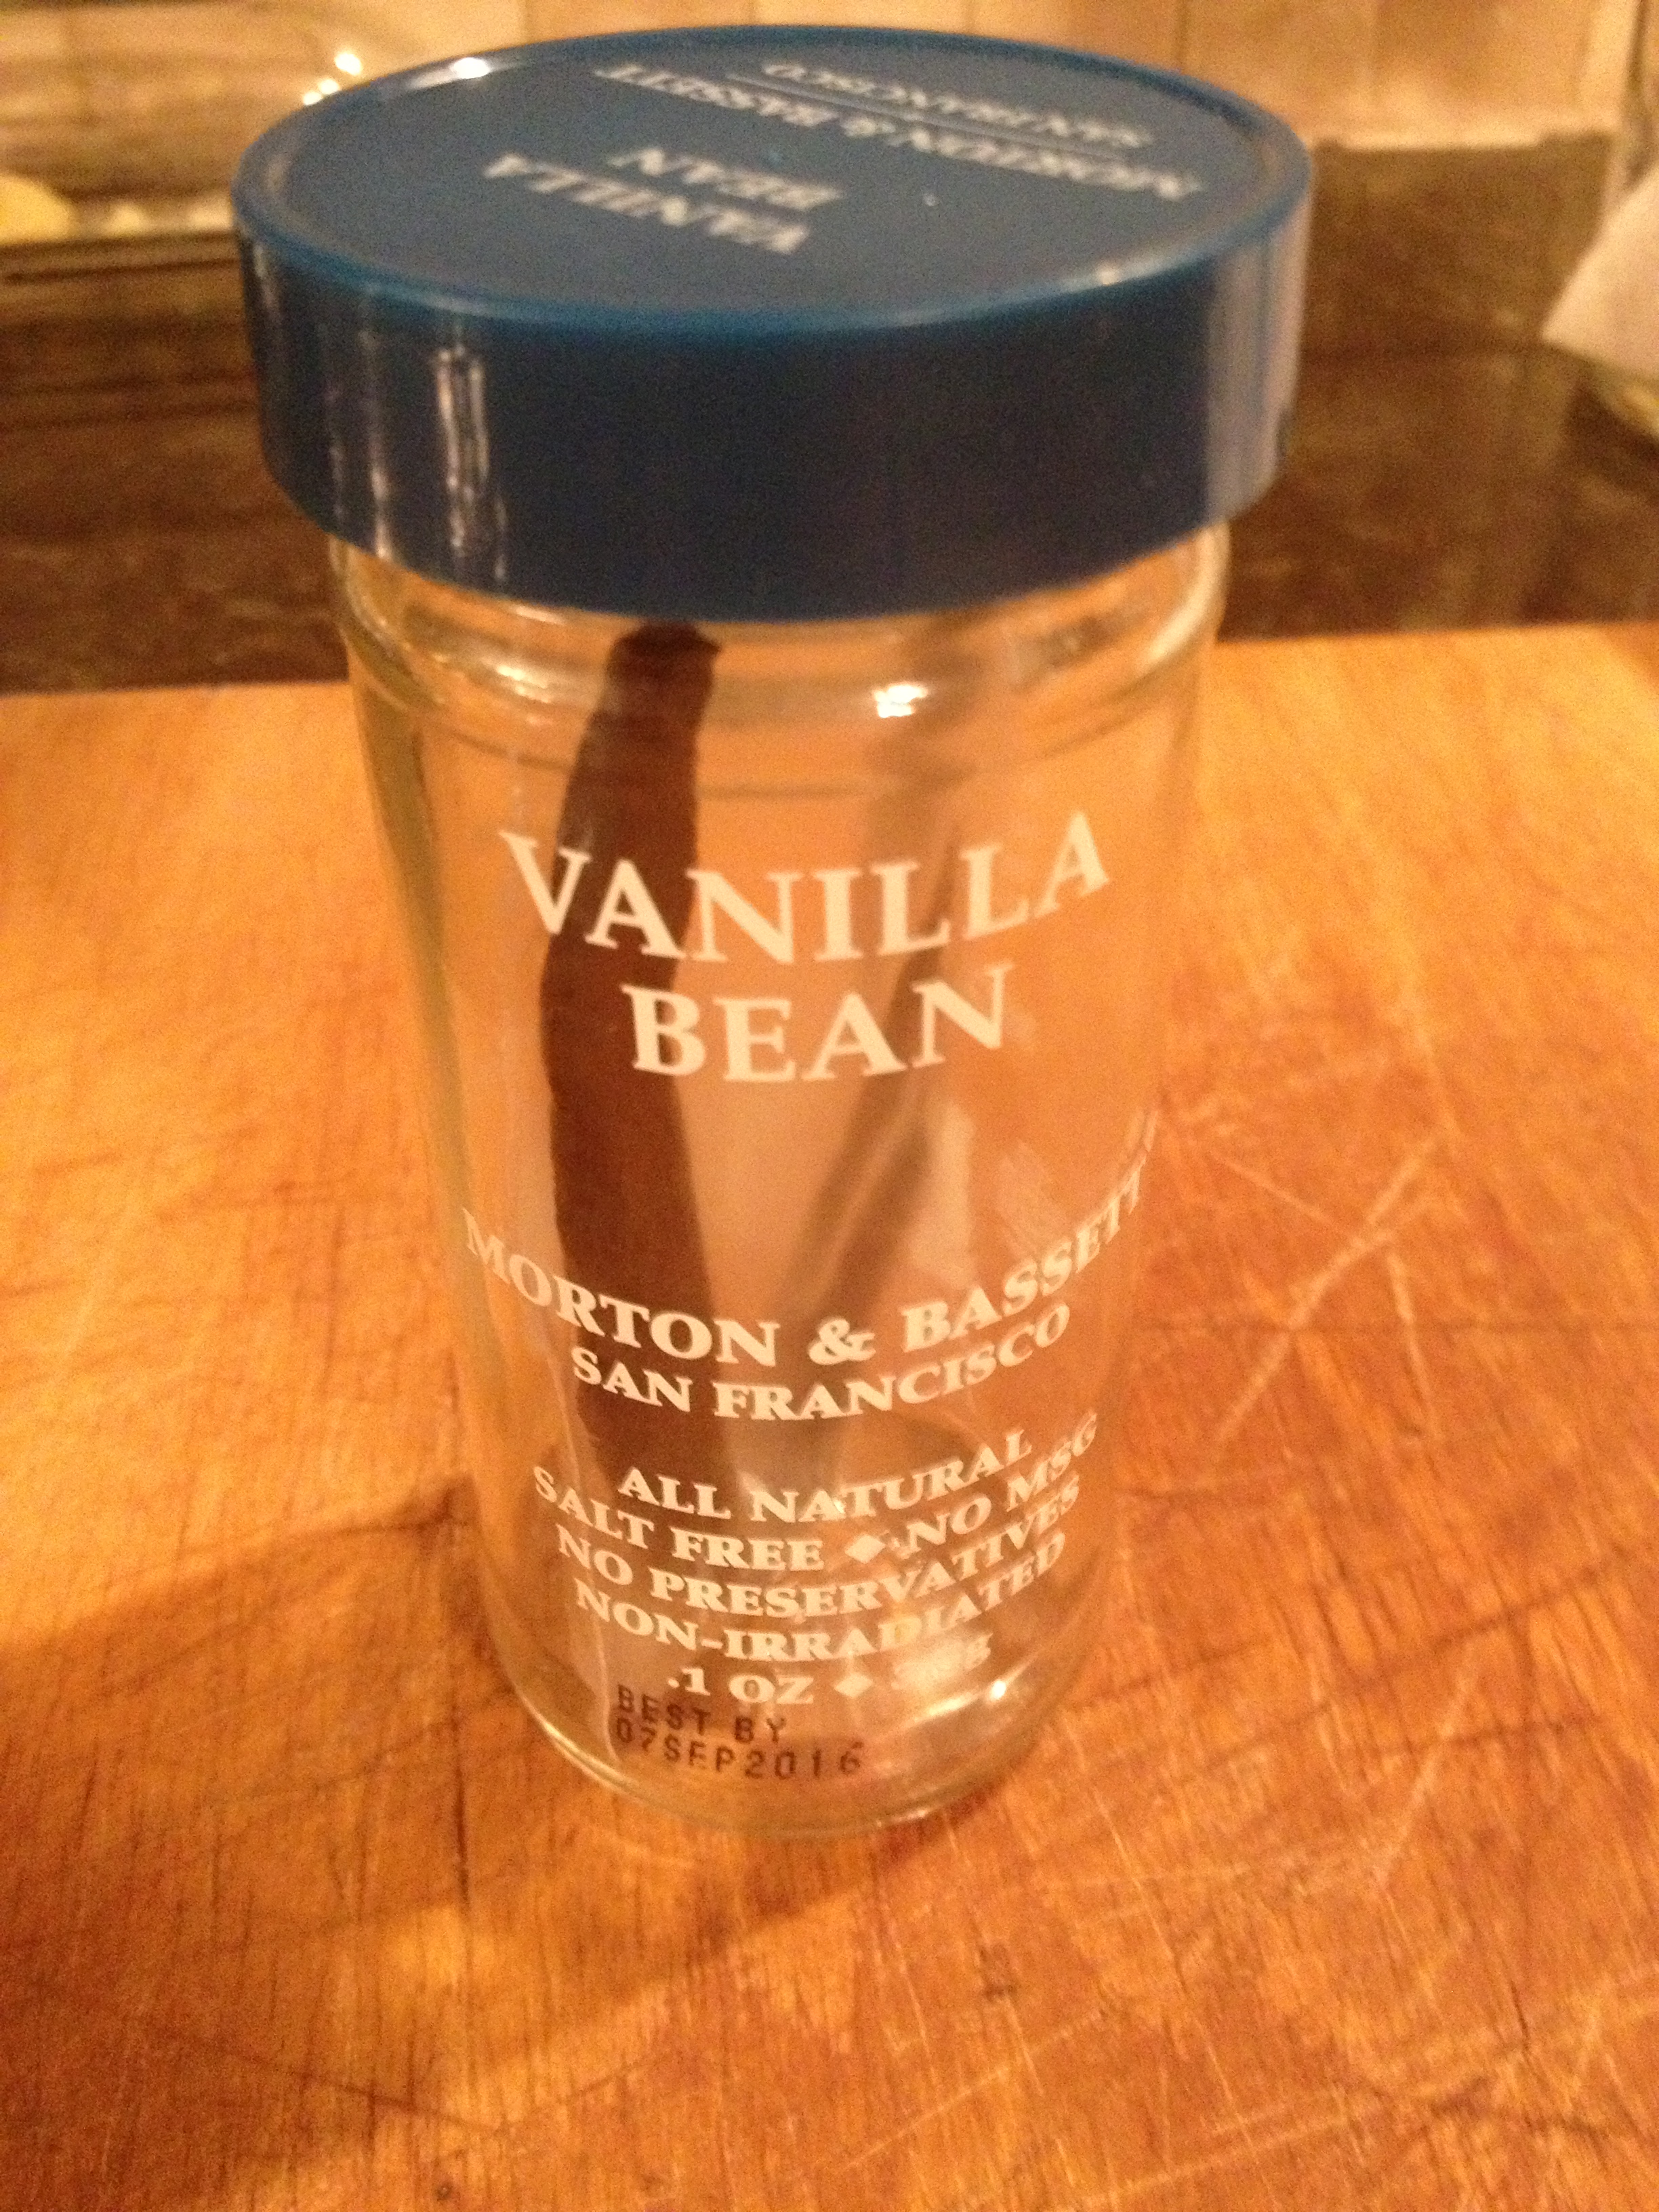
  • 4-5 vanilla beans, sliced open

Jalapeño Vodka:

  • 3 halved and seeded jalapeños** (I would go towards the milder jalapeño vs. a spicier pepper)

How to Make:

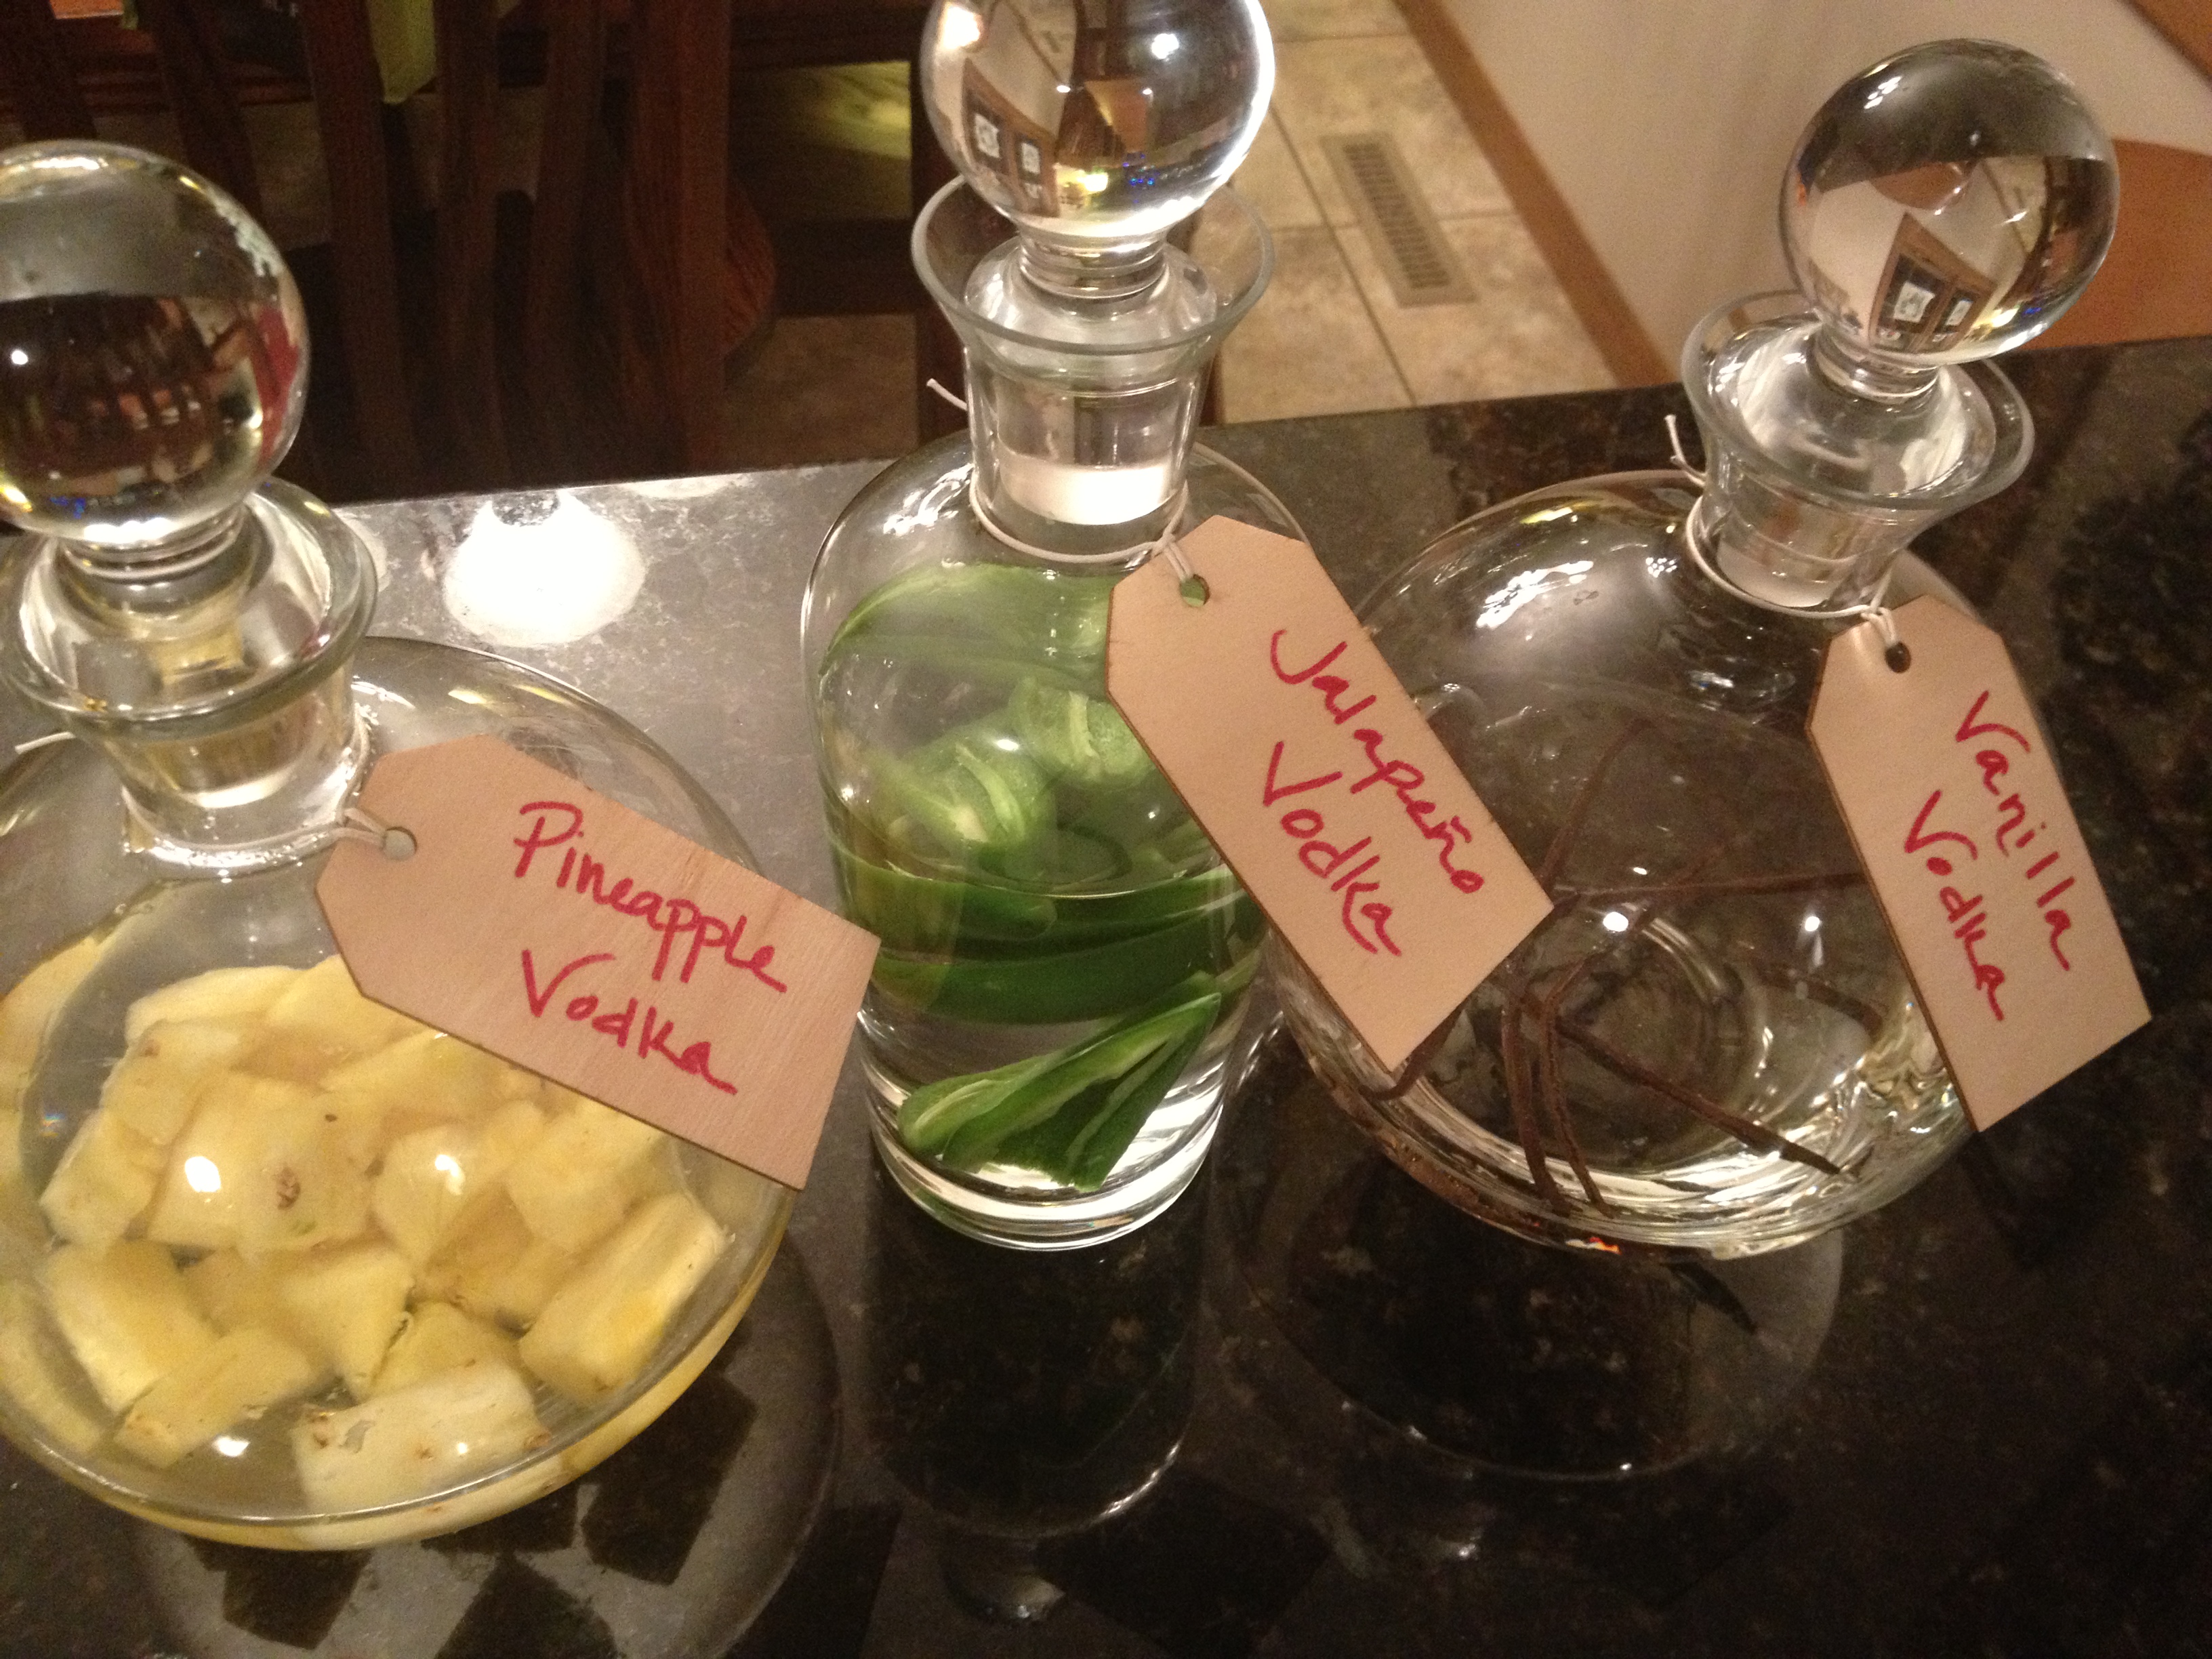
First things first – wash our your clear vessels with hot, soapy water and dry them. After you decide how many flavored vodkas you’re hankering to make, split the plain vodka up amongst your clear vessels. Here are the three I chose to use:

Upload May 28, 2013 904

Next you’ll need to prepare the flavor mix-ins of your choosing.

For the vanilla vodka, I wanted a fairly sweet and intense flavor so I sliced open the vanilla beans a bit to enhance the saturation level. If you’d rather go for subtle flavor, I’d throw in just the plain vanilla beans. Recommend 4-5 beans.

Upload May 28, 2013 906

For the pineapple vodka, chop up the pineapple into nicely sized chunks. Think large, edible chunks (size wise). I highly recommend using fresh pineapple if you can.

Upload May 28, 2013 911

And for the jalapeño vodka, just slice the jalapeños in half, de-seed them with a sharp knife and drop them into the vodka.

**However…please read the below cautionary tale. Wash your hands once you’ve finished chopping!

Upload May 28, 2013 912

Once all of your mix-ins have been added, put your vessel stoppers and ensure they’re snug. As Real Simple noted, you’ll want tight seals. If you’re putting this into a gift basket or anything, I can also add some cling wrap to ensure your stoppers stay in place.

Upload May 28, 2013 914

You can either refrigerate these right away or you can give to your gift recipients right away and let them know that THEY will want to refrigerate these. You need time for the flavors to infuse! The recommended time is 3 days to 1 week in the fridge. Once it’s been a week, you’ll want to remove, or instruct your recipient to remove the flavoring mix-ins.

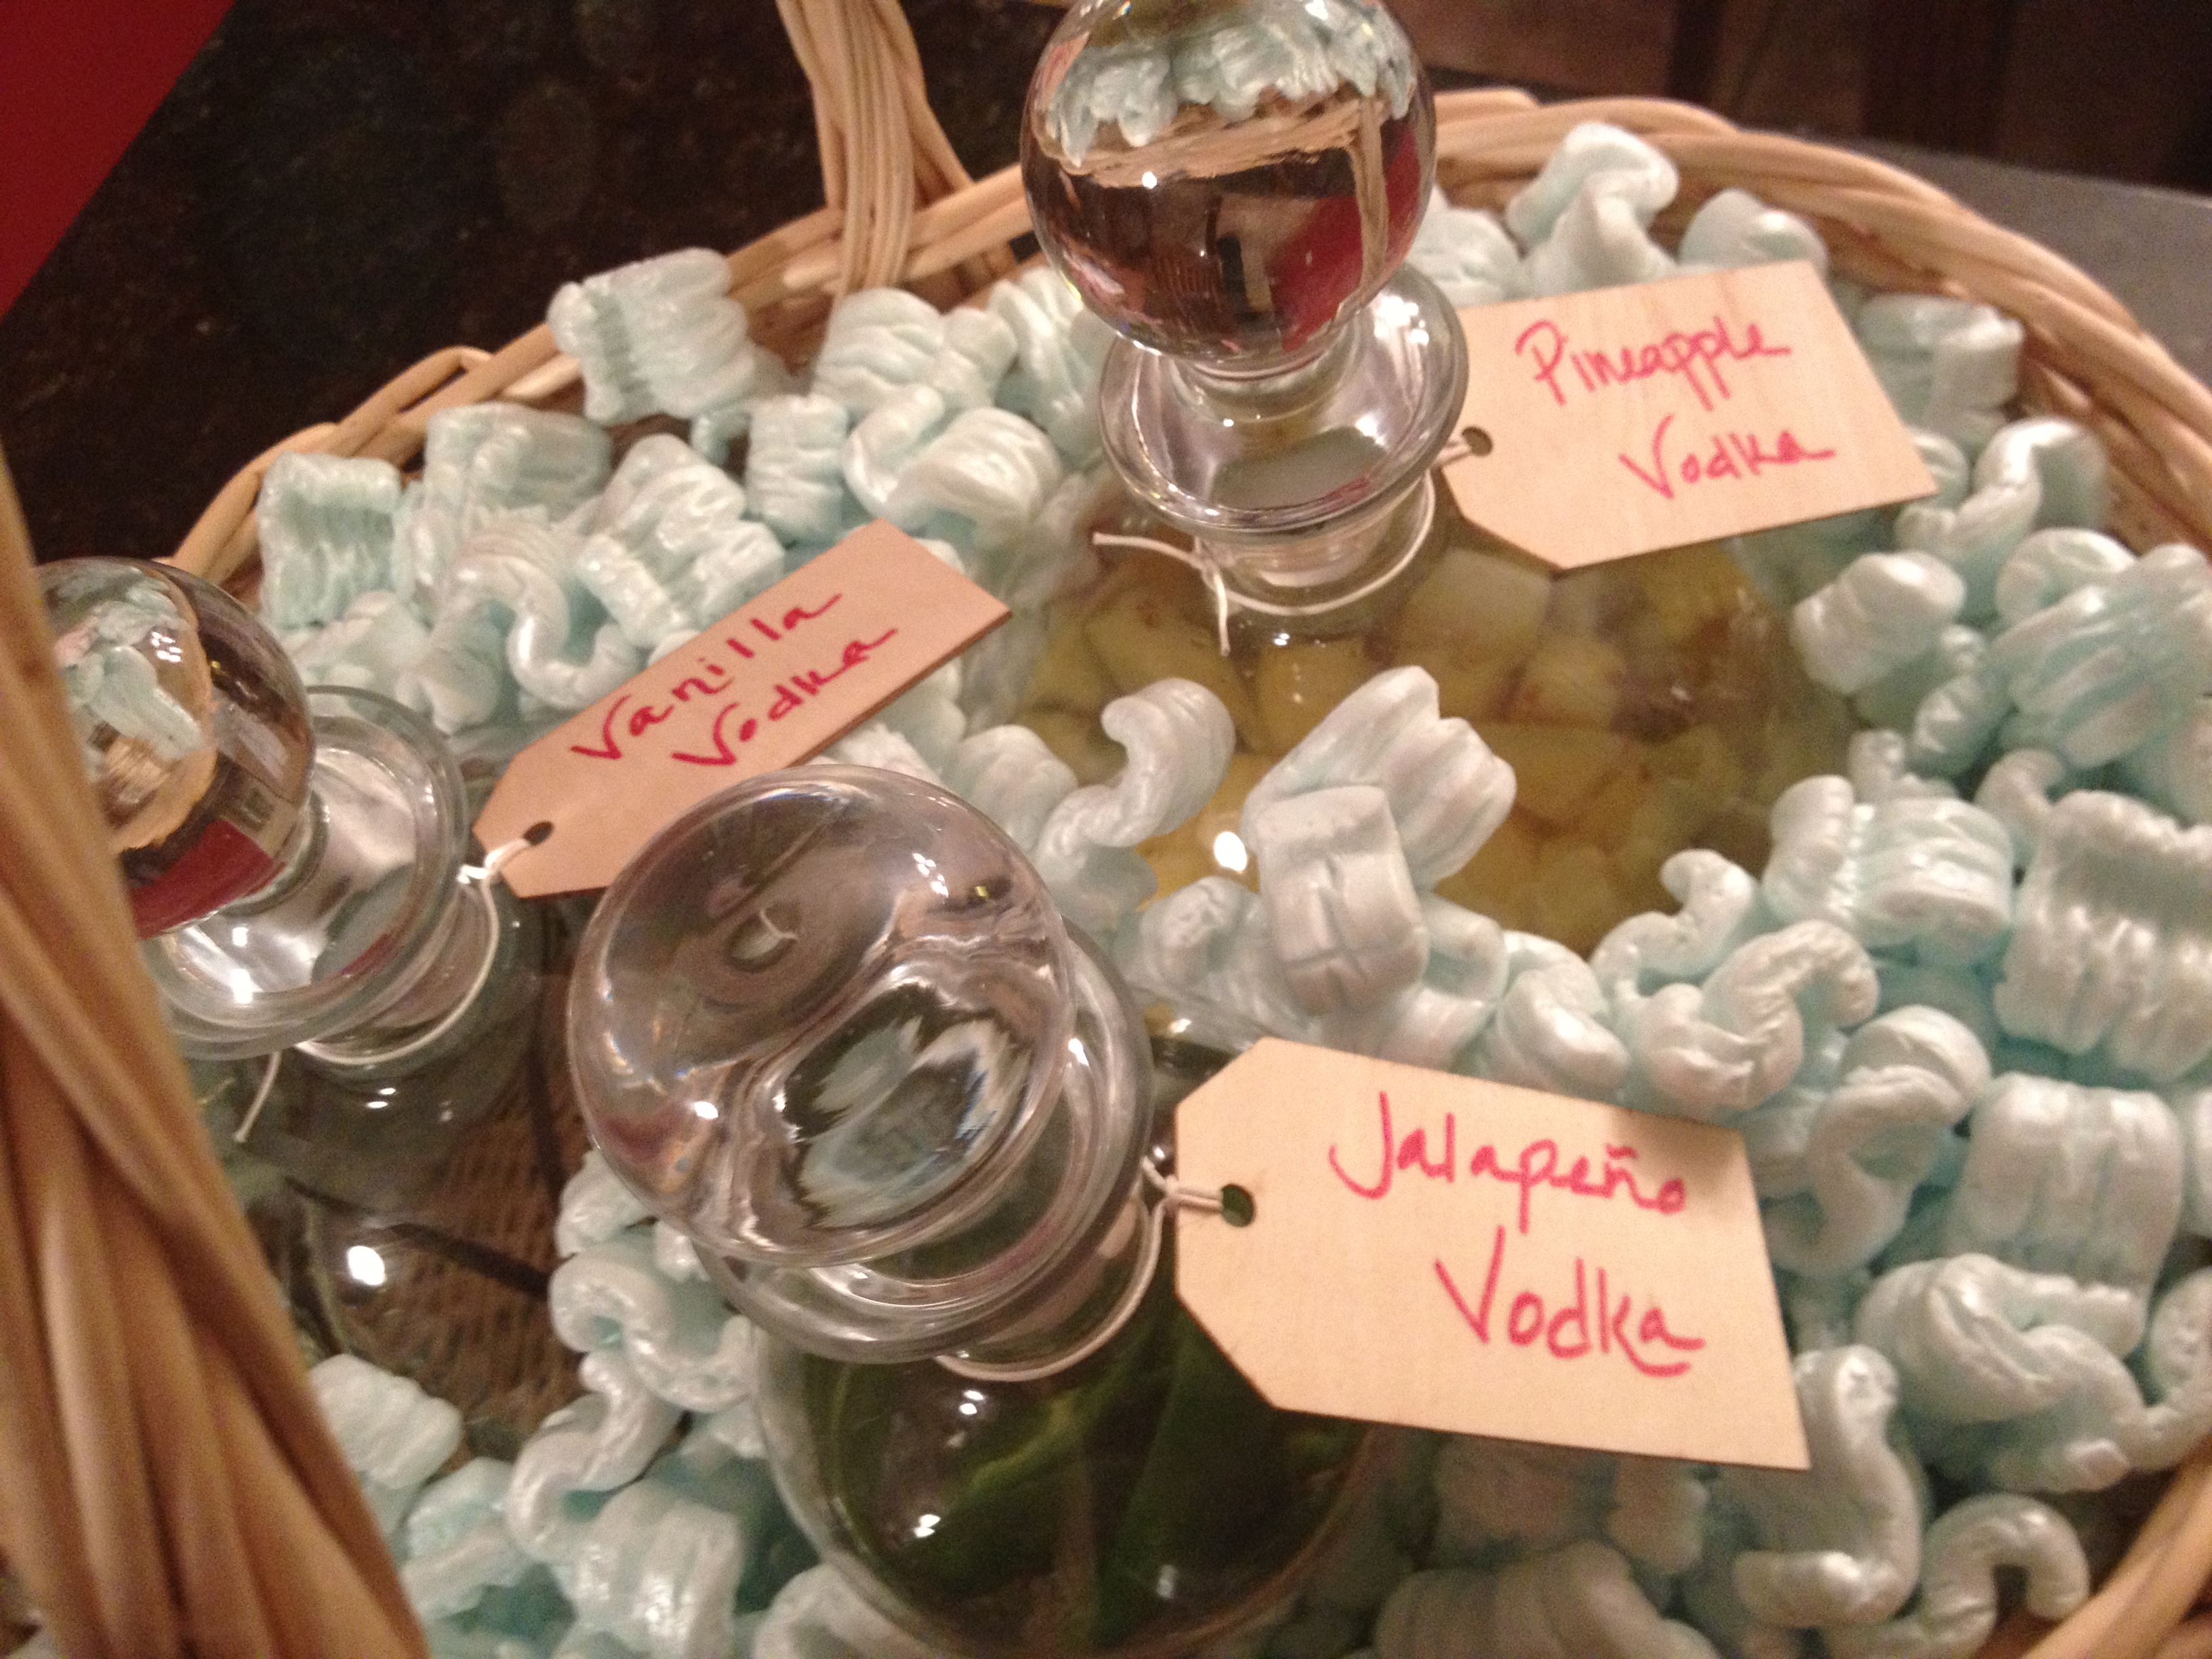
Wrap your twine around the neck of the bottles, add your flavor label to the gift tags and instructions for infuse time and a reminder to remove your mix-ins.

Supposedly, these will be not so good once you reach the 2 month mark but hopefully, they’re so tasty that they are consumed LONG before that 2 month mark arrives. However, to be safe, I would recommend noting the 2 month expiration date for anyone you give this to.

Tie the tags on, wrap up your vodkas or stick them in a basket and voila! A neat, homemade gift that will be a delicious addition to any fun libation.

Upload May 28, 2013 916

Upload May 28, 2013 917

Enjoy!

** So the story I must share with you for both humor and warning is this…I made the pineapple and vanilla vodkas and had turned to my jalapeño vodka to finish up with. I sliced those babies up and placed them in the bottle of vodka, closed up the stopper and thought I was done, as I reached up and gave my cheek a little scratch and rubbed my nose. Can’t explain why, my face must have itched. Well…within about 10 seconds, my face started to really itch. Then burn. I wiped my face with the side of hand, wondering what the heck was happening. My nostrils started to burn, as in, REALLY BURN. I started to sneeze. Then it hit me…I had rubbed jalapeño juice ALL OVER the bottom portion of my face.

Ran over to the sink to flush my face with ice-cold water. Let me tell you, that does NOT work.

At this point I was becoming quite vocal about my extreme discomfort to my family who was sitting in the vicinity and was initially completely perplexed at my commentary until I shared the idiocy of the jalapeño –> jalapeño juice –> face situation. All of which was explained while taking breaths between submerging my face in water. While trying to not laugh (not all were successful at this), they started to quickly Google solutions.

At this point I was starting to whine, laugh, cry, sniffle, sneeze all at the same time. While continuing with my face-dunking in the cold water. My face now felt like it had the worst sunburn on the planet and someone had then taken a hot iron to my skin. I was not in a happy place my friends. An absurd, uncomfortable place but it wasn’t too happy.

Google informed us of a few solutions…milk was the first one that we tried. I was leaning over the sink with a milk soaked rag pressed to my face. Temporary relief was felt. But it wasn’t making the burning stop. On to solution #2!

Google then informed us to try rubbing alcohol. Apparently there is oil in the hot pepper juice which is why water doesn’t help nor milk. (I honestly didn’t know this until this whole incident.) Milk helps to balance the sting but it’s not helping to remove the actual oil from your face to make the pain go AWAY.

Rubbing alcohol went all over my face. I smelled quite amazing at this point, let me tell you.

But it WORKED. Hallelujah.

My brain had started to go to the thought of…am I ending up in the ER with one of THOSE stories?

Moral of the story as I stood in the kitchen with a beet red face, tears coming out of my eyes still from both laughter at the absurdity of the situation and the true pain my skin had just been in. God bless rubbing alcohol.

*Therefore – do NOT do as i did. Wash those hands as soon as you finishing slicing the jalapeños! I knew this cardinal rule yet spaced it out. Never again folks. Never. Again. 

Stained Mason Jars

17 Dec

So I have been harassed by multiple people in the last week about my lack of blogging. The hiatus was not on purpose, was not planned and is officially ending. To those few who really missed the blog posts, I’m back!

I actually have a plethora of items to share with you and now that life is a wee less crazy and there’s this lovely amount of vacation looming on the horizon, I think I can honestly say you’ll be seeing quite a few blog posts come up by the end of the month. And perhaps one will be a giveaway since I was intending on doing one a few weeks ago and we all know what happened there.

Fail.

However, let’s move forward and not dwell on the past 5 weeks of no blogging. I thought it would be ideal to bring you a relevant Holiday season post, this one being in the craft genre.

Are you into decorating for the holidays? Or are you into crafting things that you could, in theory, buy at the store for a high price and instead you’ll be making for CHEAP? Or perhaps you’re that guy still trying to figure out what the heck to give/make for a female in your life? Any of these things and many others leads us to this…stained mason jars.

Now, if you’re anything like me (though your intelligence may far exceed mine), you may not have known mason jars could be easily stained different colors. I had no clue and was extremely curious when I saw a pin on pinterest describing this particular craft. And as usually happens when I’m extremely curious about a craft, I decide to do it.

The Six Sisters blog is where I found this version (there are many versions out there on pinterest and on different blogs):

Six Sisters Blog

And my attempts did end up turning out very cool. I’m excited to share just how simple this craft is with you. With the current festive Holiday season upon us, these could be great in shades of red and green and could be perfect decor for your house, used to hold a Christmas gift (non-edible as we’re dyeing the inside of the jar) or even lined up out in the snow with candles inside to assist in your Christmas light display. The finished jars look neat and vintage, something a pricey store could persuade customers to buy when in reality, you could craft up a batch yourself.

IMG_1224

If that doesn’t persuade you to give this a try then I’m just plain out of arguments.

So just decide to do this one. Agreed? Excellent.

Materials:

  • Mason jar/s in any size you want
  • Mod Podge
  • Food coloring
  • Paper plate (square shaped if you have it)
  • Spoon
  • Wax paper or parchment paper
  • Baking sheet
  • H2O

How to Make:

First things first, you will need to preheat your oven to a cool 200 degrees. You can’t do this craft without heat, so don’t forget this step!

Next, highly recommend you mix up your dye concoction on a paper plate. The Mod Podge is messy and I just didn’t want to taint my dishes. If you are comfortable with the risk, then game on. Go for it.

I chose paper over a ceramic plate and had a snazzy zebra printed plate option thanks to a bachelorette party that took place earlier this year. Thought it added a little extra something special to this post. Don’t you think?

On to your plate of choice goes  2 Tbsp of H20.

IMG_1163

 Then, drop on 4 Tbsp of Mod Podge…

IMG_1164

…thoroughly mix the two liquids together. Use a spoon or whatever other utensil you feel will accomplish this task. Mix together until it’s one lovely shade of white and there’s no obvious separation between the white Mod Podge and the H2O.

Now is the time to add color! If you want the pale shade that just tints the jar (my preferred method), you’ll want to only do a few drops. Obviously, the more saturated and dark you’d like your color, the more food coloring. Truly, a little goes a long way!

IMG_1166

I wanted a really light green so only used four drops. Using your mixing utensil once more, mix the color all the way in until the entire liquid is the same shade. You can see below I copped out and didn’t FULLY mix, there’s some green and white swirls still visible but ah well. 97% mixed worked for me.

IMG_1167

Now this lovely mixture is going to go into your jar. All of it.

I lucked out with a  square plate and thus an excellent pouring mechanism using the corner. If your plate is round you will need to be creative and find a funnel of some sort or roll the plate a bit (if you can). Rolling up an 8.5 x 11 sheet of paper is my go-to for things like this and would have been my plan b if I didn’t have a square plate. Highly recommend that particular method.

IMG_1168

Now, while slowly turning the jar, pour the liquid back out on to the plate. Your goal is to coat the entire inside of the jar while pouring out the liquid, so take your time. You may need to repeat this process a few times until the entire jar is fully coated.

IMG_1170

IMG_1169

Once you’ve completed the coating process, turn the jar upside down on a cookie sheet that has been covered with a length of parchment paper or wax paper. I did three jars in my first batch, as you can see below. Make as many as you’d like at a time but do note the longer you let the jars sit upside down, the higher likelihood that the liquid inside the jar may start to drip down the jar. You will want to get these into the oven as quickly as possible to avoid that. You can also use slightly less water to make it a little less liquidy (though this may make the coating step take a little bit longer…pros…cons…you get the idea).

IMG_1171

Now bake these babies for 3 minutes in their upside down pose. That’s enough time to put on a song and bop around your kitchen while you wait. Ok, maybe that’s just me that does that but I do highly recommend. Apparently I recommend a lot of things in this post.

IMG_1172

When your 3 minutes is up, remove the jars from the oven. You’ll likely need to wipe the rims with the excess liquid that’s accumulated. You can see in the above picture the rim marks these jars made. Once the excess liquid is removed from the rims, keep the jars right side up and pop them back into the oven for another 30-40 minutes. You’ll essentially be baking them until the opaque liquid becomes transparent with a hint of your chosen color.

Like…

This:

IMG_1222

You can see the hint of green in all the lines of the jar and it’s even prettier in the sunlight. However, I failed to take a picture with these in the sunlight as I made them at night (well, when they came out of the oven and the sun was down) and then plain forgot to photograph them the next day. But as SOON as I get home on Thursday (or ok, as soon as I remember when I’m home on Thursday) I will update this post with a sunlight/mason jar photo.

IMG_1223

I know it’s subtle in my version, but that’s what I really liked. These look great lit up with a candle inside too, that’s what I really made them for. They’re simple but pretty to have throughout the apartment/house/condo etc. I also plan on experimenting with a red version in the coming weeks, and I promise to update this post with a photo of that version too. If you don’t see an update, please harass me via the comments below.

Happy crafting, all!

Giveaway Box Revealed

1 Nov

For anyone out there that thought winning the Inaugural Blog Giveaway wouldn’t be exciting, this post is dedicated to you. Walid was the lucky winner and after I was informed of his particular food choices, the creation of the Giveaway box began.

This box was, if I do say so myself, pretty epic.

Let me explain through pictures…

First up is homemade granola (original blog post and recipe can be found here)

Then was Walid’s choice of cookie – I was informed to create something ‘healthy’ and something chocolate. I came up with double chocolate chip oatmeal cookies. I may have taste tested a few. Ok, maybe six. I’d like to share that these are fantastic. Recipe will be shared in an upcoming blog post!

Next, as promised, were all the ingredients to make Knock You Naked Brownies (minus the butter). I haven’t heard yet if he’s tackled them, but he’ll be stocked whenever he decides to do so. (I did include the chocolate chips however forgot to include them in the photo. Whoops.)

Very important addition of spatulas came next. What’s a Giveaway from the Spatulas & Buttons blog without spatulas?!? And I don’t know about you all, but I always seem to need more spatulas than I have.

Next are the recipe cards for the granola, the double chocolate chip oatmeal cookies and the KYN Brownies. Very important addition.

I threw in a few extra chocolate items as well. Why? Because as I’ve said before, surprises are fun.

Finally, recipes and card went into a little envelope sealed with….

…didn’t see that one coming, did ya? Ha. Who needs wax seals when you have buttons?!

I packed it all up and off went the box with all its goodies.

It was like counting down to Christmas as I waited to hear when it arrived! I was informed it arrived safely all the way over in DC, hopefully with much of its contents consumed at this point.

So the question now is…don’t YOU want to win the next Giveaway?!? I’m planning the next one, to be announced here in the next few weeks including all the details about how to enter, when the winner will be announced and what will be in THIS particular box. I hope you’re all as excited as I am!

Congrats again Walid for winning this first Giveaway – and best of luck to all of you for the next one!

Photo Transfer to Wood

16 Oct

This is a craft post. Not into crafts? You may still want to read this one as I can promise, it’s pretty cool with a capital C.

For anyone who’s a frequenter on pinterest, you’ve most likely seen this craft in a variety of pins. This is the pin I saw many months ago and always wanted to try, showing a photo transferred on to a canvas:

Pin from A Beautiful Mess blog (one of my many favorites to read, check ’em out!)

Now this craft came to be thanks to my good friend Andrea, who’s been featured in a variety of posts thus far related to her September, 2012 nuptials (Mr & Mrs letters featured on the place card table at her wedding reception and spicy, turkey meatballs that were served at her bachelorette party). She had the idea to use this craft method of transferring a photo onto a different surface for the table numbers at her wedding reception. Neat right?

The plan was to transfer different photos of her and her now-spouse on to one side of a wood block. The other side of the wood block had the table number. The block itself would stand upright through use of a dowel and simple wood base. If you’re going to do this at home (I sure hope you are as intrigued as we were and try this out) this is what you’ll need…

Materials:

  • Wood block/s (you can cut down a larger board from a Home Depot/Lowe’s type store or find these in small, manageable sizes at most craft/hobby stores)
  • Black and white photo/s printed on white printer paper from a Laser Jet printer (the end result will be reversed from whatever image you print…so if necessary print off the original photo already reversed so it prints on the wood in the original photo format)
  • Gel medium (we used this one from Liquitex in the Ultra Matte Gel variety)
  • Mod Podge
  • Multiple foam brushes (one for each the gel medium and the Mod Podge as well as enough for all the people crafting)
  • Newspaper or paper bags to cover your work surface
  • Old rag (you’ll want to throw it away when you’re finished)
  • Small bowl filled with water
  • Scissors

How to Make:

If you’d like to make a version similar to Andrea’s that stands upright, you’ll want to create your base supports first. Use a power drill to create a hole in the wood block/s that’s an appropriate size for your support (dowel or otherwise). Drill a similar hole into your base support.

Next, sand the wood block/s down, both sides. The sanding will help the gel medium adhere better to the surface of the wood.

Thankfully, Andrea has handy men in her family who cut and sanded the wood blocks for us and they also drilled the dowel holes and base supports (not to say us females can’t be handy and tackle this process). But for those who’d like to give this craft a try, it’s pretty simple to do those ‘pre-work’ steps to cut and prep the wood, no worries.

Print off the picture/s you’d like to use in black and white, being sure to reverse the image prior to printing if you want the image to appear as the original photo does. (We used black and white photos so I can’t vouch for how well color printed photos transfer. I do highly encourage you to experiment though – let me know if it’s a success!)

Two important points about the photos – use normal, white printer paper and use a Laser Jet printer. These notes are particularly important as this project actually was completed twice. The first time (the version you’ll see in most of the photos) we used photos that weren’t printed on a Laser Jet printer and the ink didn’t transfer as well as we had hoped. Andrea re-did them prior to the wedding reception with Laser Jet printed photos and they looked worlds better. (You can see the difference in the photos below.) However, if you’re looking for a light, vintage look the non-Laser Jet printed photos may be what you actually want. Just helpful hints for you to keep in mind based on our experience.

Now here’s where Andrea and I started – with already-sanded wood blocks and photos already printed on white paper. (You’ll want to cover your work surface with newspapers before you begin.)

First, cut the photo/s down to the size of the wood block/s.

Generously coat one side of the wood block with the gel medium. Be very liberal with the amount you use as it will only help to more effectively transfer the photo to the wood.

Press the photo face-down on top of the gel medium-coated wood block, smoothing out any air bubbles and ensuring you have it nice and centered.

You’re going to repeat this with as many photo/wood block pairings as you have. Once all the photos are firmly attached to the wood blocks, you’ll want to go entertain yourself for several hours while everything dries. I’d recommend overnight, personally. Then the next morning you have something to look forward to as soon as you wake up.

This is when the small bowl of water and old rag are needed. Dip the rag in the water and start to gently rub the paper off of the wood block. You’ll need to scrub for a while and the photo will go through a few different phases before all the paper residue comes off. You can see in the pictures below that at one point it may even look green (and will most likely stain your rag in the process). Just be patient, have faith and keep going. There shouldn’t be a smidge of paper left on the wood when you’re done. (This paper removal process is a bit messy so be sure you still have your newspaper or paper bag underneath all of the wood blocks.)

When the wood block/s have dried from the damp rag/paper removal, use the foam brush to coat the entire photo side of the wood block/s with Mod Podge. This works as a sealant. Let the finished product dry for about an hour to ensure the surface is completely dry (it may appear dry but in fact be a bit tacky if you don’t wait long enough).

Now as I mentioned above, we did this project twice. Here is what the resulting wood blocks looked like when we used the photos printed without a Laser Jet printer (still a cool, vintage-y look in my opinion)…

…and here it is with the Laser Jet printed photos…


The key about this entire project is that the imperfections are what make the finished product look neat. If you have a few air bubbles or creases where the photo didn’t fully transfer to the wood, that’s alright. It gives the photo a little character. (Perfect is boring anyway.)

This would look great up on the wall or standing upright on display – like the table numbers at Andrea’s wedding. Or, you may have something else entirely in mind. Be creative and give this a go!

Chewy Sugar Cookies

14 Oct

I’m back with a post that I hope you take seriously. Sugar cookies people, they must be taken seriously.

This is my theory – there’s not anyone out there who doesn’t enjoy sugar cookies. (If you know of anyone, don’t tell me. I’d like to keep the fantasy alive.)

I mean, there are folks who aren’t so into peanut butter cookies (what?)…or those bizarre people who don’t like mint cookies (still don’t get that one) and then people claim you need to be ‘in the mood’ for a good gingersnap (who are these people?). But seriously – aren’t you always in the mood for a sugar cookie?

Scenario #1 – You had the worst day, one of those days where you’d like to just bang your head on a wall. Solution = sugar cookie.

Scenario #2 – You had the BEST day right down to hitting all the green lights both to AND from work. Boom. Sugar cookie.

Scenario #3 – You are nervous as all get-out because you have a job interview/olympic triathlon/big date/final exam etc. the next day. Heeeelllloooo….sugar cookie.

Scenario #4 – You want to bake something delectable but don’t want to spend the whole DAY in the kitchen. Enter….sugar cookies.

Scenario #5 – You want any excuse possible to not do what you know you should be doing (i.e. laundry…unpacking…laundry…loading the dishwasher…taking out the trash…laundry)…consume a sugar cookie

Ok, ok, you get my point. I believe sugar cookies fit every mood, any type of day you had and always seem to hit the spot whether you have a real sweet tooth or not. They’re just a magical cookie.

Now, sugar cookies are fun because you use cookie cutters and frosting etc. BUT, sometimes you may not have the time for the whole roll-out the dough/cookie cutter scenario. THIS is the recipe for you in that particular circumstance. This version (thanks to my favorite magazine Real Simple) of sugar cookies is quick, simple and results in cookies that are as tasty as they look. I DO want to share a roll-out dough/make fun shapes/decorate type of sugar cookie with you at some point on the blog. But that post is not this one.

These cookies I made for a Iowa State University (GO CLONES!) tailgate. Both of my parents and my younger brother are Cyclones, so we were down enjoying a tailgate in Ames, IA and these were the perfect addition to the spread that day. (That’s the reason for the cardinal red and gold frosting colors.)

You in the mood for a sugar cookie?! (Obviously rhetorical due to the argument above.)

Ingredients:

  • 2 1/2  cups  whole wheat flour (I used whole wheat, but you can use all-purpose if you’d prefer)
  • 1 1/2  teaspoons  baking powder
  • 1/2  teaspoon  kosher salt
  • 1  cup  (yes, that’s 2 sticks) unsalted butter, at room temperature (I’ve explained why room temp butter is necessary in past posts, just trust me. Your beaters/mixer will thank you.)
  • 2  cups  sugar
  • 2  large eggs
  • 1  teaspoon vanilla extract (the good stuff, if you have it!)

Glaze Frosting: (this is a pretty common recipe amongst many websites/blogs but I found mine here)

  • 1 cup powdered sugar
  • 1 tablespoon light corn syrup
  • 2 tablespoons milk
  • food coloring to achieve your desired color palette
  • 1 teaspoon vanilla extract

How to Make:

Turn up the tunes that put you in a good mood (My roommate and I are currently huge fans of “Finally Found You” and “Heart Skips A Beat”. We highly recommend.). This should be the first step because tunage makes cooking/baking a lot more enjoyable, particularly when baking up sugar cookies. Add in a sous chef or two and the fun level just increases. Guaranteed.

Once the music is cranked, you’re ready to begin. Preheat your oven to 350 and go find two large-ish mixing bowls.

In the first of those bowls, whisk up the flour, baking powder and salt. Get everything mixed up well.

Now, mix up your butter and sugar in the other bowl. If you’re fancy with a KitchenAid (I didn’t have mine at this point, sadly) electric mixer, set your speed to medium high and go entertain yourself for 2-3 minutes. This is a great opportunity to dance to that excellent music you just put on.

For those without electric mixers, you can still dance. You just get to mix while you’re doing it. Multi-task.

Mix until everything is light and fluffy. Then, slowly beat in each of your eggs. Splash in the vanilla.

Now, on low speed, slowly mix in your flour. Do this in batches or you’ll end up with a huge flour cloud and an immediate need to clean your kitchen. Don’t overmix – you only want to mix until the batter is “just combined” when you turn the mixer off. Trust Real Simple. Don’t overmix.

Spray your cookie sheets with some Pam before dropping “heaping” (Real Simple’s word) spoonfuls of the batter on to your cookie sheet. 3×4 method always works!

The recipe suggests rotating the baking sheets halfway through the baking process, but I just kept a close eye on them and I think you can bake without this step. Unless you have a finicky oven, then maybe you should do the rotating thing. I’ll leave that up to you. Key thing here – bake 12-15 minutes. Your cookies will get a little golden on top and that’s when you’re good to go.

Let them cool down (at least a little bit) before you try one. You WILL want a second. I’d bet just about anything on that.

If you are going to add any frosting, make sure the cookies are completely cooled. Or if you’re impatient like me, just know the frosting will be a little melty. As long as you’re alright with that, proceed.

To mix up your frosting (forewarning – this is more of a  ‘glaze’ than a frosting), stir all (except the food coloring) your ingredients together. Once it’s all thoroughly mixed, start creating your desired color with your food coloring. Remember a few drops of color goes a looonnggg way, so start with a few and add more if needed.


Now I struggled with frosting the first few cookies. The knife wasn’t spreading the frosting well and I was getting frustrated. It was getting all gloopy.


Then I remembered the fun kitchen utensil that usually sits untouched in the drawer – the pastry brush! It’s PERFECT for applying this particular frosting/glaze because the liquid is fairly thin and you can move the glaze around on the cookie much better with the brush than a normal knife or spatula.

The frosting will harden, just give it a little time. You WILL be able to stack and pack these into Tupperware – we brought them on a 3 hour car ride and they survived just fine.

Now set these out for all your friends and just sit back and watch them disappear.

Just…

like…

that.

Inaugural Giveaway – Winner Announced!!

29 Sep

Drum roll…………………………………………………………………………………………..

…………………………………………………………………………………………………………..

……………………the winner is Walid Omar!! WOOOHOOOOOOOOOOO!!!!!!!!!!!!!!!!!!!!

Walid, you were the lucky number today. I’ll be sending you an email shortly to get all the details of what you’d like in your package and where I’ll be sending the lovely parcel to!

Thanks to everyone who became a Follower to enter the Giveaway! I’m thinking of doing these on a bi-monthly basis, so there will be plenty more opportunities for you to win! Meanwhile, you’ll be kept in the loop as I dive into recipes of all sorts and crafts here and there.

To give you an idea of what’s planned for upcoming posts…

In the food department: to-die-for sugar cookies, complete with a homemade frosting/glaze. You will want to make these, trust me.

In the craft world, I’m excited to share this one with you. Using gel medium to transfer photos on to wood. It’s rather simple and looks extremely cool when you’re done.

So stay tuned! Great things are coming up in blog posts. Hope everyone gets themselves outside to enjoy the beautiful Fall weekend, I’m off to an apple orchard here shortly. Going to try my hand at homemade apple butter this weekend. We’ll see what happens…

The Inaugeral Giveaway Post

25 Sep

‘ello all!  I have been meaning to write this post for five days now so I apologize profusely for my tardiness. I taunted you with a Giveaway Post and then took forever to write it. I’m a failure. So sorry.

On the upside…the time is now, the time is here – THIS is the Giveaway Post! YOU could win!

Here are the glorious details:

What: A fun-filled package could arrive on your doorstep, in your mailroom, to a P.O. Box near you. It will be filled with theeeeese items:

  • A cookie of your choice, whether from this blog or not. The winner can pick the type of cookie (this means “peanut butter” not “big”, just for those of you funny people out there).
  • A snack of your choice, from these two options: Granola or Chipotle & Rosemary Nuts
  • All the ingredients (other than butter – that’s yours to purchase) for Knock You Naked Brownies because that’s the REAL point of this blog – trying to bring tasty recipes into your home for YOU to make and enjoy! I’ll provide just about all the ingredients and then you can roll up your sleeves and give it a go. Humor me, ok? I think you’ll surprise yourself. And they are TASTY, I promise!
  • A spatula to add to your kitchen. I solemnly swear I’ll pick out a really great one. But what it looks like will be a surprise, I hope that’s alright.
  • You never know what other surprises I’ll throw in. Just because surprises are fun. I love surprises. And if you don’t, too bad. There will be some in the package. Handle it.

Why: Because everyone needs a fun package in the mail sometimes! I wish I could send you all a fun package but then I’d be broke and it just wouldn’t be as special. But don’t you worry, there will be more Giveaways. Why? Please read this section again.

When: The Giveaway entry period will end Friday, September 28 at 11:59 PM. I’ll announce the winner in a post on Saturday morning sometime between 9:08 AM and 11:43 AM. Just for a little added anticipation.

How: As stated in my previous post, you must be a Follower on the blog to be entered. You must click the button in the upper right corner of the blog, follow the prompts and become an official Follower to be entered (becoming a Follower means that you’ll get an email each time I post in the future, which is on average about 4-7 times a month I’d say). This is also how I’ll clarify the details of the package and the mailing address with the winner as I get to see a list of all the lovely email addresses of the blog followers. The winner will be selected through use of a random number generator where each follower will be assigned a number and the RNG will do the rest. Equal chance for all!

So if you’re not yet a Follower, please be one! Then you’ll not only have the opportunity to win but you’ll be updated each time I have a new recipe or craft to share. C’mon, it’s a win-win.

If you already are a Follower, congratulations – you’ve entered the Giveaway and have nothing else to do except wait for Saturday’s announcement! You’re so on top of things.

If you just read this blog in passing, well, I’m so glad you stopped by. Please continue to do so. But unfortunately I don’t know who you are so can’t enter you into the Giveaway. Sorry about that.

Those are all the details. That’s it. Simple and super fun – I can’t wait to put this package together for the lucky winner!

Best wishes to all who enter and may the odds be ever in your favor…(ha, couldn’t help it)…

Snickerdoodles

13 Sep

Before I dive into one of the best cookie recipes EVER, I have a few things I need to share with you (at least read #3 if you don’t want to read #1 and #2)…

1) Can I just say I love September? There are many reasons why this is such a glorious month (cough…birthday…cough, cough), but I truly think Fall foods are some of the most delicious, cozy foods ever. Get excited as I hope to have many blog posts of Fall foods to share with you soon, many I hope to whip up this weekend. This particular weekend is the first where I will not only be home long enough to eat something from my own fridge/cupboards, but I’ll have plenty of “me time” in the kitchen. I can’t tell you how happy that makes me!

2) I have exciting news! Well, exciting to me. I’ve mentioned how much I’ve wanted one of these in a multitude of blog posts…I’ve been staring at them in the store like a kid staring at the puppy section in the pet store. I’ve made the excuses: “it’s too much money”, “where would I store it” blah blah blah. But I give up. I want one!

Yes, yes, you may have already guessed it. A KitchenAid Mixer is going to be purchased this weekend. It’s my birthday present to myself and I’m going to love it to pieces. Now I just have to decide on a color (HELP)!

3) So…with it being Fall, the season of baked goods and with the upcoming purchase of my new BFF the KitchenAid Mixer…I’m going to have all these goodies that I will not be able to eat all by myself. And as it’s a month for cool kids to have birthdays, seems only right to have my first blog giveaway!

Yes, you read correctly. A GIVEAWAY.  Where YOU WIN things. I won’t tell you what is specifically in the giveaway yet, but I’ll have an upcoming post with all the details. It will probably consist of a variety of homemade goodies from me and most likely also involve a spatula or two. Probably some buttons involved somehow if I’m being completely honest. (You should have seen that one coming.)

I will say, all you will have to do to win the giveaway will be to be a follower on the blog. So if you’re one of those readers who has not clicked the ‘Follow’ button yet, this is the time to do it! The Giveaway Post will occur within the next week (I hope!) with details including when the winner will be announced etc…so stay tuned!

Now that all of THAT is out there…we can get to down to the cookies.

I have this thing for chewy cookies, don’t you? If a cookie is crispy or crunchy…meh…not my thing. But chewy cookies, um, YES please. Thus, I was on the mission to find a tasty, CHEWY version of snickerdoodles. And I dare say, I think I was successful. I do warn you, these are one of those cookies where you can’t have just one. Or two. You may find you’ve eaten five before lunchtime. It happens. I won’t judge you because well…that may have happened to someone I know. A friend of mine. Ok, to me. Whatever. I’m NOT ashamed. Nor will you be you be when you taste one!

Few last notes, I chose to use a recipe without cream of tartar (because I didn’t have any) and found this exact same recipe on multiple blogs. So, I’m not sure where the credit should go to, but just know many have tested it out, devoured them, blogged about it etc. TRUST in THEM. And me too I hope!

Ingredients:

  • 2 3/4 cups all purpose flour (I chose to use whole wheat flour, whatever you prefer)
  • 1/2 teaspoon of salt
  • 2 teaspoons of baking powder
  • 1 cup (2 sticks) unsalted butter, softened
  • 1 1/2 cups granulated white sugar
  • 2 eggs

**Important Cooking Notes added on 9/26/12:

  • I’ve had a few readers try out this recipe and would like to mention if you prefer sweeter cookies, adding a dash of vanilla will help with that. I made these without and loved them, but if you’re in need of real sweet taste beyond the cinnamon and sugar, the dash of vanilla will accomplish that.
  • Be sure to use unsalted butter or the cookies may turn out a bit salty. If you must use salted butter, then leave out the 1/2 teaspoon of salt.

Coating:

  • 2 Tablespoons of granulated white sugar
  • 2 teaspoons of ground cinnamon

This is a simple recipe, just requires some blending before you get to the fun part.

First things first – preheat the oven to 350. Grab a medium-sized bowl and mix your flour, salt and baking powder together. Make sure it’s all mixed up well and then set that bowl to the side. (Apologies for the lack of picture. I don’t know where my mind was.)

Grab the butter and make sure it’s SOFT. Trust me. Not kinda soft. Not a little bit soft. SOFT. Or it will stick to your mixer’s beaters and if you’re anything like me…you will get upset…spout off a few choice words…stop the blender…poke the butter out of all the beaters crevices…etc. etc. etc. Just trust me. 🙂

Now take that lovely, soft butter and mix it with your sugar using either your hand mixer or your electric mixer. It takes about 3 minutes, so set a timer, put on some good blending tunes (highly recommend “Don’t Wake Me Up” by Chris Brown…it’s perfect for kitchen tunage needs) and get mixing. It should look pale, fluffy and glorious when you’re finished.

Once the sugar and butter is all blended, mix in your eggs one at a time. When they’re all mixed in, slooooowllllly mix in your flour mixture.

Once it is ALL mixed together, get out a small plate or saucer and pour out your cinnamon and sugar “coating.” A small bowl works too, I just prefer the plate/saucer method.

Roll your dough into small balls, then roll them in your cinnamon/sugar mixture before putting them on a Pam-sprayed cookie sheet. I follow the 3 x 4  method, as you’ve likely seen in past posts.

Bake them for 12 – 15 minutes, until they have a hint of that lovely, golden brown color. Pull ’em out and let them cool. Or don’t let them cool and pop one in your mouth when they’re still warm. Either way, be prepared to be wowed.

Set them out for friends…or maybe just for yourself.

These are also great cookies to pack up and take to the office or a party as they don’t crumble in Tupperware. Trust me! I took these babies all the way to Chicago with me a few weeks ago on the plane and there wasn’t one broken cookie.

So bake yourself a batch and enjoy these delicious little morsels. They’ll be gone before you know it!

Yogurt Popsicles

27 Aug

Popsicles.

Let me tell you, popsicles are sometimes the perfect treat. When you crave something sweet, but not overly so. When you want something cold but are perhaps feeling too lazy (not sure that’s actually possible) to scoop ice cream/frozen yogurt. You want to feel like it’s summer at all times of the year. The list can go on and on.

Back-story: I was shopping at one of my favorite kitchen-y stores (Kitchen Window in Uptown…check it out…it will change your life…and your wallet’s size) shopping for a gift for a friend of mine. As I was perusing the aisles, these popsicle molds jumped into my hands. I swear it.

I came home, all excited about my popsicle molds and then realized…I had no popsicle ‘recipe’ in mind to make. This lasted a few weeks until I found this on pinterest. Success! Unfortunately our fridge/freezer took this particular day to stop working properly. The first round of popsicles never froze and I was stuck using a spoon to eat my semi-cold yogurt concoction. Recommendation – use a freezer that works. Who would have thought, right? I was determined to give them another try though and I can vouch that with a properly cold environment, you’ll have yourself some legitimate and tasty popsicles.

Here we go – three ingredients and some cold temperatures will result in a delicious treat you could legitimately eat for breakfast, a snack OR dessert. (Plus it’s fairly healthy!)Seriously, such a genius idea – thanks to Joylicious for this great recipe!

Ingredients (makes 6-8):

  • 12-16 oz. Greek yogurt, plain or vanilla ( I used a little less than 16 oz. to fill my 6 molds, but you may need more or less depending on the size/amount of your molds)
  • 1/2 cup raw honey
  • 1 cup mixed berries (Fresh or frozen)

Other items you need:

  • Popsicle molds (Hopefully there still available in stores! I would imagine Target, Costco or even Walgreens would have these.)

How to Make:

This is super simple – so it would be a great one to do if you have small people running around. Seeing the popsicles go into the freezer as liquid and come out as wonderfully solid deliciousness would be a fun experience for any kid. Or if you’re 23. Or 49. There’s no age limit on the glory of popsicles.

Mix together your yogurt and honey…


…then gently fold in the berries and ensure they’re not stuck together if you choose the frozen route.

Grab your popsicle molds and pour in your mixture. Some of my bigger berries were easier to push into the mold after I filled it up with the yogurt/honey mixture.

Once all the molds are full, wipe off any excess drips from overflowing, put the tops/bottoms (…is it the top? Or the bottom? Riddle me that.) and put these babies into the freezer. Give them about 3-4 hours, or have them in there overnight.

Aren’t they cute all locked together?

When you take the popsicles out of the molds, be gentle! You may have to warm up the mold a bit with your hands and twist a little with the handle, but it should come out pretty easily.

And look at how pretty this is.

Dig in and enjoy!

Beef Satay with Peanut Sauce

20 Aug


Can I just say that peanut sauce is one of theeeee best things. Ever. Of all time. YUM.

I had never made peanut sauce before, just thoroughly enjoyed it at restaurants or at friends’ houses. But I was intrigued and also desperately wanted to give it a try. When I came across this pin on pinterest, I knew it was meant to be, baby!

Beef.

Peanut Sauce.

HEAVEN.

Ugh, SO GOOD.

Ok, so Spoon Fork Bacon is a blog I’ve featured before and they have some of the best recipes I’ve tried. Truly. They have unique ingredients but simple steps and the resulting food is just AWESOME. Highly encourage you to go and check out their blog and give ANY of their recipes a go. You won’t be disappointed!

I didn’t tweak their ingredients at all, so trust in their ingredient list. I did!

Ingredients: Serves 3-4

(Don’t be intimidated…this seems like a long list, and it is, but the receipe is super, super, super simple. Take a deep breath. Read on.)

Meat:

  • 1 lb boneless and trimmed New York strip steak, cut into ½ to 1 inch cubes

Satay Marinade:

  • 1/3 cup dry roasted peanuts
  • 1/3 cup light brown sugar
  • 1/4 cup plus 1 1/2 tablespoons low sodium soy sauce
  • 1/4 stalk lemongrass, chopped (You’ll find this by the other fresh herbs…took me a bit of wandering to find it)
  • 3 garlic cloves, chopped
  • 1/2 lime, juiced
  • 1 tablespoon peeled and diced baby ginger
  • 1 tablespoon turmeric
  • 1/4 teaspoon curry powder
  • 1/4 teaspoon black pepper
  • 2 tablespoons vegetable oil

Spicy Peanut Sauce:

  • 1/3 cup reserved marinade
  • 1/4 cup dry roasted peanuts
  • 3 tablespoons vegetable oil
  • 1 1/2 tablespoons low sodium soy sauce
  • 1 lime, zested and juiced
  • 1-3 Thai chiles, seeded (If you can’t find Thai chiles, just find a different pepper that falls in your ‘spice’ tolerance. If you’re clueless, Google. That’s what I do!)
  • 1 garlic clove, chopped
  • 1 green onion, thinly sliced

Garnish:

  • Chopped dry roasted peanuts
  • Thinly sliced green onions

Items You Need:

  • 7-8 bamboo skewers, soaked in water for 30 minutes (Don’t skip this step! This ensures your skewers don’t go up in flames.)

How to Make:

Ok, now if you haven’t run away in terror after reading the ingredient list, I’m going to show you how easy this is to make.

Once you’ve chopped up that New York strip, toss the meat into a large bowl. Season it up with some salt and pepper and set it to the side for the time being. I forgot to photograph this step. Whoops.

Now that looooonnnggg list for the marinade? Put ALL those things into a blender or food processor. Don’t freak out. It’s not the prettiest image. I fully understand.

And put your finger on blend. Hold that button until the whole thing looks smooth. *Warning –  ignore the color (blame the peanuts)  and just close your eyes, dip in a finger [with the blender/food processor UNPLUGGED] and give the marinade a try. SO GOOD, right? Now you just wait for the peanut sauce.

Take 1/3 of this mixture and save it for that peanut sauce.

The rest you can pour over your cubed beef. Toss the beef with the marinade so everything is evenly coated. Now, set those marinating beef cubes in the fridge for about 4 hours. You want nicely saturated meat, so be patient!

While you’re killing time and trying to not think about the delectable meat taunting you from the refrigerator, we’re going to make some peanut sauce.

You know that looooooonggg list for the peanut sauce? Put ALL of THOSE things into your blender or food processor.

Blend away until this looks smooth and a fairly similar to the marinade in color and consistency.

Give the sauce a try and I challenge you to not make a verbal comment after. I think mine was something like “HOLY CRAP”. Something like that. Maybe a bit more colorful. I don’t recall, I was in peanut sauce heaven.

Now don’t eat up all the peanut sauce before you’ve grilled your meat. You may be tempted to do so. Not worth it. Even with a spatula like that.

Patience, people.

Once your meat has fully marinated for the 4 hours (or close to that if you’re not willing to wait that long), skewer about 5-6 cubes of the beef onto each bamboo skewer.

Now, the Spoon Fork Bacon instructions – “Place a grill pan over medium-high heat. Pour oil into pan and grill skewers for 2 minutes, on each side. Repeat until all skewers have been grilled.”

I do not own a grill pan and have -5 on the grilling abilities scale. However, I came up with a process that worked. I just grilled them up on the stove top in a big pan with oil, turning them as instructed – every 2 minutes. But if you own a grill pan, I bet that route works even better.

Once your skewers are all done, place them on folks’ plates or on a big serving platter. Scatter some chopped dry roasted peanuts and chopped green onions over the top of the skewers and drizzle some peanut sauce all over as well. Admire how fantastic this looks while wiping that little bit of drool off your face. Yeah, we all know it’s there. No judgment.

Pour your peanut sauce into a serving dish (a ramekin works real well however mine was wedged in the dishwasher) and top it with some additional chopped dry roasted peanuts.

Serve this up and be prepared for people to be amazed with your skills. Only you’ll know it didn’t take much skill…just that index finger pushing the ‘blend’ button. But shhhhh, they don’t need to know that. 😉