
You may have thought crayons were left behind in your 3rd grade desk, but NO…there are still so many wonderful things you can do with these little guys. The basis behind this project is the simple fact that crayons melt. In the process of melting, these make a wonderful art creation that rivals how colors bleed and blend in a watercolor.
This is a very popular pin on pinterest that most who are even infrequent visitors to the site, have stumbled upon and maybe even too, been inspired by.
The original pin on pinterest that inspired me:

From Whatever…
Before I made my own version of this a few months ago, I decided I’d take a slightly different approach. As much as I love the Crayola brand, I preferred to have the wrapper off of the crayons I was using. I also wanted to use only a select few colors on each canvas I made: greens/yellows….blues/purples etc.
I tackled this craft for the first time with a good friend of mine, Katie. She was as intrigued as I was if it would work, so we bought ourselves quite a few of the 64 boxes of Crayola crayons and set to work.
My first attempt turned out pretty cool, far better than I anticipated. The only negative, didn’t realize until after the fact I had created art out of Packer colors. Oops. The deep love I have for Minnesota sports did make me feel a little bad about that. Trust me, this was unintentional!

Because the first canvas turned out so great, I wanted to give it another go and track the craft progress with some photos to share with you all. This is fun no matter what your age, so if you have little kids around that need a good, easy and not-too-messy craft project, this is perfect. This is also an ideal craft if you just want your mind to drift and think about nothing other than how beautiful certain colors are as they merge and trickle down the canvas. Very soothing.
How to Make:
First step, buy yourself some crayons and a canvas (any size will work, but I like the bigger, square ones myself). Depending on how you want your final canvas to look, you may need to buy a few boxes of crayons. To get all the blues/purples that I needed, I bought 3 boxes of 64 Crayola crayons.
Next step is to peel off the paper on all of the crayons. I truly believe this project works better without the wrapping, and it’ll look a lot nicer up on your wall that way too. Give yourself a good chunk of time to unwrap crayons; it does take you a bit longer than you may anticipate. One and a half Disney movies should get you through it. Or 3-4 Brothers & Sisters episodes. (The latter is my current obsession. This is my 3rd time through the series and it still is as great as the 1st time I watched it. If you haven’t watched it before, check it out. All 5 seasons are on Netflix!)

Next, heat up your hot glue gun. Also, figure out how you’d like your colors laid out on the canvas. I wanted a random assortment of blues and purples, so you’ll see I started gluing them on the canvas without much rhyme or reason. But, this could also look great with all one color merging into another (i.e. all blues…fading into all purples). Up to you!
You’ll want these glued along one side of your canvas. Try to keep them as close to one together as you can. Just a few dabs of hot glue will keep each crayon in place.

Keep going until all of your crayons are securely glued. Don’t get discouraged by the weird color of the crayons right now. It’s hard to tell what the actual colors will look like together at this point (cerulean and blue violet may appear to look the same color at this stage, but we know they do NOT when the crayon is used on paper). Have no fear.

I use my bathtub for this next part, because all the mess is then easily contained. I lined the bathtub bottom with leftover grocery bags to catch any of the waxy drips.

You’ll want to aim your canvas with the crayons dripping down. Hold the canvas from the back or the top and tip the canvas to get the type of drips you want.

I use my hairdryer on the hottest setting as well as the lowest setting. This helps keep the crayons from splattering too much.
This is after only about 10 seconds of heat:

I use the method of moving heat over all of the crayons first before focusing heat in on certain sections. This is what it looked like after this first pass over.

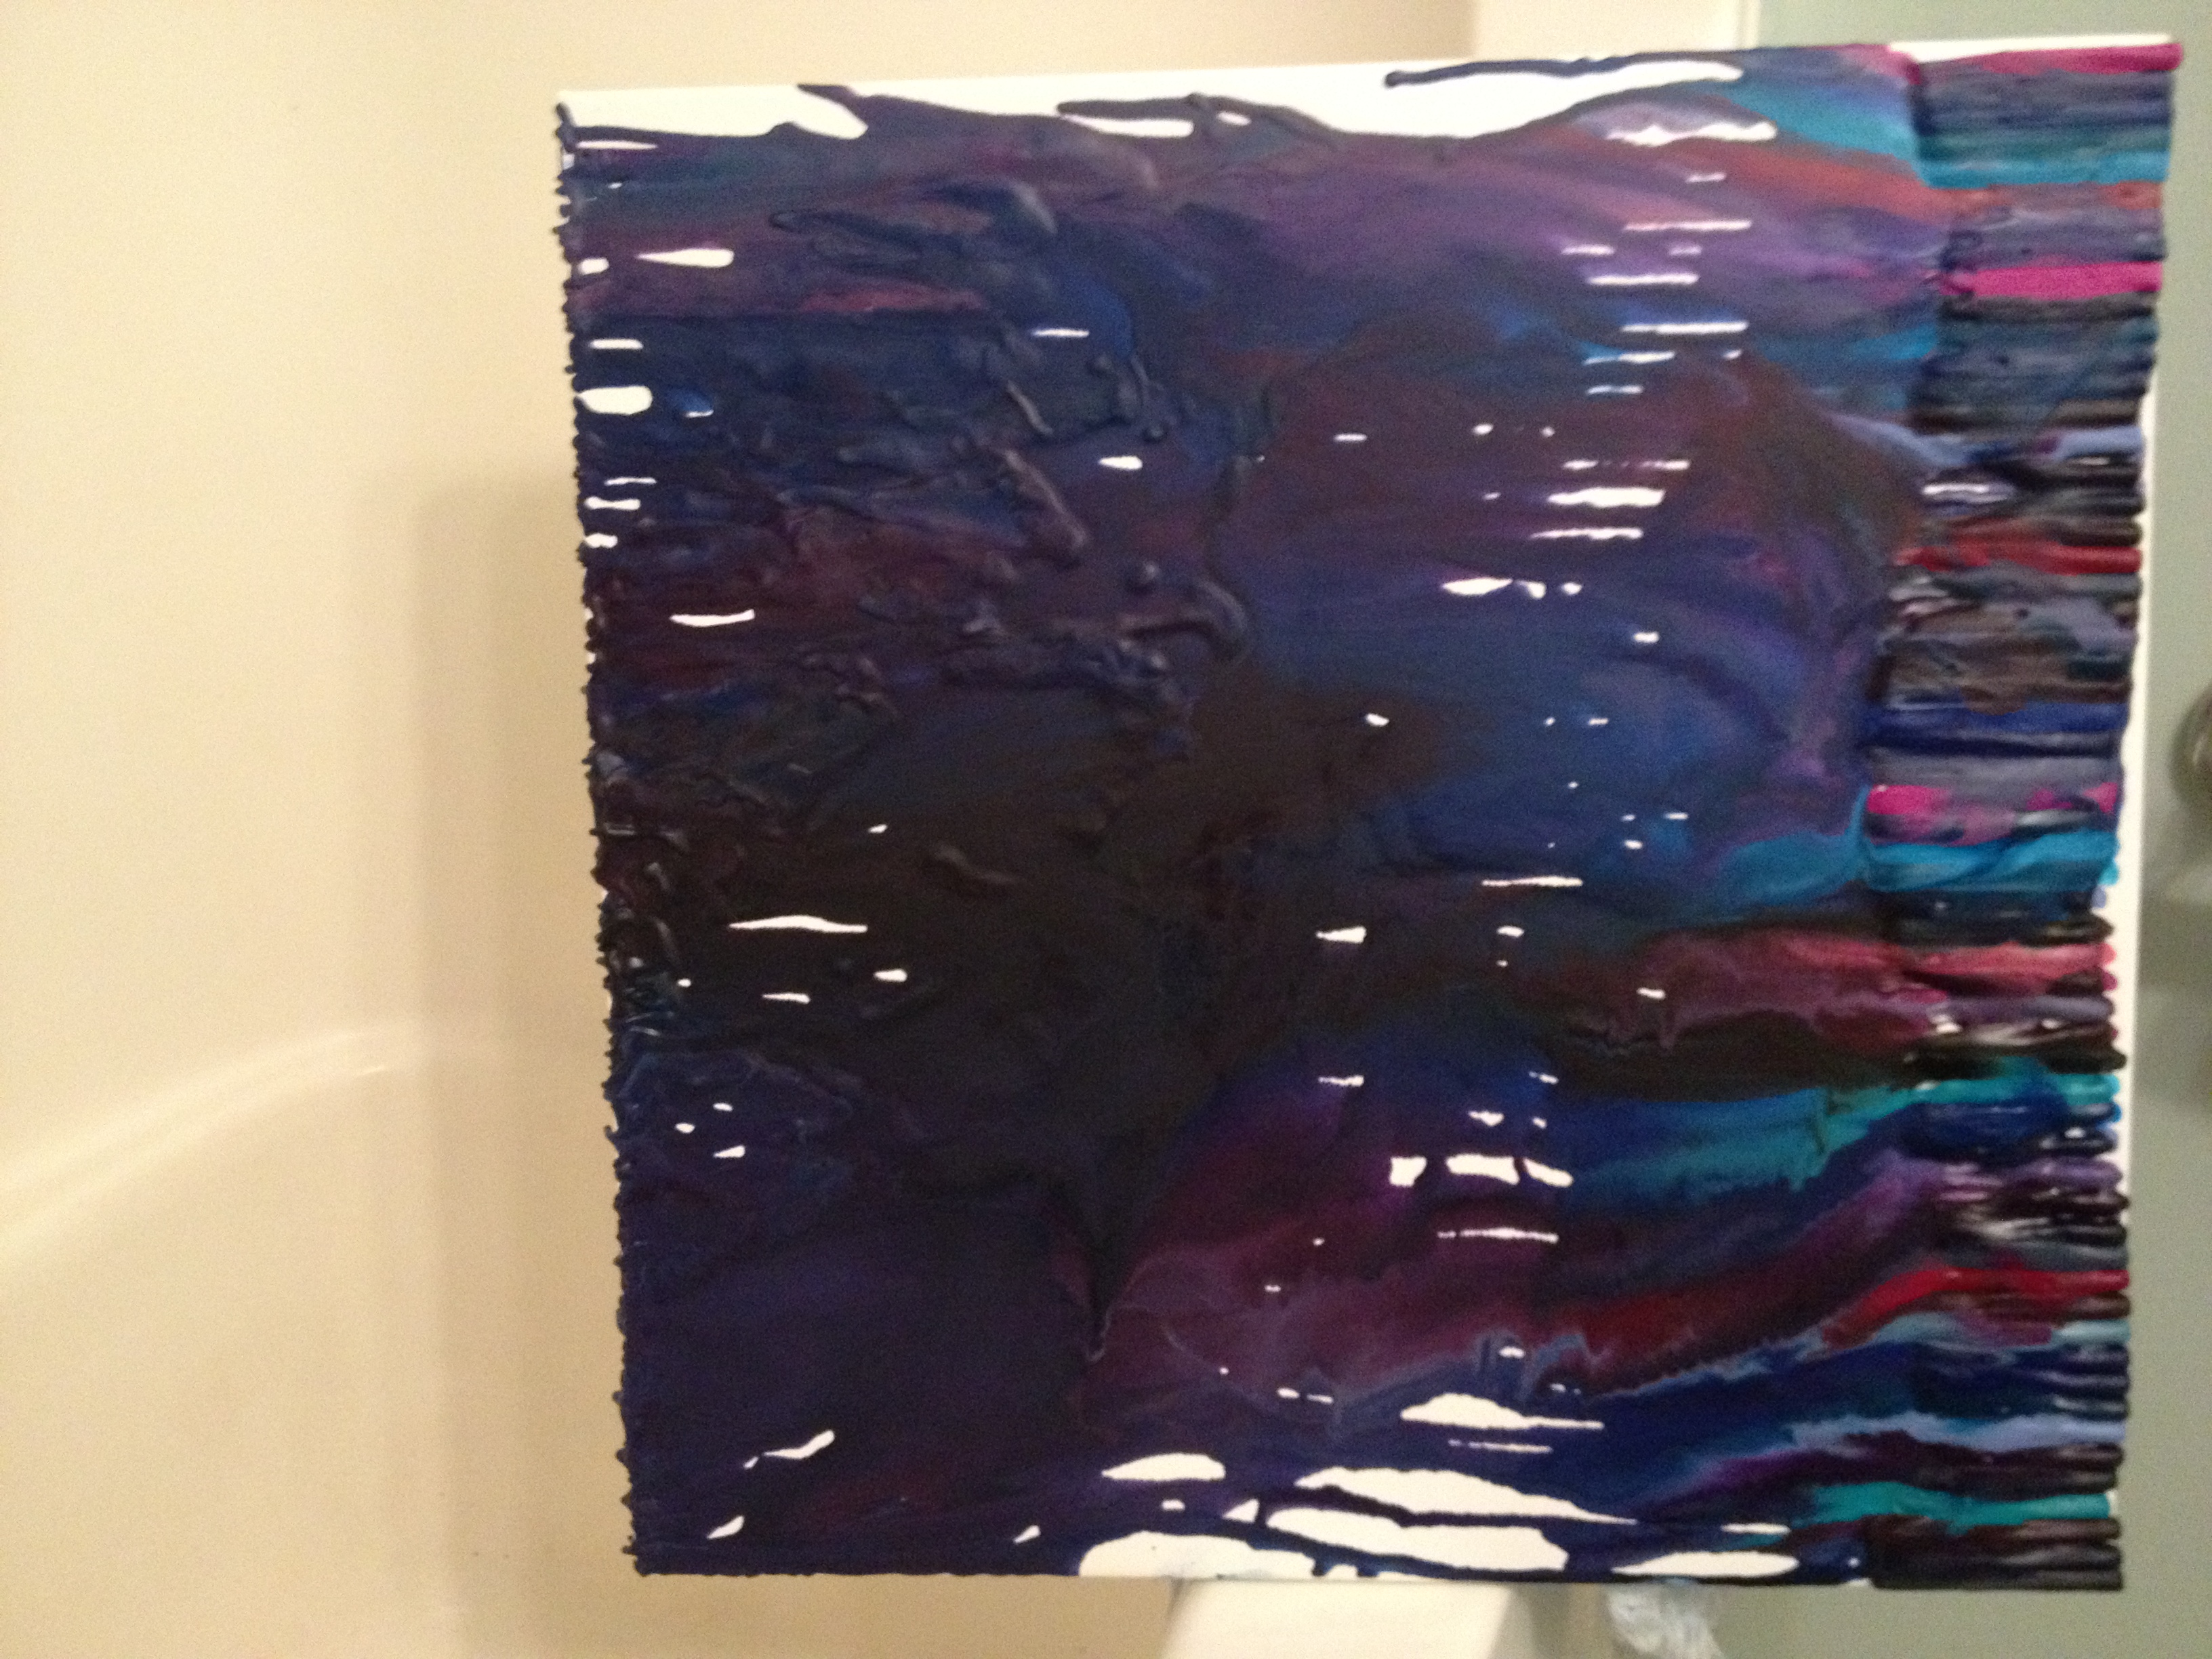
Then, after a good chunk of time of melting all of these crayons out, this is what it turned into.

At first, I felt that I wanted all of the white spots gone. But as I’ve left it sitting perched on my tub all week, every time I walk by or in the bathroom I took a second to think if it looked ‘done’ or not. I kind of like the imperfection, so I think I’m taking this as ‘done’. 🙂
You can go for as long as you’d like until the canvas looks like your idea of ‘finished’.
For easy cleanup, just toss your grocery bag ‘dropcloths’ into the trash. Any other stray drips that ended up hitting the tub can be picked off once the wax cools (I just filled the tub with cold water and then picked them off) and then scrub over any colored waxy stains with a Mr. Clean Magic Eraser for a few seconds. You won’t have a single stain on the tub that way.
This looks great anywhere you need a pop of color. I have both the green/yellow canvas and the blue/purple canvas up on either side of the mirror in my bedroom. It’s perfect.
I’ve seen other versions of this (also on pinterest) that could be fun to try as well:

From Light&Spoon

From an Etsy shop: JKCreate

From Dilly-Dali Art
May have to make a ‘V’ for the next version of this (perhaps oranges/reds/pinks?) for our living room. (Both my roommate and I have ‘V’ last names). We’ll see if I can make that happen.
I hope this inspires you to dig up your old crayon collection and get a little artsy. 🙂
Tags: Canvas, Crayon


