Chipotle & Rosemary Nuts

8 Apr

I’m back for an Easter morning post. (Happy Easter to all!)

This was a recipe I tasted for the first time back during my Memphis visit with my friend Marissa (can you tell we ate a lot of delicious food?!? Marissa knows her stuff, let me tell you.)

This is an Ina Garten (the Barefoot Contessa) appetizer/snack recipe from her cookbook How Easy is That (one of my new favorite cookbooks. It’s awesome. Go buy it.). It went over very well for the visitors we had at the Vose house this weekend, and the whole amount is almost gone. You can also keep these in Tupperware to pull out for another event days down the road.

Ingredients:

  • Vegetable oil
  • 3 cups whole roasted unsalted cashews
  • 2 cups whole walnut halves
  • 2 cups whole pecan halves
  • 1/2 cup whole almonds
  • 1/3 cup pure maple syrup (I used a mixture of pure and store-bought syrup. Mom mixes up a concoction of both so you get the best of both worlds.)
  • 1/4 cup light brown sugar, lightly packed
  • 3 tablespoons freshly squeezed orange juice (Mine was not freshly squeezed – I used Simply Orange and it was tasty. Use whatever orange juice you have, but if you can do freshly squeezed – DO! 🙂  )
  • 2 teaspoons ground chipotle powder (Took me a bit to locate this on the grocery store shelf as not all spice brands had it…but it’s worth the time of looking. This is the key ingredient.)
  • 4 tablespoons minced fresh rosemary leaves, divided (Highly encourage fresh> dry)
  • Kosher salt

How to Make:

Preheat the oven to 350 degrees. Locate a nicely sized sheet pan and rub it down with vegetable oil. Or Pam would work too. Up to you.

Now time to mix some nuts! Mix up your cashews, walnuts, pecans, almonds…

Add in 2 Tbsp of vegetable oil, maple syrup, brown sugar, orange juice and chipotle powder. All of those items were added though there aren’t pictures of all steps below.

I encourage you to mix it up in a bowl as it’s a bit easier than Ina’s direction of mixing it up on the pan. But perhaps you possess greater “mixing abilities” and the pan would work for you. Toss everything around so all nuts are evenly coated in tasty goodness.

Now grab the rosemary and mix that it too. Ina suggests adding 2 Tbsp now and 2 Tbsp after cooking. I plain forgot this and added 4 Tbsp right up front. It may make a difference adding it after, it may not. Up to you and your personal preferences with rosemary. But I think adding it all in prior to the oven works just fine. Add in 2 tsp of salt as well and toss everything evenly.

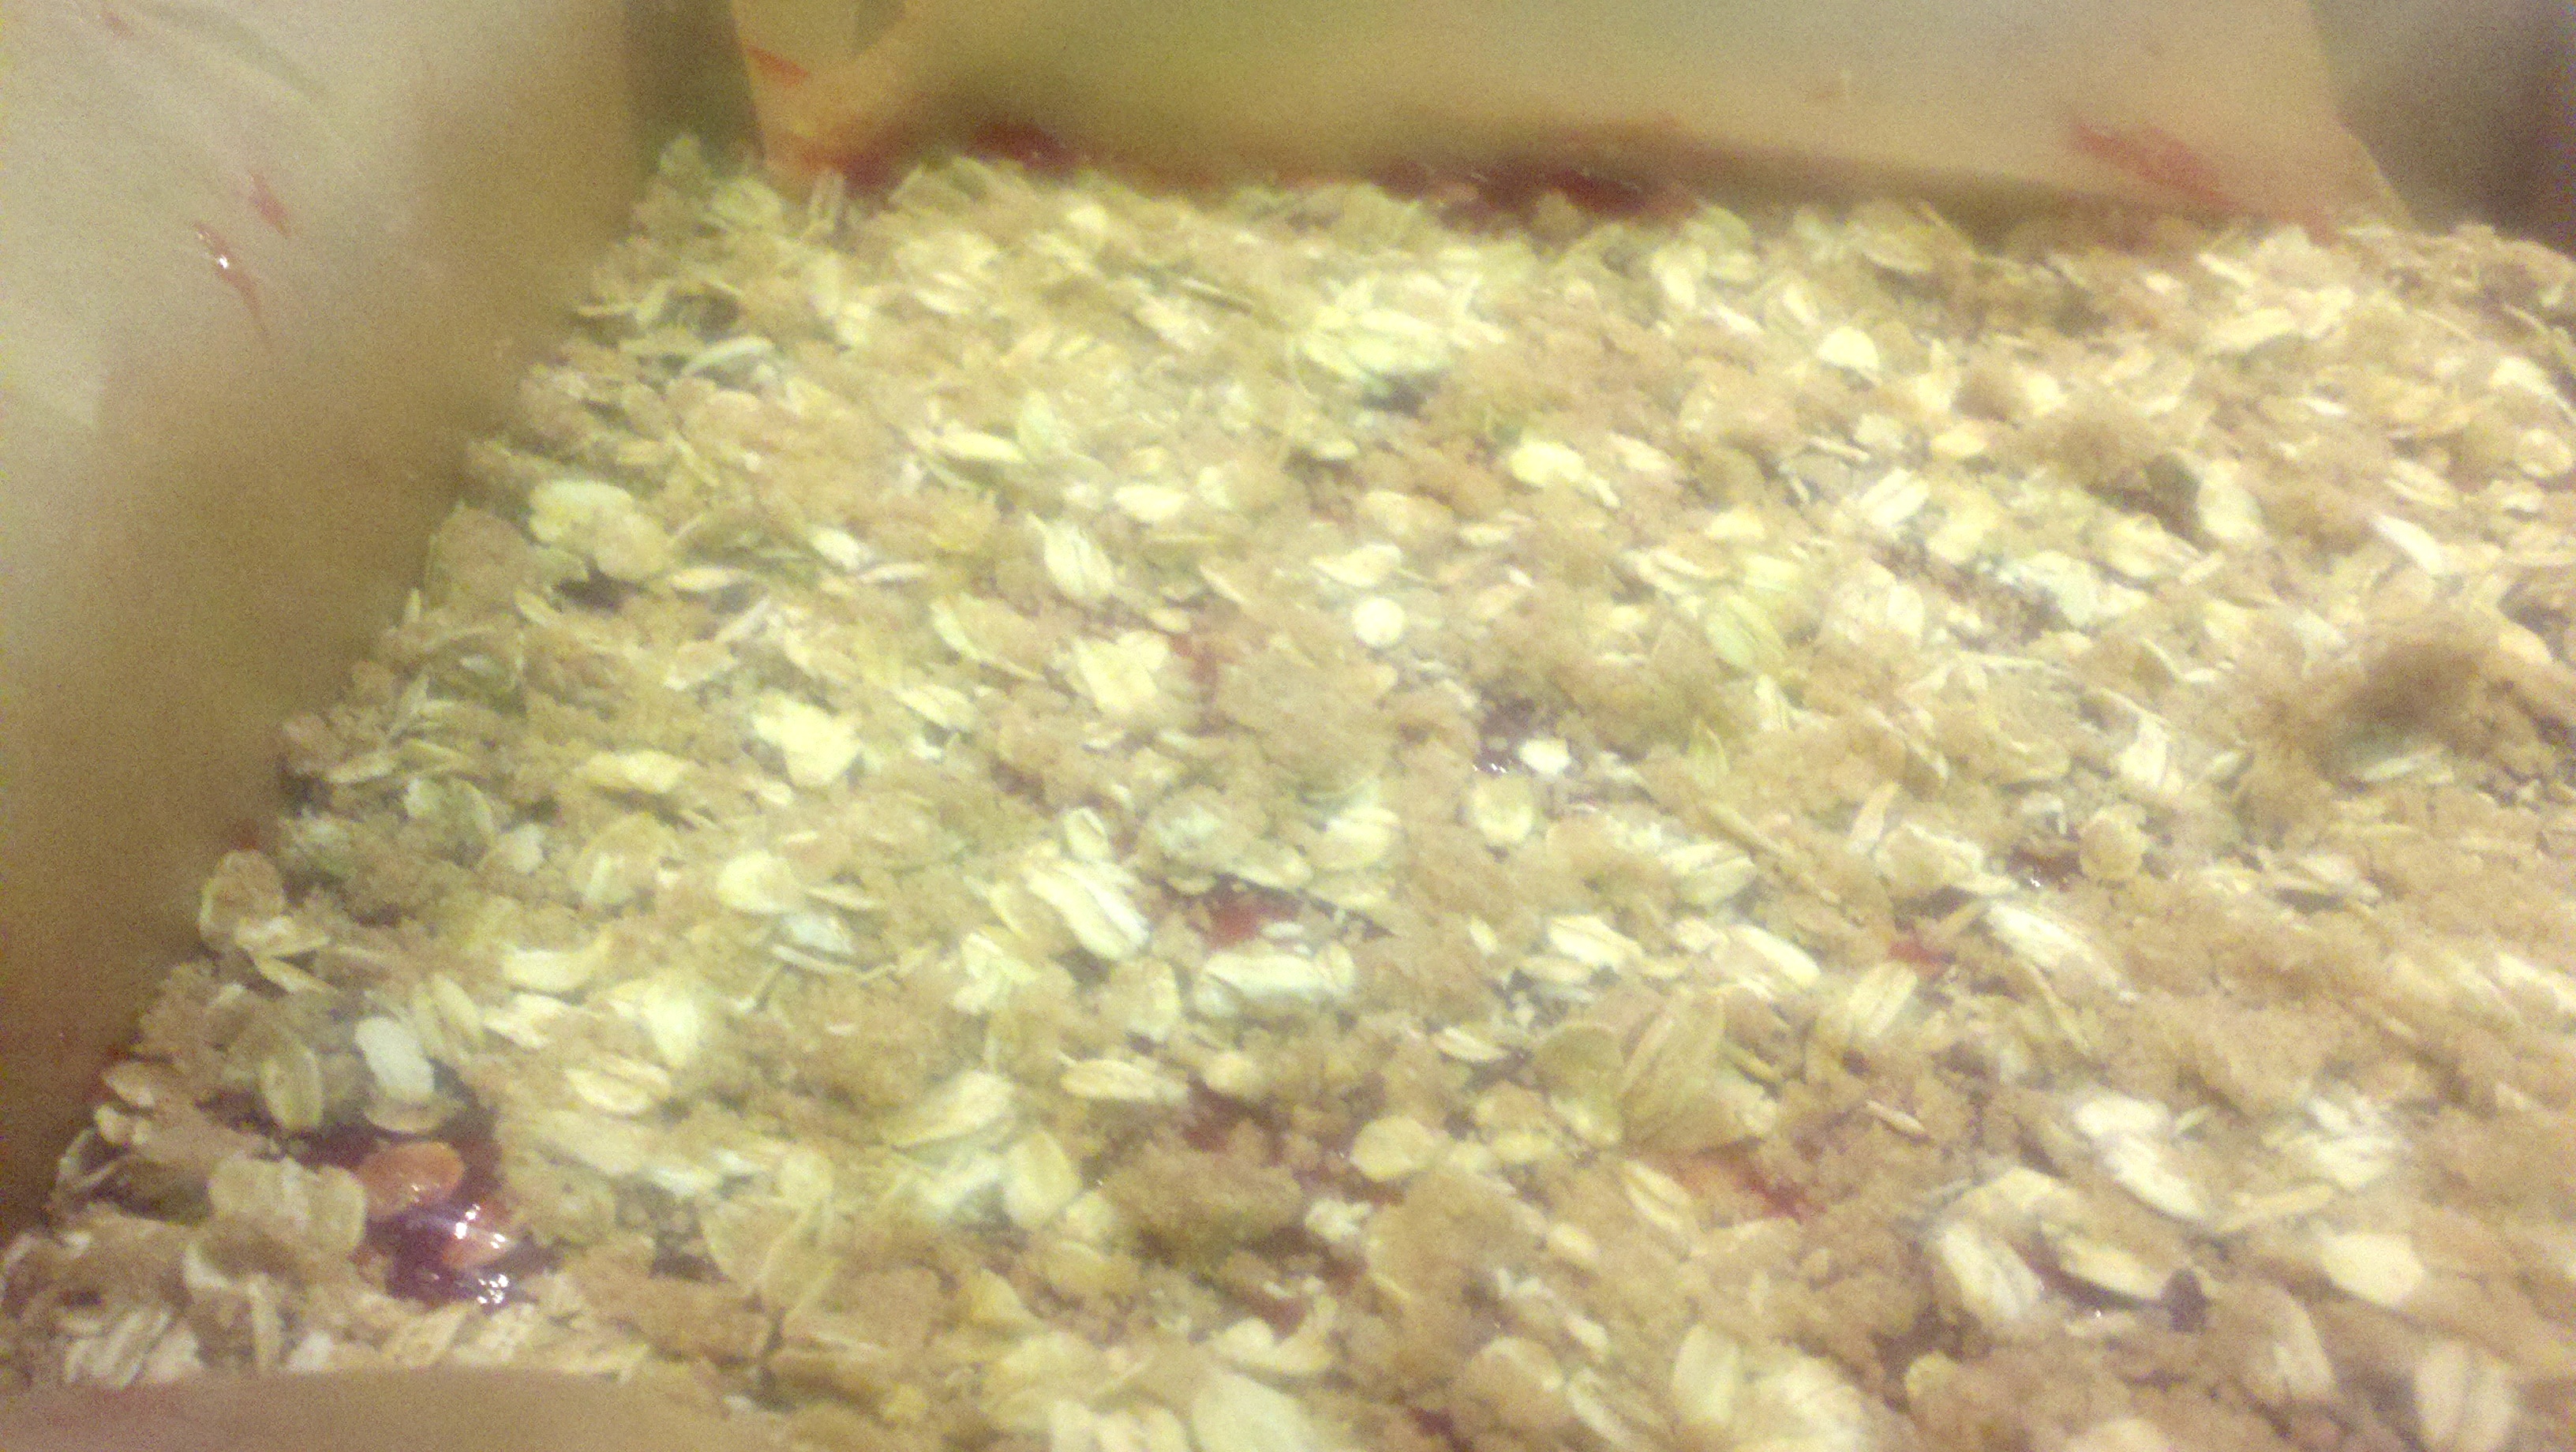
Spread the nuts in one layer, as best you can. Roast them in the oven for about 25 minutes, pulling them out to mix things about 2-3 times during that time. You’ll know everything is done when the top is “glazed and golden brown” – according to Ina. Below is the halfway point.

Once the 25 minutes is up or the nuts look done, pull ’em out of the oven. Add in 2 more tsp of salt and (if you didn’t add all 4 Tbsp in prior to the oven…) the remaining 2 Tbsp of rosemary.

Toss everything so the salt and rosemary (if you added it after) are evenly coating all the nuts. It will be sticky due to the maple syrup and brown sugar, so you’ll want to continue to mix the nuts around as they cool to prevent as much of the sticking together as possible. They will naturally clump a bit, which is alright, but you don’t want the whole thing to be one, big, massive pile. Which is what it will become if you don’t get in there and fix the situation. Serious.

I used wax paper to let everything cool while spread out and at the same time, not causing more unnecessary mess to the pan or another surface.

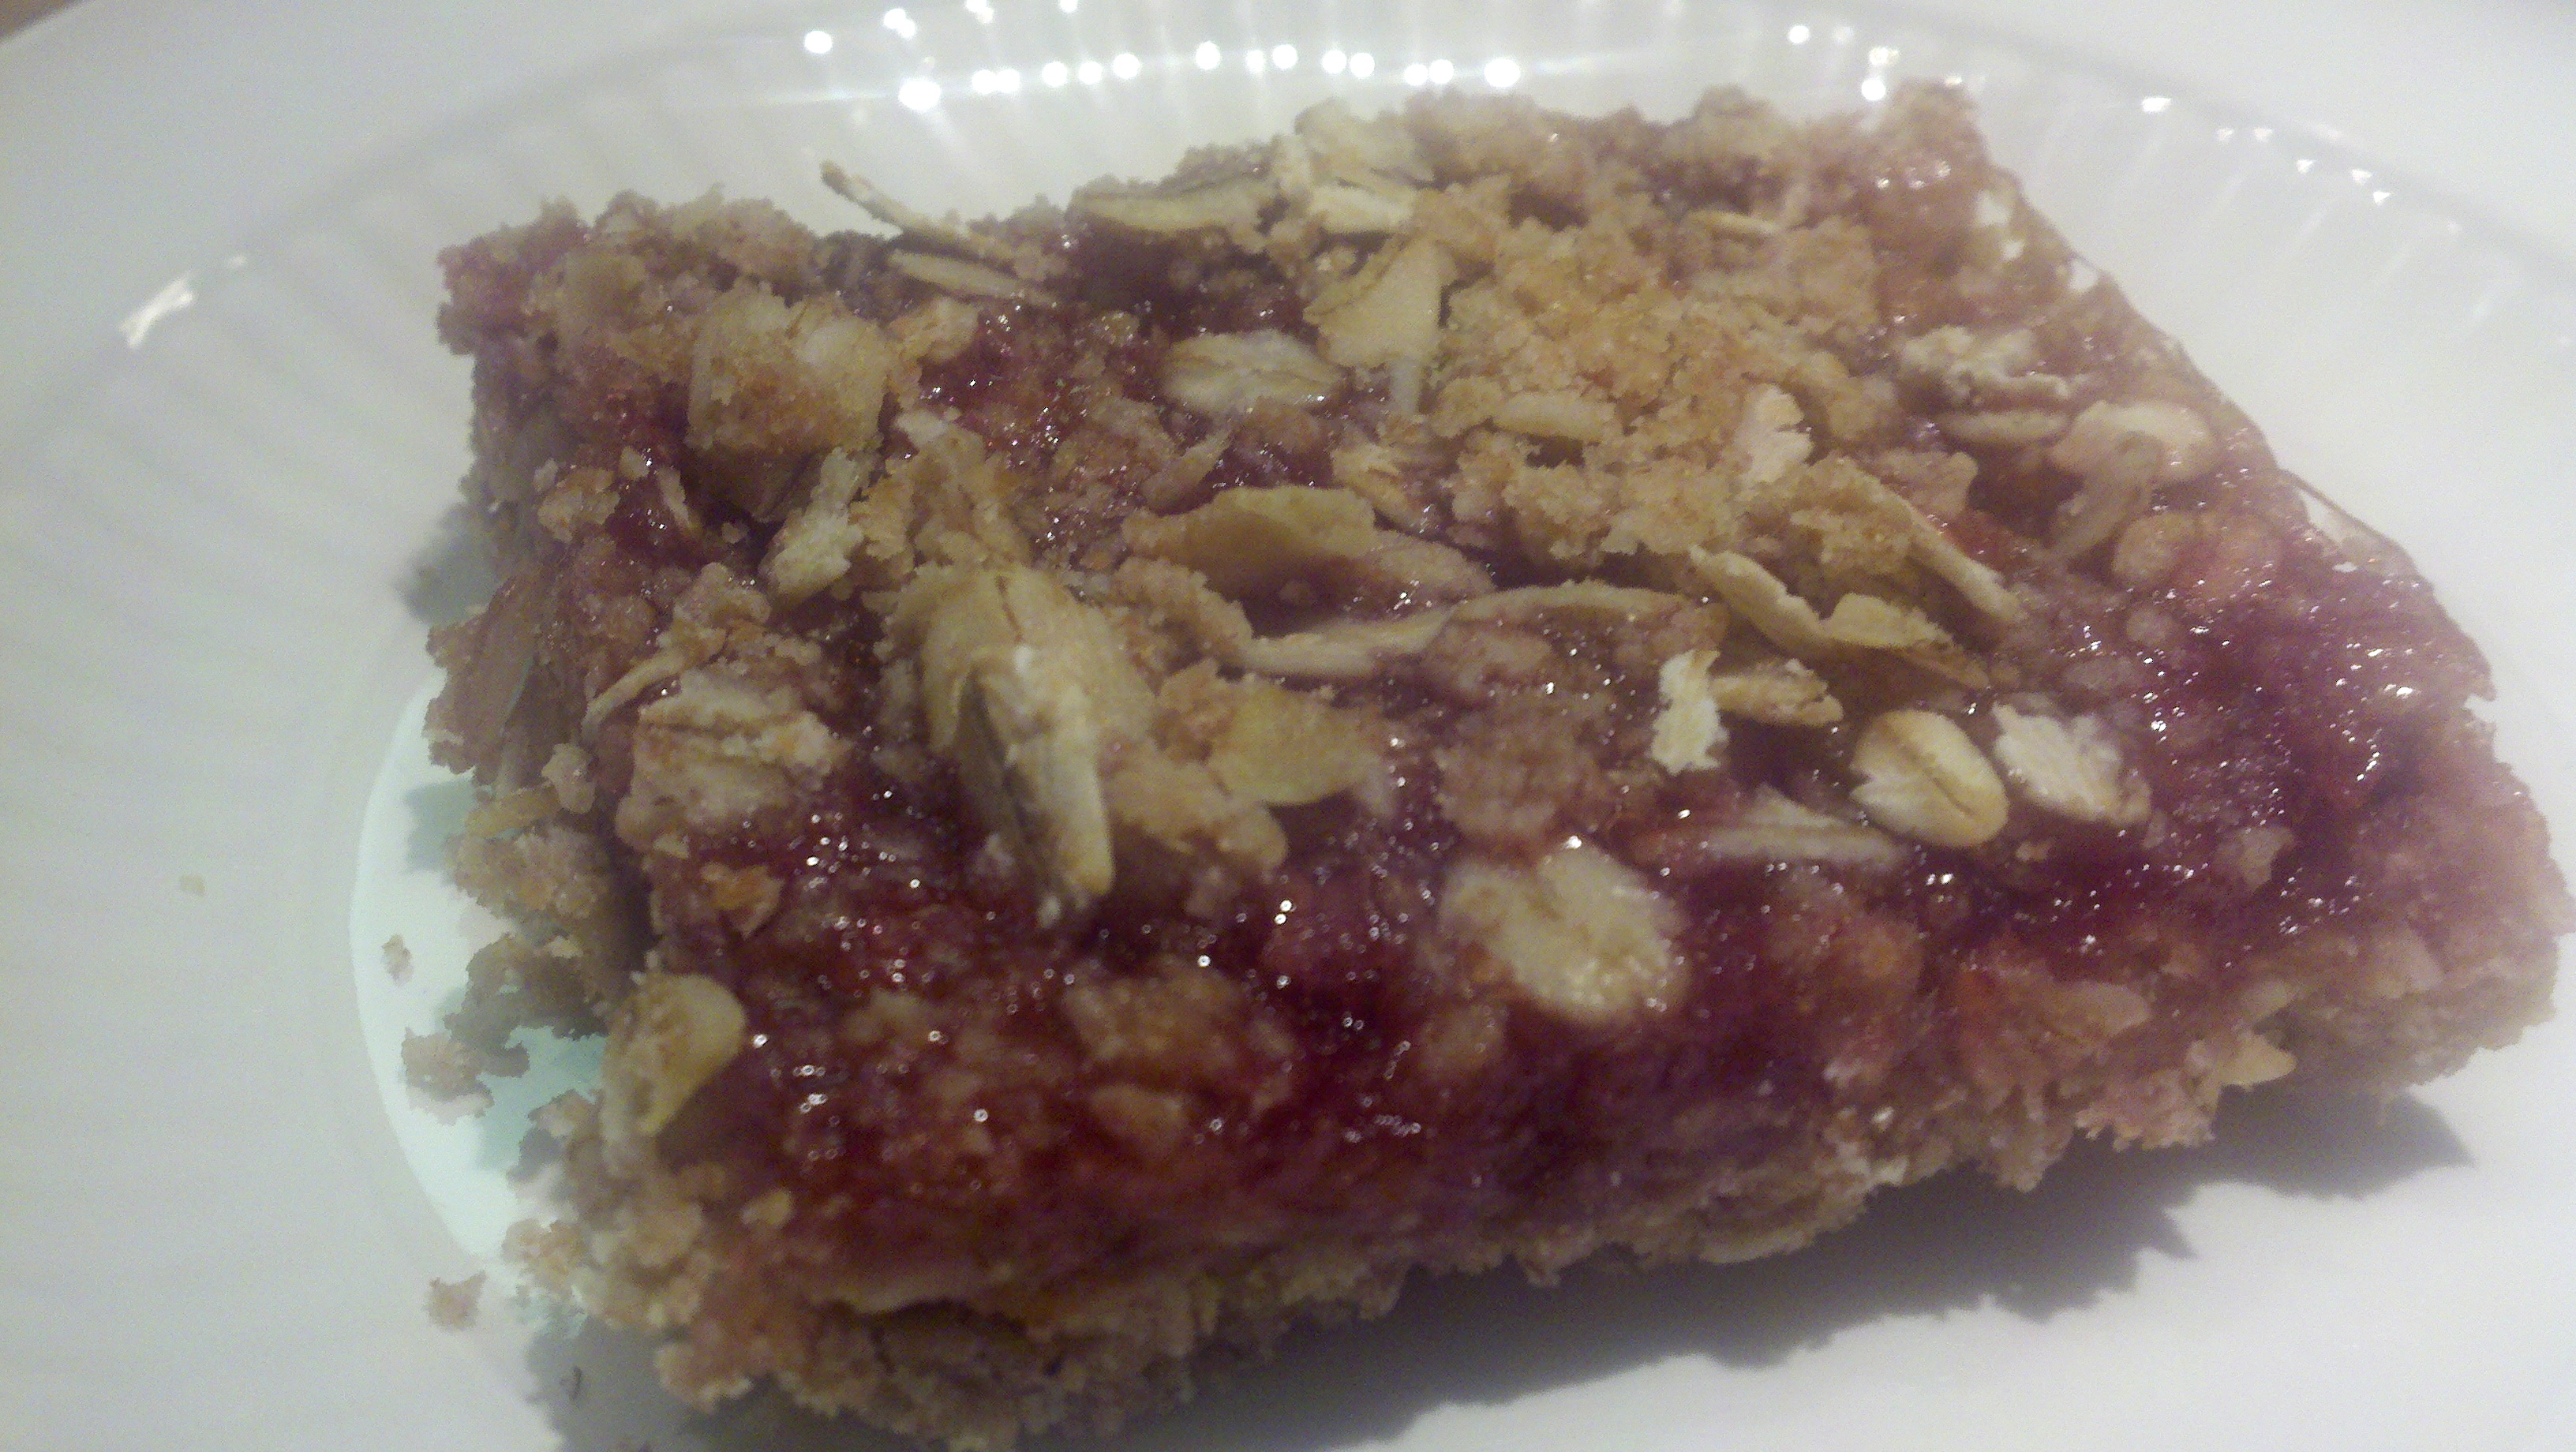
Store in Tupperware and pull it out to astound your guests with your amazing cooking skills (they don’t need to know there are only a few steps and it’s extraordinarily simple to make)! Enjoy!

Granola

7 Apr

This is the second of the flurry of posts that will be coming about due to Easter weekend cooking at the Vose house. This recipe is not a Vose recipe, but one that I wanted to make this weekend nonetheless. It’s excellent with yogurt – normal or frozen. You can also add whatever variety of ingredients you’d like.

I came across this recipe from a coworker of mine passing it along. I was in search of the perfect granola recipe and wasn’t having a ton of luck in my internet searches. Although hard to believe from some of my more caloric recipes previously posted, I do like to make healthier things to have on hand in my kitchen. Granola was something I wanted to be a healthy snack or dessert and many recipes are actually much higher in sugar and carbs than needed.

NOT saying this is the healthiest recipe on the planet, but it’s not terrible for you. Take it or leave it – but I think it’s very tasty. Course I only post things on here I think are tasty so perhaps I’m slightly biased. Oh well.

This recipe is taken from Leite’s Culinaria website with only slight variations from me.

Ingredients:

  • 4 cups old-fashioned oats
  • 1/2 cup unsweetened coconut flakes or shreds (this time I didn’t use the coconut as the individuals eating it weren’t huge fans. However, I’ve previously made this and enjoy adding this in. Your choice about your personal views on coconut.)
  • 1 cup whole raw almonds
  • 1/2 cup brown sugar
  • 1/2 teaspoon salt
  • 1 teaspoon ground cinnamon
  • 1/4 cup olive or vegetable oil (I’ve used both and found both to be similarly effective. Use what’s on hand.)
  • 1/4 cup mild honey or light agave nectar (I like honey, though agave nectar may be better for those more health conscious. I should be more of that…oh well.)
  • 1 teaspoon vanilla extract
  • 1 1/2 cups chopped dried fruit (I usually used dried cherries or cranberries. Cranberries was used in this version.)

How to Make:

Essentially all you need to do, is mix everything together. However, there’s a slight method that is suggested.

Preheat the oven to 300°F. I’m the master of forgetting to preheat and then have to sit around wait for the oven to heat up. Don’t be like me.

Grab yourself a nice large bowl and mix your oats, coconut, brown sugar, salt and cinnamon. I know my brown sugar usually gets a little chunky so try to break those up as best you can.

Next in a separate microwavable safe bowl, microwave the oil and honey for 20 seconds. Pour the heated mixture into the dry ingredient mixture and make sure everything is thoroughly coated. Add in the vanilla too and stir it in.

Once everything is all mixed up, pour it into a 9×13 baking pan and spread it out evenly (you want everything to bake evenly don’t you!?). Nicely done sous chef, nicely done.

I put the timer on for 25 minutes, but the original recipe says 25 – 40 minutes total. You want to bake it until the top turns golden brown. Also, pull out the pan about 2-3 times during the baking process to stir it around. You want all the granola to be baked well – not just the top. Below is the half-way point.

Your kitchen smells pretty dang good at this point. Serious.

Once you have a golden brown mixture, pull it out and mix in your dried fruit. Then it’s suggested that you push the granola to one side so that it cools in nice little clumps. If you’re into clumps then yes, follow this method. If you prefer clumpless (not a word, but it felt like it should be used here) granola, then spread it out evenly to cool.

Throw it into yogurt, ice cream, oatmeal or whatever other fun item you’d like!

Da Mama’s Potato Salad

6 Apr

Be prepared for several blog posts in the next few days – I have been a cooking machine! With assistance, of course. The majority of recipes coming up will be some “Vose Favorites” which are either homemade recipes or passed down through my parents.

First up is one of my personal favorites, great for Spring or Summer in particular. It’s my mama’s potato salad – Da Mama as she is often referred to. She made up this particular concoction, as many probably do with their potato salad recipes. I love this one because it’s both simple and full of bacon. I have no shame in admitting the latter.

You don’t need a terrible amount of ingredients:

Ingredients:

  • 5 big Idaho potatoes – peeled and diced in quarters (or smaller pieces if they’re extra massive)
  • 1 celery stalk – diced
  • 2 hard boiled eggs – diced
  • 4 slices of bacon – diced
  • 1 tsp of relish
  • 1/2 cup mayonnaise (you can always add more as you go, but start with between 1/4 and 1/2 cup)
  • Salt and pepper to taste

How to Make:

First up – locate two eggs.

Plop them into a saucepan with water and a dash of salt – boil them up. As soon as the water begins boil, put the lid on the saucepan and turn off the heat. Let it sit for 30 minutes. This is Da Mama’s process.

Meanwhile….grab your potatoes and your potato peeler. At one point, when I made Mom’s potato salad I had no utensils as I happened to be living in Europe and was dirt poor…I used a knife. If you choose the latter method – just be careful and don’t peel anything other than the potato. I speak from experience. Ouch doesn’t quite cover it.

If you have a sous chef – as I happened to last evening – have them dice up the celery while you’re peeling potatoes. Please harass them throughout the dicing/peeling process. It’s a necessary step.

Once you’ve peeled your potatoes, slice them in 4 or 6 pieces each, depending on the size. Note the nicely stacked diced celery. Nicely done sous chef.

Then pop the potatoes into a pot with water high enough to cover the potatoes. Boil them until when you stick them with a fork, the fork can easily splice the potato. Avoid overcooking – consistency of cooked carrots (aka gross mush). Avoid undercooking – consistency of apples (aka crunchy).

After your eggs sat for their 30 minutes with the lid on, pour out the water and pour in cold water instead. Again, let your eggs hang out for 30 minutes in their new cold water bath. This is the continuation of the Da Mama’s process.

Now it’s bacon time! Grab four slices and lay them on top of a paper towel upon a large dinner plate. Pop into the microwaved and heat in 1 minute increments, flipping them each time. Or, if you’re into the stovetop cooking – fry up your bacon that way. Depends on how much time you’d like to devote to both cooking the bacon and cleaning the splatter after. I usually cook via stovetop – but Mom insisted with the microwave to both save time and her stovetop from grease dots.

Once your bacon is thoroughly cooked, dice it up into small pieces. When the potatoes are cooked – dice them up into bite size pieces and throw them into a bowl. Dice up the hard boiled eggs too once they’ve finished their cooling process. Throw in the celery too.

Throw in the mayonnaise. Start with only a bit…about 1/4 cup. Stir it in and assess how much you need to add in. I added just about 1/2 cup total. Mix in all in. Everything should be lightly coated but not glooping (is that a word?) with mayonnaise. That would be gross. Don’t do it.

Now, add in your bacon. Doesn’t it look excellent? It MAKES the potato salad. I’m not joking. One bit.

At this point you can also add in your tsp of relish. Mix it all in – salt and pepper it up as well. More pepper than salt. Lotsa (yes, that’s a word) of pepper according to Da Mama.

You have now made the best potato salad on the planet. Be very pleased with yourself. Then, dish yourself a nice full dish and devour it. Maybe you even want a nice full larger dish. No judgment from this person. Mmm…Da Mama’s Potato Salad.

Lox Bagels

3 Apr

Need a good way to start the morning? Need a little zip when you begin your day? Do you enjoy delicious food to get you out of bed in the morning? I sure hope you would say yes to ALL three of those (because I sure do)!! I have a simple, delectable, wondrous, magical…ok, lots and lots of good adjectives…recipe/assembling order for you.

Lox bagels baby! These can be made in a variety of ways and this just happens to be how I prefer it. But as I say in many posts, experiment and make your own concoction!

First, I highly recommend finding some Everything (also known as Kitchen Sink) bagels. They have a such a great mix of flavor, which I think is one of the best parts of this meal. I found some great bagels at Whole Foods that are from the St. Paul Bagelry. For anyone in the area – encourage you to give these a try!

Slice up the bagel and pop ’em into a toaster. I like mine toasted, though you may decide untoasted is your thing. Either way, these bagels will be tasty. You can’t go wrong!

Grab a white onion and slice a few rings off.

Find some tasty looking tomatoes. Only tasty looking tomatoes will do. Chose wisely.

Cut a few slices…one or two for each bagel.

Set your sliced veggies aside and grab some cream cheese. I think this concoction works best with plain cream cheese, but you could always use a vegetable cream cheese, chive cream cheese – anything with a little zip would probably work well. I really like to let the Everything bagel be my main flavor, which is why I go with plain.

Spread it on your bagel and then grab your lox. I didn’t have a great reason for why I picked the brand I did, but it looked like it would be good, so into my basket at Whole Foods it went.

Slice it into pieces that will fit well onto the bagel. I had about 3-4 pieces layered on each bagel half. It didn’t quite use up the whole salmon slab, so I have a bit leftover to use for another bagel.

Now it’s time to layer! On top of the cream cheese slathered bagel halves, lay your lox pieces…then the tomato… and finally the onion…and TA-DA! Lox bagels baby!

Raspberry Oat Crumble Bars

31 Mar

Image

I enjoy creating opportunities to wear my apron. I feel it’s only allowed when baking, not with cooking. Well, perhaps for the especially messy cooking…but with baking it just feels right. Broke out the apron today to bake these wonderful creations – raspberry oat crumble bars.

I found this on fantastic baking blog that I encourage you all to check out: 17 and Baking. I’m excited to try quite a bit of the recipes featured on her blog as I continue expanding my baking repertoire and finding more opportunities to wear my apron.

This recipe is only slightly different than how Elissa wrote in on her blog:

Ingredients:

  • 1 1/4 cups flour
  • 1/3 cup packed light brown sugar
  • 1/2 tsp salt
  • 5 oz (10 Tbsp) cold unsalted butter, cut into pieces
  • 1 Tbsp milk
  • 1 1/2 cups old fashioned oats
  • 3/4 cup seedless raspberry jam (I thoroughly enjoy jam and slathered on slightly more than this. How can there be too much jam?!?)

How to Make:

Preheat your oven to 375 and grab your food processor! Mix up your flour, brown sugar and salt in the food processor first. Then put in the butter pieces and pulse away until the mixture starts to look crumbly. This is a good sign…crumbly = excellent. At this point pour in your Tbsp on milk and make sure it’s mixed in.

Image

For those poor unfortunate souls (name that movie!!) without a food processor…don’t know how you survive. However, you’ll be glad to know this recipe doesn’t discriminate against your lack of materials. Grab a pastry cutter to work everything together or use a fork too. Prior to my wonderful food processor addition, I would use a fork for this sort of task. However – do be careful to not overwork the butter in, you want crumbs. (I speak from experience…a previous fruit crisp was mush because the butter was worked in too much. Not pretty. Don’t be like me.)

At this point, grab your oats and a big bowl. Pour in the mixture from the food processor and work your crumbs and oatmeal into a bigger crumbly mixture. Again – don’t overmix! Just get it all worked in together.

Image

Separate out 3/4 a cup of this mixture (for the delicious topping).

Image

Pour the rest into a buttered or parchment-lined 9×9 pan. Press it down to make the nice, thick crust.

Image

Take your jam and spread it out on top. If you’re as into jam as me, or like raspberry a LOT or you just want to go BIG with your dessert – slather on a bit more than the 3/4 cup. Then, crumble the rest so it’s spread out on top evenly.

Image

Pop it in the oven for 20-25 minutes.

Image

Pull it out to cool when it looks like perfection…I thought that was at 22.3 minutes. But I’ll let you be the judge of that. If you have a cooling rack…or like me, an extra grate from the oven (hey, I’m resourceful!), set it on there to cool. That way to air can move over and under the pan.

Image

When cool, slice it up into squares. I encourage the addition of a little whipped cream…ice cream…frozen yogurt…ANYTHING to jazz it up a bit. If you’re into the ‘simple’ dessert, it’ll still be delicious on its own. But I like to be a proponent of adding ice cream or frozen yogurt.

Image

However it’s served – DIG IN! Happy Saturday!

Dr. Pepper Shredded Pork

28 Mar

For all those out there madly in love with shredded meat (I am included in this group), man do I have a recipe for you. It requires patience, as a forewarning. It also requires a Dutch oven. I JUST bought myself one only a few weekends ago (gracias tax return!) and this was the recipe I KNEW I would try first. Not exaggerating, this recipe has been on my radar since I first read it on the Pioneer Woman’s website a year ago. I really, really, REALLY like shredded pork. Really.

As a related side note, in my post a few days ago I mentioned I wanted to buy the Pioneer Woman’s new cookbook (which I did. Of course.) and this recipe is also featured in her cookbook. If that’s helpful for you to know.

Ok – so very simple ingredients and process…all you have to do is plan enough in advance and have a lot of mouths who need delicious food. This guy takes 6 hours in the oven, so plan your chopping/assembling accordingly.

Ingredients (serves 18 – yes 18. I made this entire recipe too. I now have 17 servings to eat or feed others with. This is where the ‘plan ahead’ part comes in. Oops.)

  • 1 whole large onion (I used a white onion and it was perfect. Just sayin.)
  • 1 whole pork shoulder – 5 To 7 Pounds (Depends on how many you’re feeding. I used a smaller one closer to 5 lbs.)
  • Salt and freshly ground black pepper
  • 1 can (11 Ounce) chipotle peppers in adobo sauce (Depending on the amount of spice you can handle, use as much of the can as you desire. I’m somewhat of a spice sissy…so I used about 3/4 of the can.)
  • 2 cans Dr. Pepper (Or bottles…aim for 24 or so ounces.)
  • 2 Tbsp brown sugar

How to Make:

As I said, very simple. Grab your onion and chop it into quarters and line the bottom of your Dutch oven.

Then, on top goes your lovely chunk of pork shoulder. Salt and pepper as much as you’d like. Then, pour on the amount of chipotle peppers and adobo sauce you’d like (the whole can or less depending on ability to handle spice).

After that, pour on your DP all around and on top of the meat, getting into all the crevices. Last, add your 2 Tbsp of brown sugar into the liquid, stirring if needed to get it dissolved. I also sprinkled parts on the top of the meat because I really love a sweet shredded pork with a bit of heat, but that’s just me. The lid goes on top and you’re going to pop it into a preheated 300 degree oven. Turn that timer on to the 6 hour mark and find something to amuse yourself for half a day. I hope you do more than I did with cleaning, Downton Abbey episodes and relaxing on my patio. Although now that I think about it, that’s a fairly fantastic Sunday. Ah well, you may have different expectations. Do give the meat a flip 2-3 times in that 6 hour time period. That way everything gets a chance to soak and intermingle within the glorious Dutch oven. (Below is what mine looked like at the halfway point.)

Once you have made it, somehow, to the 6 hour mark with or without starting to drool due to the smell, take it out of the oven.

Pull the meat out and using two forks, shred it up as much or as little as desire. Then throw the meat back into the pot to soak in more juice before serving.

This is great for tacos, for sandwiches, or for a main dish on its own with a side or two. I had some leftover grits which went perfect with the meat. I am not one of those unfortunate people who don’t mind food touching (if you are one of those people, I don’t judge…ok, just a little) so I loved the extra juice from the meat mixing in with the grits. But eat however you wish – can’t imagine a way this wouldn’t make an excellent meal.

YUM is putting it mildly.

Yogurt Covered Blueberries

25 Mar

It’s double-post Sunday! Not intentional, but I meant to post about the grits recipe last night and this gem this morning. Due to need of way too much sleep and other activities…they both are going up today. If this is too much, please hold off and read this post tomorrow. I understand. I needed a little pick-me-up this weekend, and this and the grits recipe sure helped with that. I’m also in the process of cooking up a delicious smelling item which I’ll share tomorrow. Either way – I will honestly admit that some tasty food helps me on those ‘blah’ days. I promise it’s not my only solution, but it sure helps.

For those still reading…greek yogurt + blueberries + your freezer = best snack ever! I found this idea on pinterest here and decided it’d be a great spring snack…and summer too now that I think about it. Frozen fruit is just always a good idea in my mind.

Yogurt Covered Blueberries:

Ingredients:

  • One carton of Blueberries (in theory, you can do as many blueberries as you want, but I used one little plastic carton.)
  • One 5.3 oz tub of Honey flavored Greek Yogurt (I used the recommended brand – Dannon’s Oikos, but any should work. I used honey flavor, but you could experiment with any flavor you’re craving. I have an inkling any flavor you’d pick out will work.)
  • Toothpicks (or any other dipping device you have on hand. Also, this is not an ingredient, I realize. But you need some sort of dipping mechanism, so I included it.)
How to Make:

I lack toothpicks currently…or perhaps just can’t find them. However, I had wooden skewers on hand which worked just as well. All you do is dip your blueberries one by one into the Greek yogurt and then plop them on a cooking sheet. (A pizza pan fit better in my freezer, so that’s what I used.) It’s a very cathartic process – dipping the blueberries. One small carton of blueberries used up the small tub of yogurt almost perfectly.
Stick the finished pan full of yogurt covered blueberries in the freezer. I checked mine after about an hour and a half and they were 97% finished up. Only the ones where I got a little enthusiastic with yogurt – those weren’t all the way frozen. No big deal though, I plucked them all off the pan and put them into one sandwich Ziploc…then stuck the Ziploc back in the freezer. They come off the pan very easily, so no worries there!
I’m now enjoying a handful as I type. Very tasty and a great snack for  any occasion…including lack of occasion. Like today. A Sunday afternoon where you need something to make you smile. These will do the trick. Enjoy!


Creamy Bacon Cheese Grits

25 Mar

Something I recently tried and loved – grits. This was on that same trip to Memphis that I mentioned a few posts back. I had shrimp and grits while out to dinner with my friend Marissa one night. They were so much better than I ever imagined them to be. All those times I imagined grits. Which happens a lot. Not really. But I didn’t expect them to be as delicious, lets just say that.

When I got back from my trip and made my next grocery store excursion – I went and found some grits. I knew I’d have to give them a whirl in the kitchen…but wasn’t yet sure what type of recipe I’d use them in.

My bff the Pioneer Woman (we may just be bffs in my dreams, but that’s ok) has a few delicious recipes for grits on her website. I decided this weekend I was going to make them and looked through some of the varieties she had posted. One stood out – Creamy Bacon Cheese Grits. Doesn’t that sound fantastic?!

I had a relaxing Saturday night in and cooked away while watching the Notebook. Pretty ideal in my world, but I realize that may seem rather dull to my peers. That’s alright – judge away!

Back to the grits which are fairly easy to make:

Creamy Bacon Cheese Grits:

Ingredients (to make 6 servings, which is cutting the recipe Ree posted in half):

  • 4 slices Regular Bacon, Cut Into 1/2-inch pieces (I like bacon, so I left mine in larger chunks. Up to you and how much you love bacon.)
  • Half of a whole Yellow Onion, Chopped
  • 1 cup Stone Ground Grits (I used stone ground white grits, but I believe any type should work!)
  • 2 cups Low Sodium Chicken Broth (I’m a moron and grabbed chicken stock at the store instead…but I looked up if this was a decent substitute and it is. But for the legit recipe, broth is recommended.)
  • 1 cup Water
  • 1 cup Heavy Cream
  • 3/4 cup Grated Cheese (I used a Colby & Monterey Jack version)
  • 1 dash Cayenne, For Heat
  • Salt As Needed
  • Black Pepper To Taste

How to Make:

Here we go! Grab a cutting board and the bacon and start slicing it into 1/2 inch (ish) pieces. As I stated above, mine were a bit larger because I love bacon. But up to you. Throw the diced bacon in a big pot over medium heat for a few minutes (I went for about 4 min).


Then add in the onions to cook with the bacon for a few more minutes (I gave this about 5 ish min). The bacon should be “chewy and onions are golden brown” when this step is complete, according to my bff, the Pioneer Woman.

Next is adding the grits, chicken broth (or chicken stock in my case) and the water. Stir it all up together and wait until it comes to a boil. At that point, reduce the heat so it can simmer  for about 30-40 minutes. You’ll want the lid on the pot for this simmering process.

Throw your spoon in there every now and then to give a quick stir. Don’t reach it and taste test the onions, bacon and grits combo. That’s bad…but it tastes SO good. (I did this on average 3.8 times. No judgment from me if you taste test.) If your grits start to look dry, splash in a bit more of the broth.

After the 30-40 minutes of simmering has passed, it’s time for the beloved cream. Pour it in! Put the lid back on and simmer again on low heat for another 30 ish minutes. This is hard because your kitchen and remainder of your abode (condo, apartment, house, grass hut) all start to smell fantastic. If you must, perhaps one more taste test will help get you through the next 30 minutes.

Once the looonnnggg 30 minutes has passed, remove from heat and add the seasonings – cayenne, salt and pepper. Also, add in your 3/4 cup of cheese, which will melt into the glorious concoction after a few stirs. Then pour into bowls, on to plates and serve with whatever you’d like. I had mine all by itself with a very tasty beverage. But most want something more for dinner, so if you have a great pork chop or chicken breast – throw these on the plate as a side to the meat. Enjoy the wonderful goodness of grits!

New Favorites

22 Mar

With being a work traveler, unfortunately my time in the kitchen is reserved for Thursday night – Sunday. And if I’m being realistic, Friday night – Sunday. Tonight as a prime example, I was just too tired to cook anything. I try to have leftovers ready to be thawed or reheated if possible on Thursdays – tonight was lasagna. 🙂 Not terrible, but there’s no time in the kitchen usually.

Thus – tonight’s post is dedicated to something else, some of my new favorite things that I encourage any readers out there to check out or explore. (Other than number two being a relative of mine, none of the folks below have any clue who I am. I just love their stuff and as a content consumer, want to share with the world how much I love them!)

1) Birchbox. I discovered this only a few months ago after reading about it on a few blogs. Birchbox is a great site for anyone who loves health and beauty products and trying new brands. I’m not too much of a high-end brand person, but I love the idea of trying sample sizes of different brands – plus, they’re travel size (which I need)! The way Birchbox works – you pay per month or per year, and you receive a box each month with usually 4-5 sample products. They vary from makeup to hair accessories to (and in the case of my first box) teas! You’re able to try out each of the items and you can rate them on Birchbox’s website to help earn reward points (which when you gather enough reward products, you can buy the full size versions). You can also decide you really enjoy XYZ nail polish and dang it, you want to buy more! You can go out to Birchbox and you can order the product in the full size version. Either way, in my opinion, it’s a win-win. You learn about new products and you may even find a great treasure. My first Birchbox came last week – check out the great items:

Items  in my box include:

  • Color Club Nail Lacquer (in He Loves Me)
  • Jouer Luminizing Moisture Tint
  • Harvey Prince Ageless perfume
  • Orofluido Beauty Elixir hair treatment
  • stila Smoky Eye Card
  • Tea Forte Skin-Smart Teas

I can’t wait to try each of these products over the weekend! Maybe there’s one that I’ll end up buying more of…I’ll let you know how the experiment goes.

2) etsy. Etsy.com is FANTASTIC if you love finding unique items and getting ideas for things you could create yourself. Whether it’s art, clothes, food, gifts or my personal favorite, jewelry – etsy has many great shops with more products than you have time to look through. I love to get ideas from the great artists and crafters on there or even make some purchases! Two shops that are my current favorites:

My aunt has a great shop for anyone that needs some beautiful art on their walls: Gillyflower Cottage. Whimsical flowers, delectable pears and even some creatures with personality are currently featured.

Another one of my favorites is the Elisabeth Ashlie shop. They sell handcrafted jewelry that is right up my alley (and perfect for the earring chain). I recently made a purchase from their shop receiving these cute, springy pair of earrings:

3) The Pioneer Woman Cooks – Food From My Frontier. This I have yet to purchase but have been looking forward to it for months!! I am planning a trip to Barnes and Noble (or B&N as I fondly refer to it as) in the next few days to have a tasty chocolatey beverage and look through this new volume. I’ll then buy it. Go to the grocery store. Come home and make more food than I can consume by Sunday night. (This is a terrible pattern I fall into). But it means it’ll be a perfect weekend. 🙂

The post the above link brings you to on her website gives a little sneak peek and will show you, simply from her verbiage and pictures alone, why I love her blog so very much.

Those are the favorite items I needed…had to…couldn’t not share with you. Whether they’re interesting to you or not, perhaps one person out there is intrigued enough to learn more.

I found out about ALL of these items via a blog. (Serious.) I hope I can help pass along the great finds other blogs have provided to me, to anyone who happens upon this one.

Lobster Pasta Salad

19 Mar

I have a thing for cold pasta salads. I can’t turn them down. Throw some lobster in there…and wow. That would be heaven. That would also be what my family cooked to celebrate (yes, again) my dad’s birthday last Friday. This time it was my parents, my younger brother Greg and I who were celebrating. We all cooked together – Mom and I chopping while we gave Dad the lobster duty (I’m a wimp.). Here’s why we picked it…

I was showing Dad one of my new cookbooks from the Barefoot Contessa (Ina Garten). We were flipping through, realizing Mom and Dad have that very same cookbook and they’ve made a few tasty items from it too. We were chatting about the store that Ina Garten used to own (called the Barefoot Contessa…which is where the name came from) and that lobster salad was apparently one of the many delectable treats her shop was known for. Next page we flip to…lobster pasta salad. Done.

The great thing about this recipe – it has grains, meat and vegetables. It’s a full meal! We just added some crispy baguettes from the grocery store and that was our entire dinner. It’s simple to whip up too – just chopping/boiling/mixing. That’s it! Our only complaint was it was a tad salty for our taste, so we’d cut back when we make it again. But we also didn’t let the salad ‘marinate in its juices’ for the 6 hours recommended. This could have helped the salty taste subside. Perhaps. If you like salt, then pour it on. However, if you are sensitive to overwhelming sodium, you can cut back and still have a delicious salad.

I made a few tweaks based on our family’s preferences but take it with a grain of salt. (Ha.)

Lobster Pasta Salad:

Ingredients:

  • Kosher salt (I’d decrease the salt the second time around and have modified the recipe below to reflect that)
  • Olive oil
  • 1 pound small pasta shells (We used Conchiglie but any small shells will do.)
  • Kernels from 4 ears of corn (This is about 3 cups. Ignore the lack of the other 2 cobs in the picture below. We did use 4. Promise.)
  • 6 scallions, white and green parts, thinly sliced (If you’re not with it, like me, this means scallion stalks…so you may have two or three stems on one stalk…you want 6 stalks of scallions total. And a partridge in a pear tree. I also had to look up stalk vs. stem. Confusing stuff.)
  • 1 yellow or orange bell pepper, seeded and small-diced (We used yellow, but if you’re into super colorful aesthetics with your food, the orange would pop better against the yellow corn and red tomatoes…just saying.)

  • 1 pint of cherry tomatoes, halved
  • 1 pound cooked fresh lobster meat, medium-diced (We tried to find fresh lobster but Mankato, MN was fresh out…we were creative and used frozen lobster tails instead…it still tasted great – so if you can’t find fresh lobster, no worries.)
  • 3/4 cups good mayonnaise
  • 1/2 cup sour cream
  • 1/4 cup freshly squeezed lemon juice (2 lemons)
  • Freshly ground black pepper
  • 3/4 cups minced fresh dill (We were also fresh out of fresh dill and bought the herb blend/paste instead. It worked great, but a little goes a long way. We only used about 2 Tbsp fearing it would overpower the dish. As Dad said…you can always add more.)

How to Make (all Ina’s instructions):

Bring a large pot of water to a boil and add 2 Tbsp of salt and some olive oil. Add the pasta and cook it for 8 to 10 minutes, until al dente. Add the corn to the pasta and cook it for another 2 minutes, until the corn is tender.

Drain the pasta and corn together in a colander and pour them into a large mixing bowl. Add the scallions, diced pepper, tomatoes, and lobster, tossing gently to combine. Allow to cool slightly.

In a small bowl, whisk together the mayonnaise. sour cream, 2 teaspoons salt and 2 teaspoons pepper until smooth. Pour over the pasta and mix well to bind the ingredients. Stir in the dill. Cover with plastic wrap and chill for up to 6 hours to allow the flavors to develop. Check the seasonings and serve chilled or at room temperature. (As I mentioned, we ate ours right away. Feel free to chill yours for the ‘flavor development’ or if you’re starving like the Voses…dig in!)

Hard for it not to feel like spring is already here when eating this dish. Enjoy!